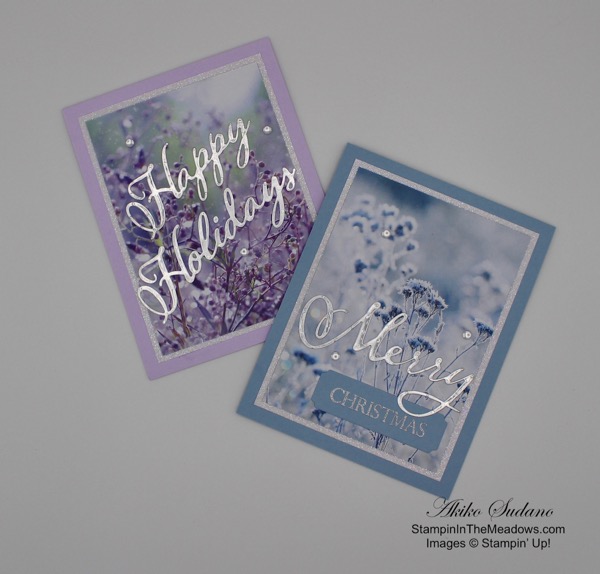
Good Morning! Today I am sharing some cards that I made for my Facebook Live video yesterday afternoon. These are simple, easy to make cards that use Stampin’ Up! Feels Like Frost specialty designer series paper and the Stampin’ Up! Merry Christmas to All stamp set and coordinating dies.
The Stampin’ Up! Feels Like Frost specialty designer series paper has beautiful winter images of nature with snow and ice. The back of the paper has designs in silver foil and white. The Stampin’ Up! Merry Christmas to All photopolymer stamp set has a beautiful and elegant font and many Christmas words that can be used in combination to convey many sentiments and the coordinating dies use the same beautiful font. When used with silver foil, they look beautiful with the Feels Like Frost paper. Here’s the video. Please excuse the first few minutes when I’m trying to ‘unstick’ my computer.
I also posted the video to my YouTube channel and you can view it here.
The holidays are coming quick and high impact easy-to-make cards are real important! It gives us the opportunity to give something special to our loved ones while maintaining balance in our busy lives.
October 15 – 31 Host Code: 3KQUKV9U
Use this host code when you order and receive a free gift from me! If your order is over $150, please do not use this code, but you’ll still get the free gift. The free gift is your choice of any item valued up to $10.00 in the 2018-19 Annual Catalog or in the 2019 Occasions Catalog! That includes some of the Host Exclusive stamp sets!
If you need any stamping supplies, I’d be very happy to be your Demonstrator. Just click on the Shop Now button on the right side of the screen to go directly to my online store or contact me if you have any questions. Happy Stamping!
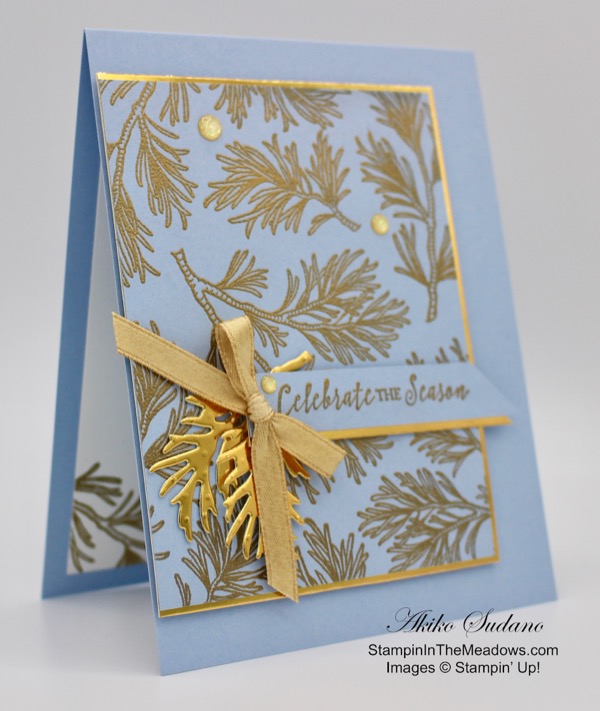
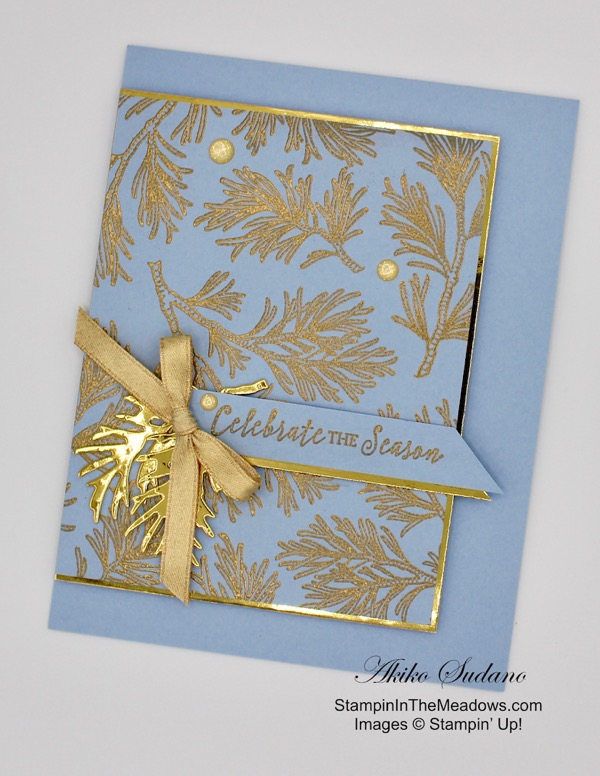
Good Morning! Today I have another Christmas card made with the Stampin’ Up! Peaceful Boughs stamp set and Beautiful Boughs dies.
It’s in blue and gold and uses the design from this week’s Freshly Made Sketches #408. You can find the supplies used to create this card at the bottom of my post along with the sizes of cardstock used.
I started by dusting a panel of Seaside Spray card stock with with my embossing buddy and randomly stamping the 3 branch stamps from the Stampin’ Up! Peaceful Boughs stamp set in VersaMark ink. I sprinkled it with gold embossing powder and heat set. I matted it with gold foil paper and adhered it to a Seaside Spray card base with dimensionals.
I cut 2 of the small branches using the Beautiful Boughs dies in gold foil. I stamped the sentiment from the Itty Bitty Christmas stamp set in VersaMark ink on a strip of Seaside Spray cardstock, sprinkled it with gold embossing powder and heat set. I trimmed the end and backed it with a strip of gold foil and arranged it on the card with the two gold foil branches.
I finished the card front with a gold satin bow and gold glitter dots, both from the upcoming Christmastime is Here suite (available Nov 1).
On a panel of Whisper White, I stamped the corners with branches from the Stampin’ Up! Peaceful Boughs stamp set with VersaMark ink. I also stamped the sentiment from the Merry Christmas to all photopolymer stamp set in the middle. I sprinkled it with gold embossing powder and heat set. I adhered it to the inside of the card.
Embossed cards at Christmas are so elegant. And this one is a simple design that easy to make. That’s a double bonus!!
October 15 – 31 Host Code: 3KQUKV9U
Use this host code when you order and receive a free gift from me! If your order is over $150, please do not use this code, but you’ll still get the free gift. The free gift is your choice of any item valued up to $10.00 in the 2018-19 Annual Catalog or in the 2019 Occasions Catalog! That includes some of the Host Exclusive stamp sets!
If you need any stamping supplies, I’d be very happy to be your Demonstrator. Just click on the Shop Now button on the right side of the screen to go directly to my online store or contact me if you have any questions. Happy Stamping!
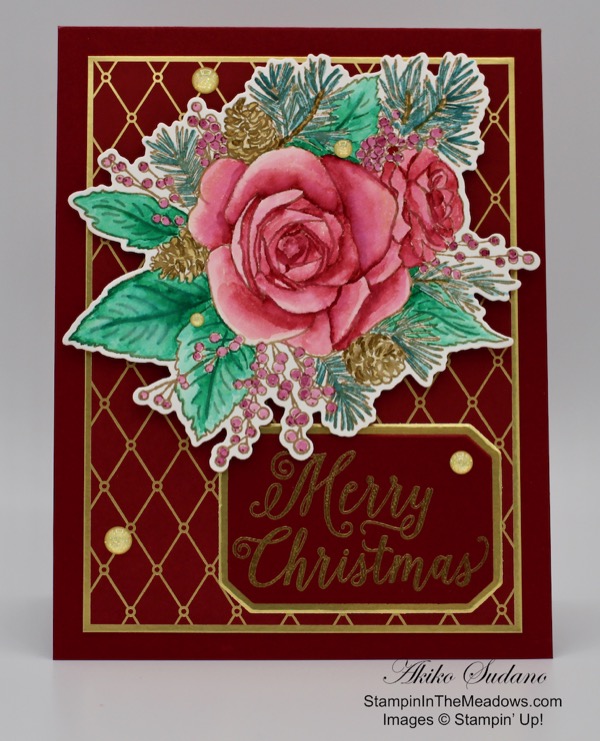
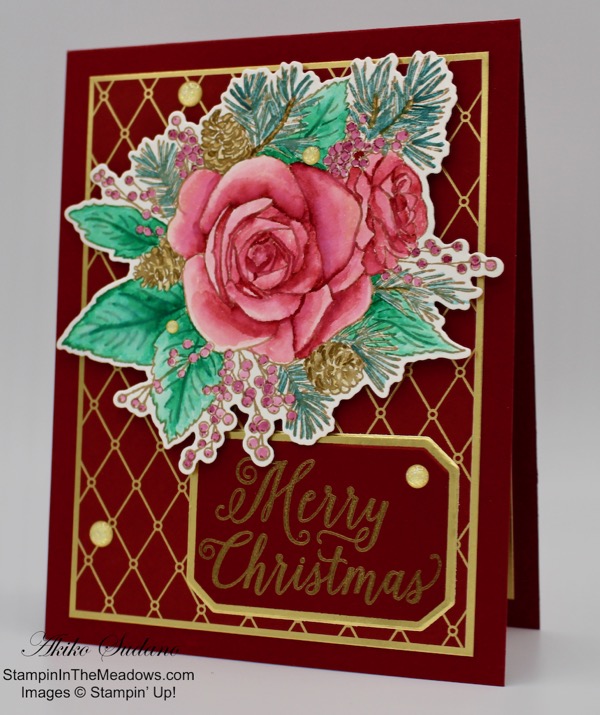
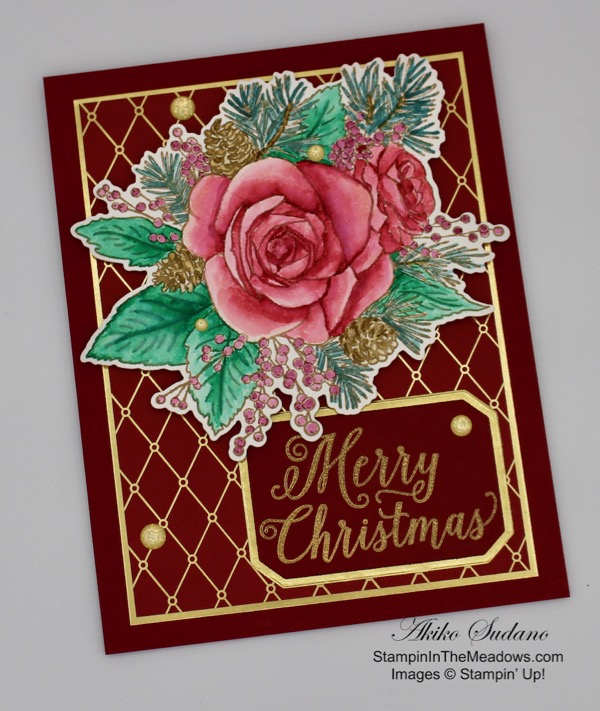
Good Morning! Today I have a sneak peek for you of a special suite that will be available beginning November 1 called Christmastime is Here. It features the beautiful Stampin’ Up! Christmas Rose stamp set which can be purchased separately or bundled with the Roses dies.
I also tried something I haven’t done for a while – coloring it with the no-line watercolor technique. I’m not very experienced with this technique, but because the rose image and other products in this suite are so beautiful, I think the card came out pretty nice. You can find the supplies used to create this card at the bottom of my post along with the sizes of cardstock used.
Because I’ve been playing with the Paper Pumpkin kit and the beautiful shimmer paper, I decided to pull out my shimmer paper because it can be used with aqua painters. So I stamped the beautiful rose bouquet image from the upcoming Stampin’ Up! Christmas Rose stamp set in Crumb Cake ink on white shimmer paper. I used my aqua painter to color the roses using Cherry Cobbler ink, the leaves in Shaded Spruce ink, the pinecones in Soft Suede ink, the pine sprigs in Pretty Peacock ink and the berries in Blackberry Bliss ink. After I colored the bouquet, I cut it out with the matching die from the Roses dies.
I stamped the Merry Christmas greeting from the Stampin’ Up! Christmas Rose stamp set in VersaMark Ink on a panel of Cherry Cobbler card stock. I sprinkled it with gold embossing powder and heat set. I cut it out with the small label from the Frosted Bouquet dies. I cut a panel of gold foil using the large label from the Frosted Bouquet dies and adhered it to the back of the Merry Christmas label.
I assembled the card front by taking a panel of the diamond patterned paper from the Christmastime is Here Specialty designer series paper and adhering it to a gold foil mat with liquid glue. I then adhered it to a Cherry Cobbler card base. Then I adhered the labels with liquid glue and the pretty rose bouquet with dimensionals. I’m glad that I used the white shimmer paper, because the roses sparkle! I finished the front off with some gold glitter enamel dots.
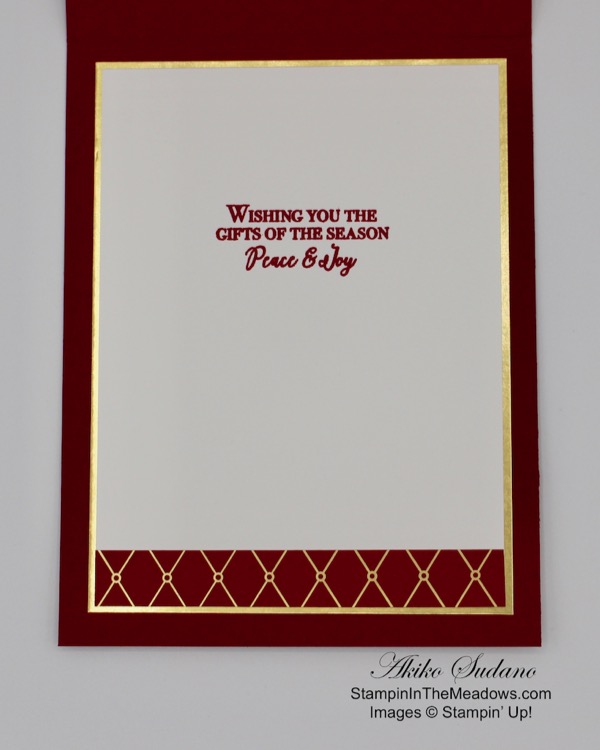
I stamped the greeting from the Stampin’ Up! Christmas Roses stamp set in Cherry Cobbler on a panel of Whisper White. I added a strip of the diamond DSP to the bottom and adhered it to a gold foil mat before adhering it to the inside of the card with liquid glue.
The idea of the no-line watercolor technique is that the outline stamping is blended with the ink used to do the watercoloring so that you don’t have harsh outlines on your images and you achieve a more natural look. I don’t think I achieved this effect everywhere in the rose bouquet, so I plan to keep working on my watercolor skills. It was fun to try something that I haven’t done in a while.
The Christmastime is Here suite will be available beginning November 1 while supplies last. Everything is beautiful in the suite and will make the most elegant Christmas Cards!
October 15 – 31 Host Code: 3KQUKV9U
Use this host code when you order and receive a free gift from me! If your order is over $150, please do not use this code, but you’ll still get the free gift. The free gift is your choice of any item valued up to $10.00 in the 2018-19 Annual Catalog or in the 2019 Occasions Catalog! That includes some of the Host Exclusive stamp sets!
Christmastime Is Here Product Suite Available November 1!
Stampin’ Up! has a new limited-time product suite called Christmastime Is Here that will be available for customers to purchase beginning November 1!
This exclusive, limited-time collection of festive, floral coordinating products has everything you need to share love, joy, and creativity this holiday season.
Products from the Christmastime Is Here Suite will be available beginning November 1 only while supplies last.
Click this image to open up a full size PDF flyer with all of the details for this beautiful new product suite! The colors in the Designer Series Paper are: Gold, Cherry Cobbler, Mossy Meadow, Poppy Parade and Early Espresso!
Today Only! – 24 Hour Stamp Sale
Today is the big day! For 24-HOURS ONLY, you can save 15% on select stamp sets. This sale will be over at midnight (Mountain Time), so head over to my online store to shop before it’s too late. Here are the details:
Get select sets at a 15% discount.
All selected stamp sets can be applied to Starter Kits.
Discount applies to select stamp sets only when purchased individually during the 24-hour promotion period.
Bundles featuring stamp sets from the promotion will not be discounted.
If you purchased a stamp set prior to the sale, we will not be offering exchanges or credits.
In the event that we run out of any item offered, promotional pricing will be honored on items backordered, up to the point it reaches the backorder limit. Once an item reaches the backorder limit and is not orderable, it will no longer be available during the promotion and will not be available to order until additional inventory arrives.
Click this image to open a full size PDF of the flyer with all the stamp sets that are on sale.
If you need any stamping supplies, I’d be very happy to be your Demonstrator. Just click on the Shop Now button on the right side of the screen to go directly to my online store or contact me if you have any questions. Happy Stamping!
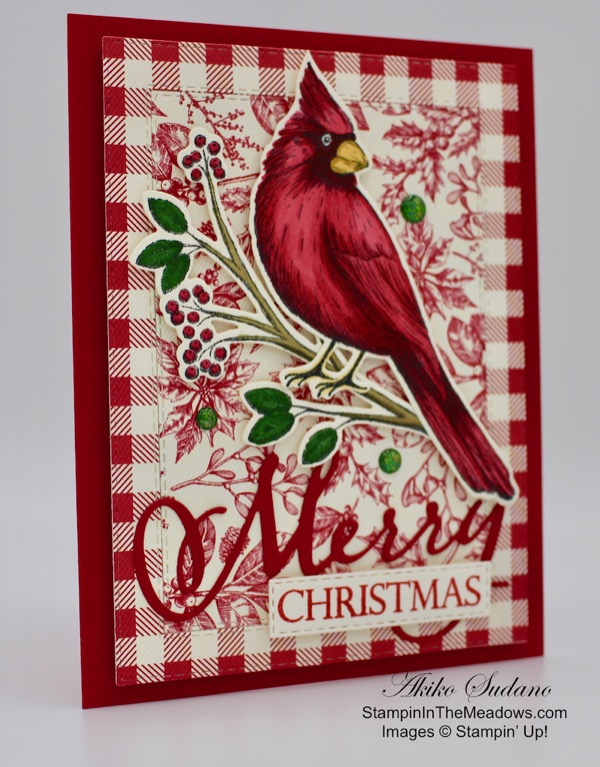
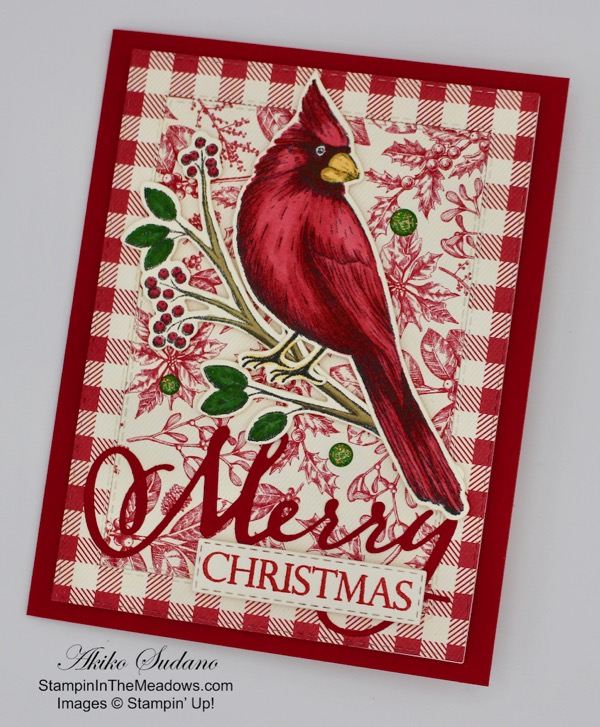
Happy Friday Morning! Today I am sharing a Christmas Card made with the Stampin’ Up! Toile Christmas cling stamp bundle along with the Merry Christmas to All photopolymer stamp set and Merry Christmas dies. Cardinals bring cheer during snowy winters and I’ve loved making cardinal Christmas cards through the years. This is the first cardinal that I’ve had that has a coordinating die, so I think it’s really special. You can find the supplies used to create this card at the bottom of my post along with the sizes of cardstock used.
I started by making a framed background using two of the papers in the Toile Tidings designer series paper and the stitched rectangles dies. I used the checked Real Red paper on the outside that I cut with the largest stitched rectangle die and the Real Red leaves and berries paper on the inside that was cut with the third largest die. I adhered both of these to a Very Vanilla panel that I cut out with the largest stitched rectangle die so that I would have a stronger background panel.
I die cut the Merry word from the Merry Christmas Dies and adhered it to the bottom of the framed panel with the fine tipped glue pen. I adhered the panel to the front of a Real Red card base with dimensionals. I stamped the Christmas greeting from the Merry Christmas To All stamp set in Real Red ink on a Very Vanilla scrap and cut it out with the long small stitched rectangle die. I used the two-step partial die cutting technique so that it would be cut close. I attached the word to the card under the Merry die cut.
I stamped the cardinal and long branch from the Stampin’ Up! Toile Christmas stamp set in Memento Tuxedo Black ink on Very Vanilla card stock. I colored the cardinal with the Real Red and So Saffron Stampin’ Blends. I also used my Crushed Curry Stampin’ Write Marker to give the cardinal’s beak some shadow (I’m going to get the Mango Melody Stampin’ Blends next, so I can use this color next time). I colored the branch with the Soft Suede and Real Red Stampin’ Blends and Garden Green Stampin’ Write Marker (I hope they come out with Garden Green Stampin’ Blends soon). I cut the cardinal and branch out with the coordinating dies and popped them on the card front with dimensionals. I finished off the card front with three green glitter enamel dots.
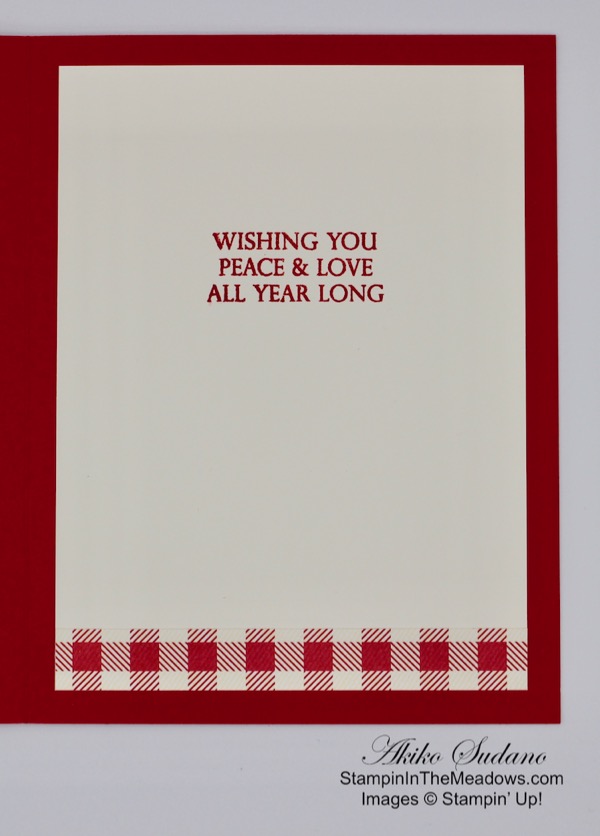
On the inside of the card, I stamped the greeting from the Merry Christmas To All stamp set in Real Red ink on a panel of Very Vanilla. I added a strip of the checked Toile Tidings designer series paper to the bottom.
I think I’m getting spoiled because coloring is so easy with the Stampin’ Blends. I used to use my Stampin’ Write Markers and stamp pads with the Blender pen or Aqua Painters to get a blended look when coloring. That was more cost effective and the effect was also beautiful. I will do this with a project next week.
I hope you like cardinal cards at Christmas! I’ll be on the lookout for these pretty birds as I drive around this weekend. I hope you have a great one!
Akiko
October 15 – 31 Host Code: 3KQUKV9U
Use this host code when you order and receive a free gift from me! If your order is over $150, please do not use this code, but you’ll still get the free gift. The free gift is your choice of any item valued up to $10.00 in the 2018-19 Annual Catalog or in the 2019 Occasions Catalog! That includes some of the Host Exclusive stamp sets!
If you need any stamping supplies, I’d be very happy to be your Demonstrator. Just click on the Shop Now button on the right side of the screen to go directly to my online store or contact me if you have any questions. Happy Stamping!
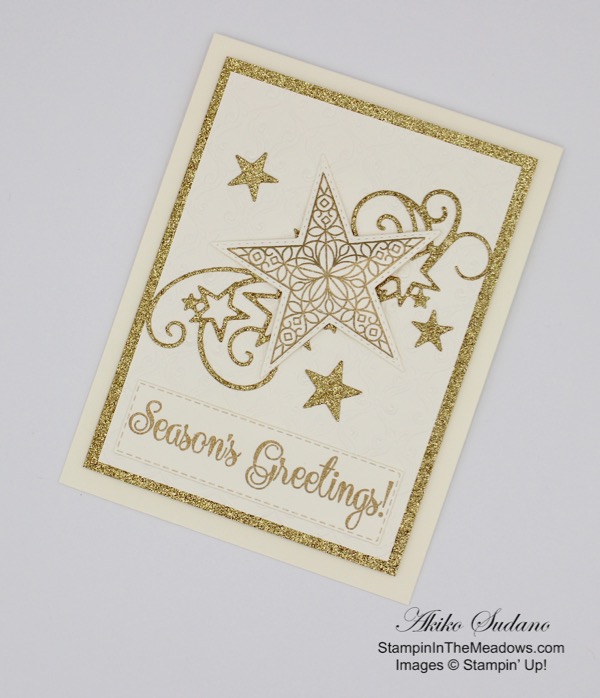
Happy Monday morning! Today I’m sharing a sparkly card that I made during my Facebook Live presentation yesterday. I used the Stampin’ Up! So Many Stars photopolymer stamp set along with the Stitched Stars dies. These are currently available in a bundle at 10% off and I sure hope they get carried over because they are both fabulous! You can find the supplies used to create this card at the bottom of my post along with the sizes of cardstock used.
My card was inspired by a one that I made a few years back with the now retired Stampin’ Up! Christmas Star stamp. That card had a beautiful silver embossed dimensional star on a navy embossed background, but I had to cut it out by hand. Today’s card has the stitched dies that make cutting so much faster and accurate. Plus, it has the gold glitter star flourish behind the star. In the video, I show how to score and fold the star to make it 3D. It gives the card a special touch. Here’s the video.
I also posted it to my YouTube channel and you can view it here.
I hope that you like the card and enjoyed the video. I know all the glitter and sparkle may be a little too much for everyone’s tastes, but this set is so versatile that I’m sure I can come up with a star filled design that is a little simpler next time. Thanks for visiting!
Akiko
October 1 – 15 Host Code: 44YKETNJ
October 15 – 31 Host Code: 3KQUKV9U
Use this host code when you order and receive a free gift from me! If your order is over $150, please do not use this code, but you’ll still get the free gift. The free gift is your choice of any item valued up to $10.00 in the 2018-19 Annual Catalog or in the 2019 Occasions Catalog! That includes some of the Host Exclusive stamp sets!
If you need any stamping supplies, I’d be very happy to be your Demonstrator. Just click on the Shop Now button on the right side of the screen to go directly to my online store or contact me if you have any questions. Happy Stamping!
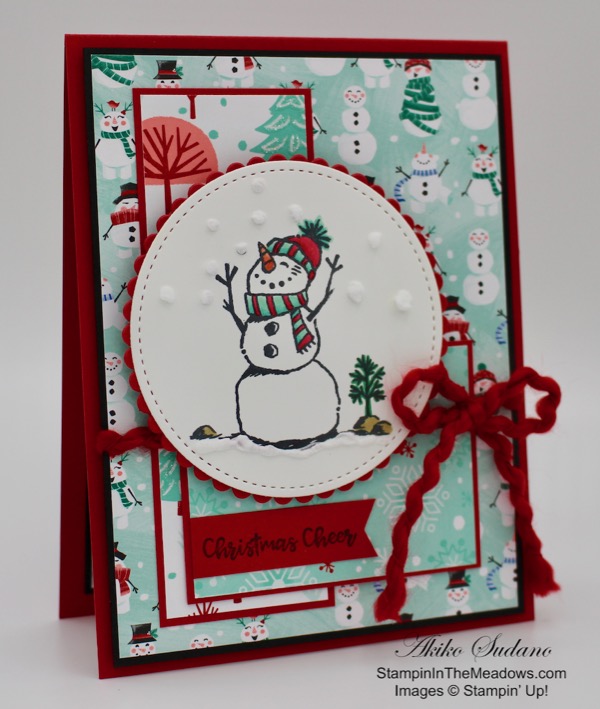
Good Morning! Here’s a cute little snowman Christmas Card made with the Stampin’ Up! Snowman Season photopolymer stamp set. I also used the Let It Snow Speciality Designer Paper to create a layered look. This is is such a happy color combination, sure to make Christmas merry! You can find the supplies used to create this card at the bottom of my post along with the sizes of cardstock used. Here’s the card:
I started building the background by cutting the Let It Snow DSP pieces. I matted the large panel on Basic Black and the smaller layering pieces on Real Red. I adhered it all together with liquid glue.
I then stamped the snowman from the Stampin’ Up! Snowman Season stamp set in Memento Tuxedo Black ink on a Panel of Whisper White. I colored it with Real Red, Pool Party, Calypso Coral, Shaded Spruce and Soft Suede Stampin’ Blends. I then cut it out with the largest circle from the Stitched Shapes dies. I added some Snowfall Accents Puff Paint and heat set it. It is so amazing to watch it puff up!! Be careful though as it will start to turn brown if heated too much.
I used the largest scalloped circle from the Layering Circles dies to cut a Real Red mat and adhered it to the back of the circle. I created the label by stamping the Christmas Cheer sentiment from the Itty Bitty Christmas stamp set in Memento Tuxedo Black Ink on a strip of Real Red and trimmed the end. I adhered this to the layered background with liquid glue and then tied the curly ribbon around it and made a bow. I adhered the Snowman Circle to the background with dimensionals and used dimensionals to attach it all to a Real Red card base.
On the inside, I stamped the sentiment from the Stampin’ Up! Snowman Season stamp set in Real Red ink on a panel of Whisper White. I added some snowflakes in Coastal Cabana ink and added a strip of the little snowmen paper to the bottom. I adhered it to a Basic Black mat and then to the inside of the card.
Snowmen are great themes for Christmas cards and for Winter cards afterwards. The snowmen in the Stampin’ Up! Snowman Season stamp set are happy and whimsical and the Let It Snow Specialty Designer paper is a winner too! Thanks for visiting and have a great weekend!
Akiko
October 1 – 15 Host Code: 44YKETNJ
Use this host code when you order and receive a free gift from me! If your order is over $150, please do not use this code, but you’ll still get the free gift. The free gift is your choice of any item valued up to $10.00 in the 2018-19 Annual Catalog or in the 2019 Occasions Catalog! That includes some of the Host Exclusive stamp sets!
If you need any stamping supplies, I’d be very happy to be your Demonstrator. Just click on the Shop Now button on the right side of the screen to go directly to my online store or contact me if you have any questions. Happy Stamping!
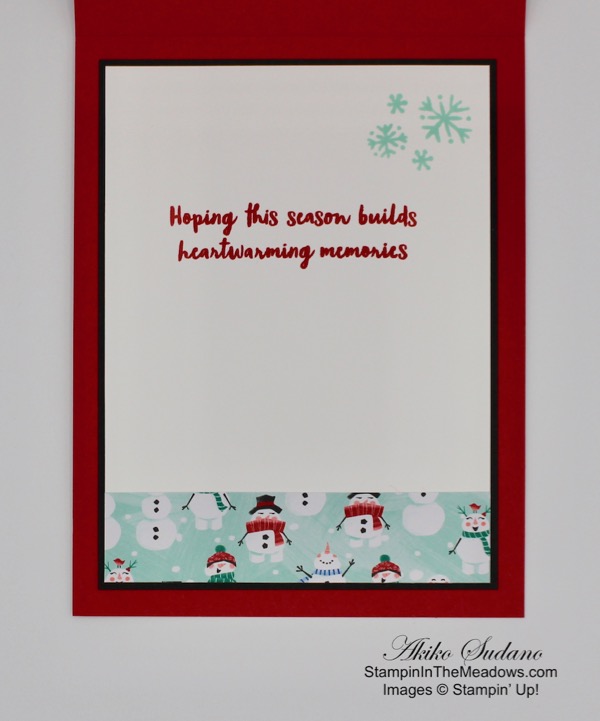
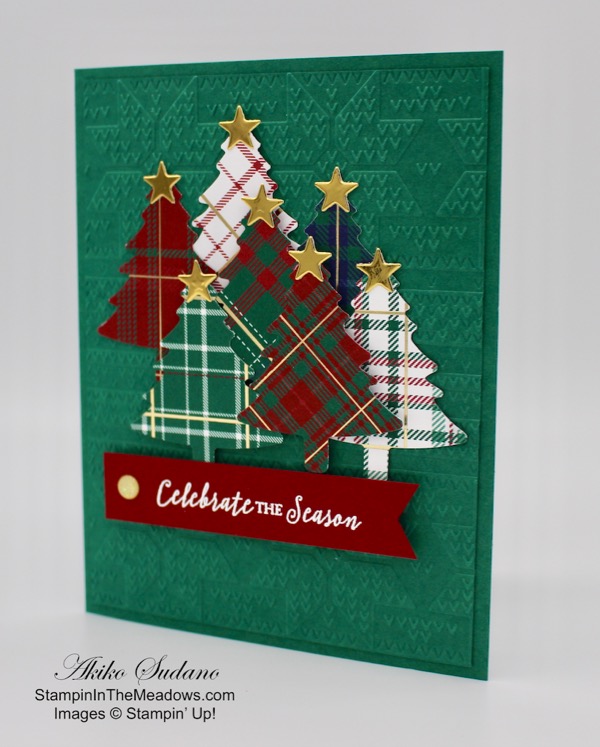
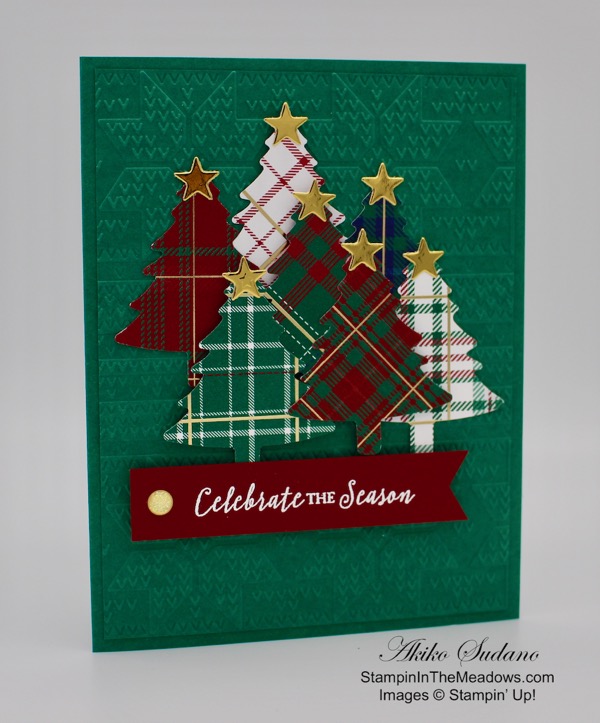
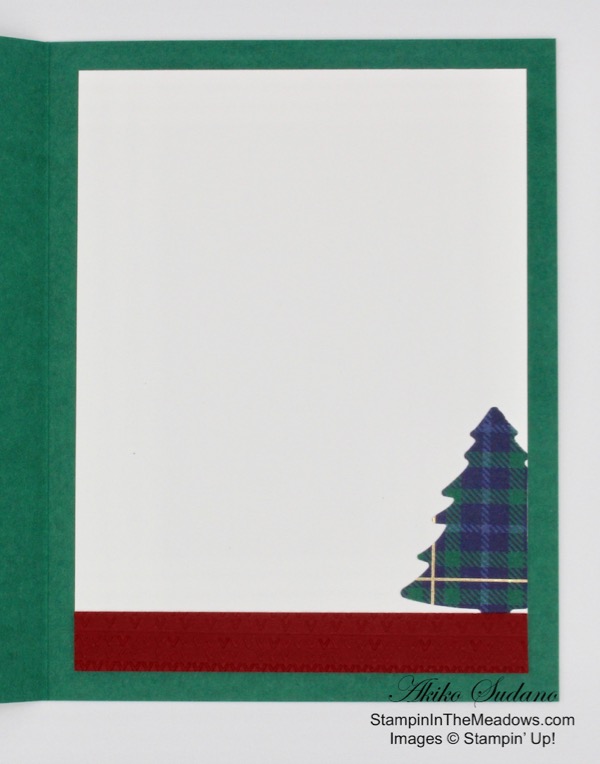
Good Morning! Today I’m sharing a Christmas card with a greeting from the Stampin’ Up! Itty Bitty Christmas cling stamp set and a forest of plaid Christmas trees. The trees are all punched from the Wrapped in Plaid Designer Series Paper using the Pine Tree punch! You can find the supplies used to create this card at the bottom of my post along with the sizes of cardstock used.
I started with a panel of Shaded Spruce cardstock that I ran through the Winter Knit embossing folder. I then adhered it to the front of a Shaded Spruce card base. I selected 7 plaids from the Wrapped in Plaid DSP. I punched out a tree from each using the Pine Tree punch.
Then I die cut 7 stars from gold foil using one of the stars in the star spray die cut in the Stitched Stars dies. The large star in the Twinkle Builder punch would also work well or gold star shaped faceted gems. These would probably take less time, but I didn’t have them, so I improvised and found that this star die cut was a good size. I adhered a star to the top of each tree with liquid glue.
I then arranged the trees and adhered them to the card front. I used liquid glue to attach the back trees and dimensionals to attach the ones in front. I stamped the Celebrate the Season sentiment from the Stampin’ Up! Itty Bitty Christmas stamp set in Versamark ink on a strip of Cherry Cobbler. I sprinkled it with white embossing powder and heat set. I trimmed the end and adhered it to the card front with dimensionals. I finished it off with a gold glitter dot from the upcoming Christmastime is Here limited release suite next month.
I punched part of another plaid tree and attached it to a Whisper White panel with liquid glue. It’s hard to see, but I embossed a strip of Cherry Cobbler with the Winter Knit embossing folder and adhered it to the bottom. I then adhered the panel to the inside of the card with liquid glue.
This is an elegant Christmas Card that sparkles with the gold foil touches in the Wrapped in Plaid Designer Series Paper and stars. But it also has a flannel and knit sweater kind of look with the embossed background coupled with the DSP. Best of all, it comes together pretty quickly. I hope you like it. Thanks for visiting!
Akiko
October 1 – 15 Host Code: 44YKETNJ
Use this host code when you order and receive a free gift from me! If your order is over $150, please do not use this code, but you’ll still get the free gift. The free gift is your choice of any item valued up to $10.00 in the 2018-19 Annual Catalog or in the 2019 Occasions Catalog! That includes some of the Host Exclusive stamp sets!
If you need any stamping supplies, I’d be very happy to be your Demonstrator. Just click on the Shop Now button on the right side of the screen to go directly to my online store or contact me if you have any questions. Happy Stamping!
Good Morning! Today I have a Christmas card made with the Stampin’ Up! Toile Christmas bundle. This is a simple card that uses the vintage images in the Toile Tidings Designer Series Paper as the focal point. You can find the supplies used to create this card at the bottom of my post along with the sizes of cardstock used.
I cut a panel of the Stampin’ Up! Toile Tidings designer series paper using the largest of the Stitched Rectangles dies and adhered it to a Real Red mat. I attached them to a Garden Green card base with dimensionals.
Using the Stamparatus, I stamped the Christmas Wishes banner greeting from the Stampin’ Up! Toile Christmas stamp set using the Real Red and Garden Green Stampin’ Write markers. The Stamparatus allowed me to use stamp the image in the same place twice. The first time was with the Real Red marker coloring the letters and the second time was with the Garden Green marker coloring the banner. I cut the banner out using the coordinating die from the Christmas Cardinal dies. I cut two of the medium leaf branches and one of the small leaf branches from the Christmas Cardinal dies and arranged and adhered them behind the label with liquid glue. I attached the label to the card front using dimensionals and added some red glittered enamel dots.
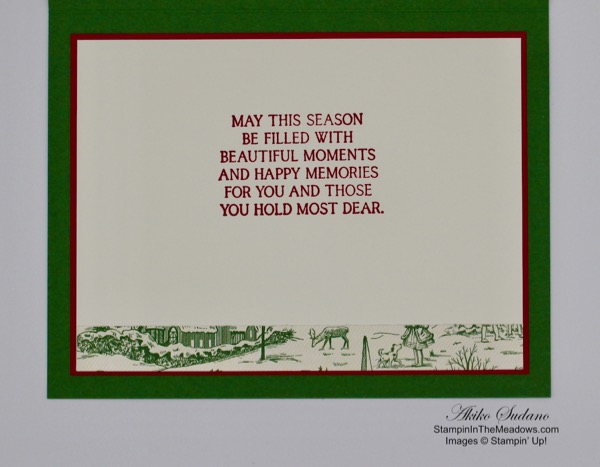
I stamped the sentiment from the Stampin’ Up! Toile Christmas stamp set in Real Red ink on a panel of Very Vanilla. I adhered a strip of the Toile Tidings DSP to the bottom of the panel and adhered it to a Real Red mat before attaching it to the inside of the card.
This is a simple and pretty nostalgic Christmas card. I hope you like it. Thanks for visiting!
Akiko
October 1 – 15 Host Code: 44YKETNJ
Use this host code when you order and receive a free gift from me! If your order is over $150, please do not use this code, but you’ll still get the free gift. The free gift is your choice of any item valued up to $10.00 in the 2018-19 Annual Catalog or in the 2019 Occasions Catalog! That includes some of the Host Exclusive stamp sets!
Join us for the Inkin Krew World Card Making Day Facebook Event!
The Inkin’ Krew is celebrating World Card Making Day on Oct 5 with a Facebook Live Event. Members of our team will be presenting live card making demonstrations throughout the day. In addition we will have fun games and give aways. You can join us NOW at Inkin’ Krew WCMD and join the fun. as we warm up for the big day.
If you need any stamping supplies, I’d be very happy to be your Demonstrator. Just click on the Shop Now button on the right side of the screen to go directly to my online store or contact me if you have any questions. Happy Stamping!
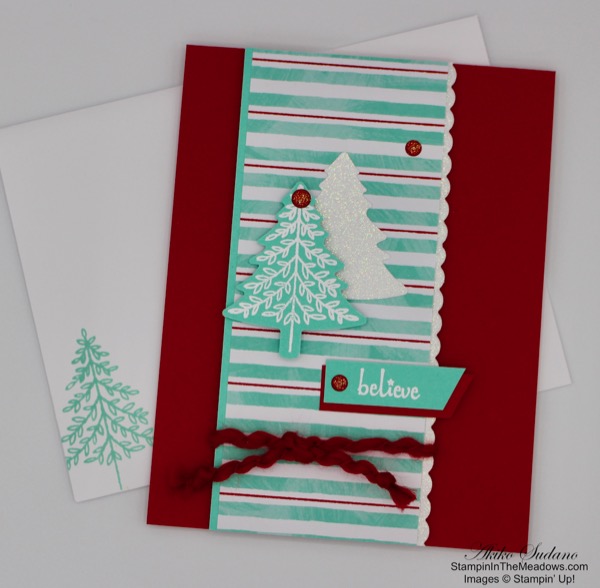
Good Morning! Today’s card is a Christmas Card made with the Stampin’ Up! Perfectly Plaid Photopolymer stamp set and the Stampin’ Up! Itty Bitty Christmas Cling stamp set. I teamed these up with the Let It Snow Designer Series Paper to make a light and cheerful Christmas Card. You can find the supplies used to create this card at the bottom of my post along with the sizes of cardstock used.
I started with a strip of Sparkle Glimmer paper that I used the die cut from the Budding Blooms dies to cut a scalloped edge. I cut a strip of the striped Let It Snow DSP and adhered a strip of Coastal Cabana to the back and edged it with the Sparkle Glimmer paper scalloped edge. I tied a piece of Real Red curly ribbon around the bottom and attached it to a Real Red card base with dimensionals.
I stamped the open leaf tree image from the Stampin’ Up! Perfectly Plaid stamp set on a piece of Coastal Cabana using VersaMark ink. I sprinkled white embossing powder on it and heat set it. Then I punched it out it out with the Pine Tree punch. I punched another pine tree from Sparkle Glimmer paper and attached the trees to the card with liquid glue and dimensionals.
I stamped the believe sentiment from the Stampin’ Up! Itty Bitty Christmas on a strip of Coastal Cabana in VersaMark ink and sprinkled it with white embossing powder and heat set. I trimmed the ends and attached it to a strip of Real Red and attached it to the card. I finished off the card front with three read glittered enamel dots.
I stamped the sentiment from the Stampin’ Up! Perfectly Plaid stamp set in Real Red ink on a panel of Whisper White. I stamped the tree image again in Coastal Cabana in the lower left of the inside panel. I added a strip of the same designer paper that I used on the front of the card to the bottom of the inside panel an adhered it to a Coastal Cabana mat before attaching it to the inside of the card. I also stamped the tree image on the lower left of a white envelope.
Coastal Cabana and Real Red make a cheerful and happy Christmas card. And I guess that this shows how to make a non-plaid Christmas card with the Stampin’ Up! Perfectly Plaid bundle. On Sunday I will be on Facebook Live making a Plaid Christmas card using this bundle on my business page at 1:00 PM Eastern time. I welcome you to tune in. Thanks for visiting and have a great weekend!
Akiko
Buy 3 Get 1 Free Designer Series Paper Sale
By popular demand, Stampin’ Up! is bringing back the Designer Series Paper Sale! During September 4–30, you can buy three packages of select Designer Series Paper, and get one FREE! See the full details on my Stampin’ Up! Promotions Page.
September 16 – 30 Host Code: EDRVYB3Z
Use this host code when you order and receive a free gift from me! If your order is over $150, please do not use this code, but you’ll still get the free gift. The free gift is your choice of any item valued up to $10.00 in the 2018-19 Annual Catalog or in the 2019 Occasions Catalog! That includes some of the Host Exclusive stamp sets!
If you need any stamping supplies, I’d be very happy to be your Demonstrator. Just click on the Shop Now button on the right side of the screen to go directly to my online store or contact me if you have any questions. Happy Stamping!
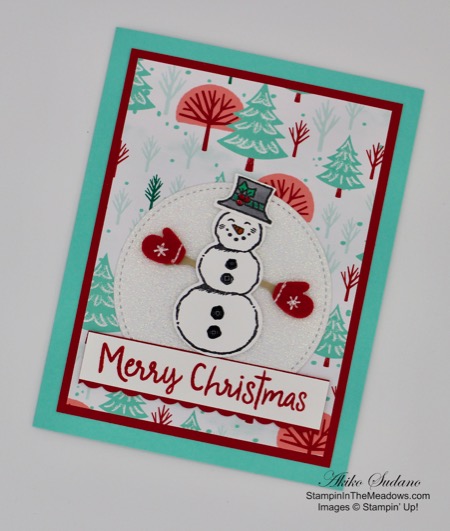
Good Morning! Today is the big day – the 2019 Stampin’ Up! Holiday Catalog is finally open for orders! Yay! To celebrate, I made a snowman Christmas card made with the Stampin’ Up! Snowman Season bundle. This includes the Snowman Season Photopolymer stamp set and the Snowman Builder punch. The Snowman Season stamp set is used for cards and tags on the cover of the new catalog.
In addition to it being the first day to order from the new catalog, today is the first day of the popular Buy 3 get 1 Free Designer Series Paper or DSP promotion. The details are on the Stampin’ Up! Promotions page.
Now, on to today’s Snowman Season Christmas card. You can find the supplies used to create this card at the bottom of my post along with the sizes of cardstock used.
I started by adhering the Let it Snow Specialty Designer Series Paper with the trees to a Real mat and then to a Coastal Cabana card base. The DSP has glitter on the pine trees, so pretty! I cut the large circle from the Stitched Shapes dies from Sparkle Glimmer paper and adhered it to the card front.
I made the snowman by stamping it in Memento Tuxedo Black ink on Thick Whisper White cardstock. I then punched it out with the Snowman Builder punch. I colored his nose with a Pumpkin Pie Stamp’ Write marker and added two large and two small coal pieces from the Let it Snow Embellishment kit to his belly. I stamped the top hat in Memento Tuxedo Black ink on Thick Whisper White, punched it out and colored it. I punched the arms in Crumb Cake and attached the red felt gloves from the Let it Snow Embellishment kit.
I stamped the Merry Christmas sentiment from the Stampin’ Up! Snowman Season stamp set in Real Red on a strip of Whisper White cardstock. I die cut the scalloped mat using the scallop die from the Budding Blooms dies on Real Red cardstock and attached the label to it. I attached it to the card with liquid glue and then attached the snowman with dimensionals.
On the inside of the card, I stamped the sentiment from the Stampin’ Up! Snowman Season stamp set in Real Red on a Whisper White panel. I added a strip of DSP to the bottom and added a Real Red mat before adhering it to the inside of the card.
The colors in the Let it Snow DSP are so cheerful and the glitter really makes it special. Coupled with the different snowmen from the Stampin’ Up! Snowman Seasons stamp set, it really makes for happy, whimsical Christmas cards.
My last few cards have been sneak peeks from the new 2019 Stampin’ Up! Holiday Catalog which is open for orders today! If you haven’t received a catalog yet but would like one, visit the Stampin’ Up! Catalogs page to request one and I’ll get it out to you. Thanks for visiting and happy holiday stamping!
Akiko
Buy 3 Get 1 Free Designer Series Paper Sale Is Back – Starting Today!
By popular demand, Stampin’ Up! is bringing back the Designer Series Paper Sale! During September 4–30, you can buy three packages of select Designer Series Paper, and get one FREE! See the full details on my Stampin’ Up! Promotions Page.
September 1 – 15 Host Code: DHYEBG62
Use this host code when you order and receive a free gift from me! If your order is over $150, please do not use this code, but you’ll still get the free gift. The free gift is your choice of any item valued up to $10.00 in the 2018-19 Annual Catalog or in the 2019 Occasions Catalog! That includes some of the Host Exclusive stamp sets!
If you need any stamping supplies, I’d be very happy to be your Demonstrator. Just click on the Shop Now button on the right side of the screen to go directly to my online store or contact me if you have any questions. Happy Stamping!


 Designer Series Paper")


")
")


 Shimmer Ribbon")


")


")


")


")


 Curly Ribbon")


 Specialty Designer Series Paper")


")


")


