Stampin’ Up! Forever Fern Hello Card

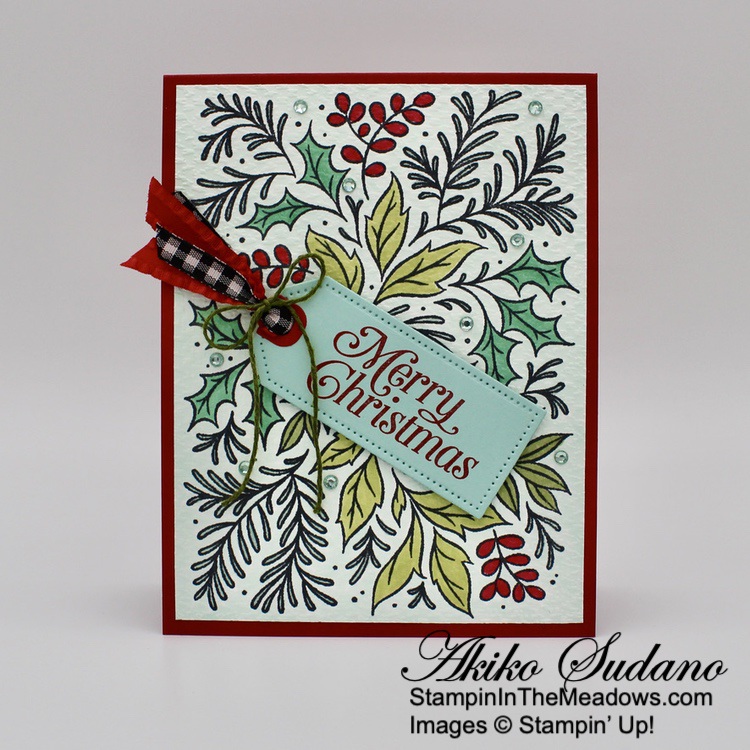
Good Morning! The Stampin’ Up! Forever Fern stamp set and the coordinating Forever Flourishing dies are some of the prettiest leaf sets with the beautiful Distinktive stamps, gorgeous sentiments and wonderfully detailed dies. And they go beautifully with the special Ever Eden specialty designer series paper that is available now as part of the Eden’s Garden Collection. So I paired these products for a simple hello card for today. You can find the supplies I used at the bottom of my post along with the sizes of cardstock used.

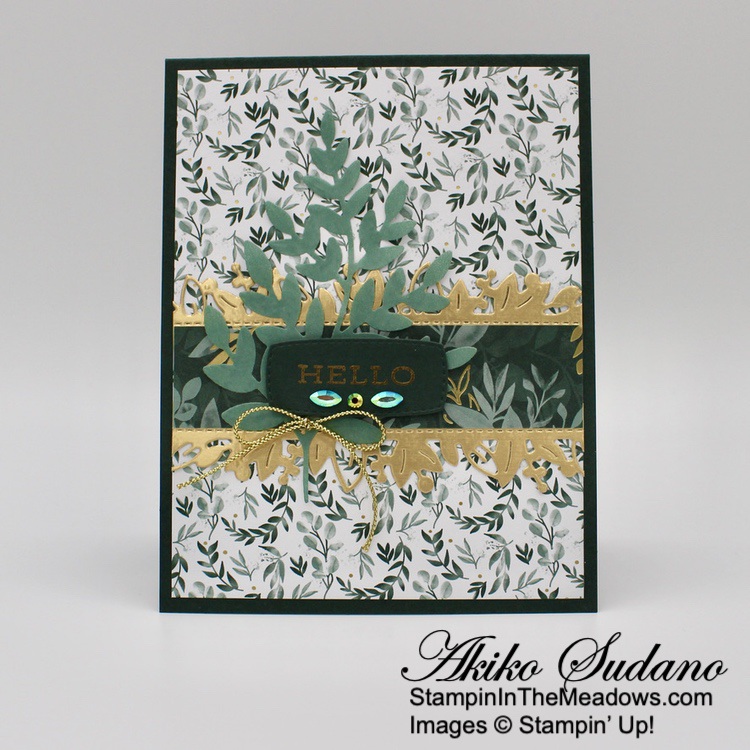
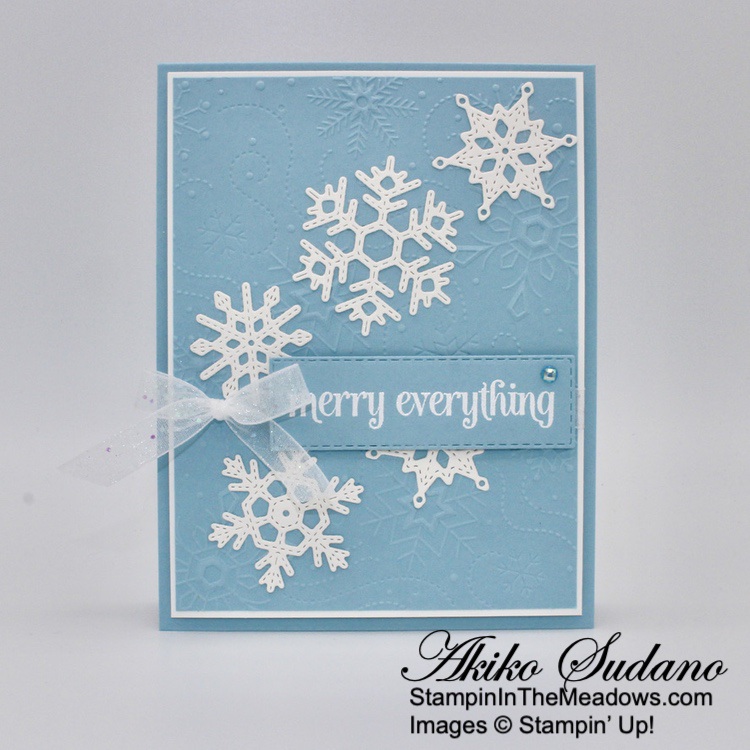
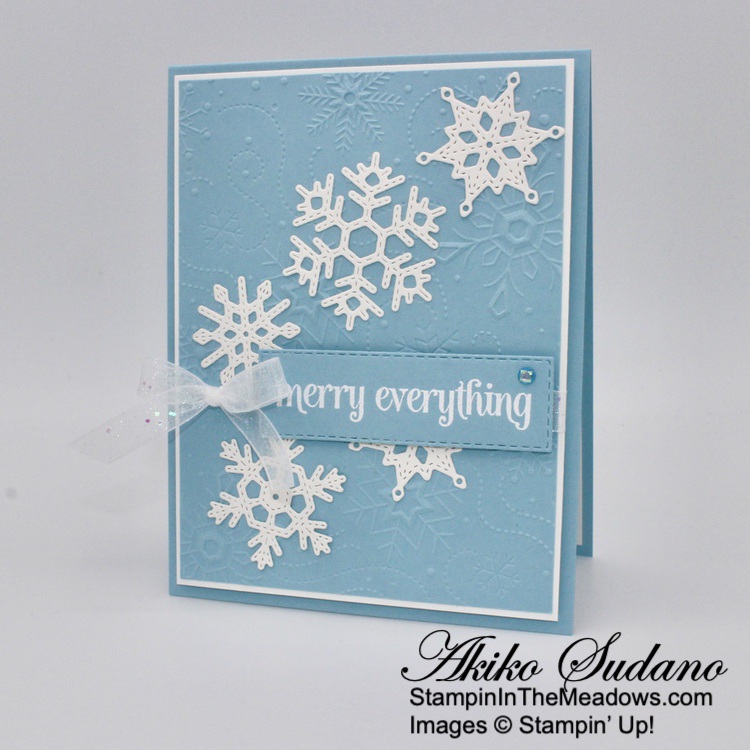
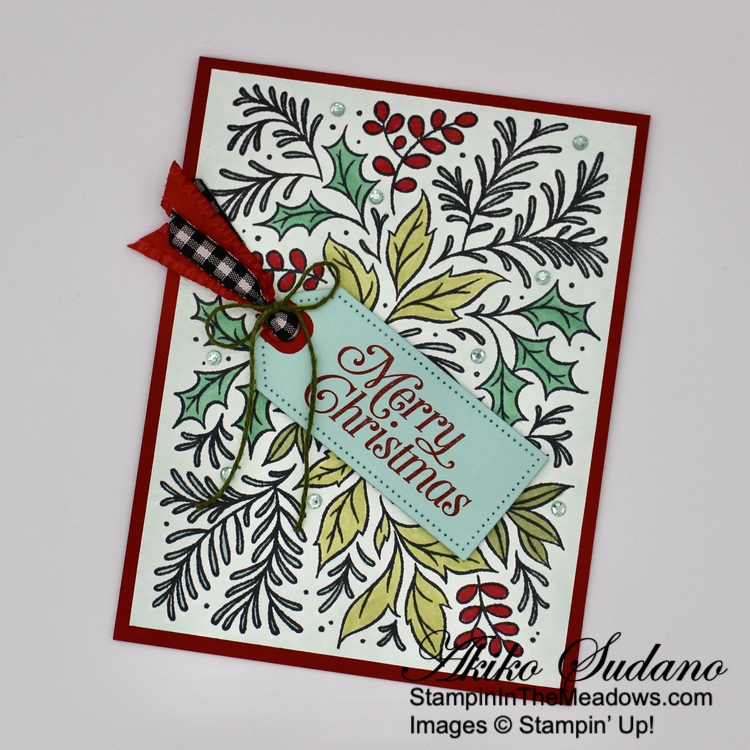
I adhered a panel of Ever Eden specialty designer series paper to the front of an Evening Evergreen card base with liquid glue. I cut two of the pretty Eden dies border from Brushed Gold foil and adhered them to the back of another panel of Ever Eden specialty DSP before adhering it to the card front.

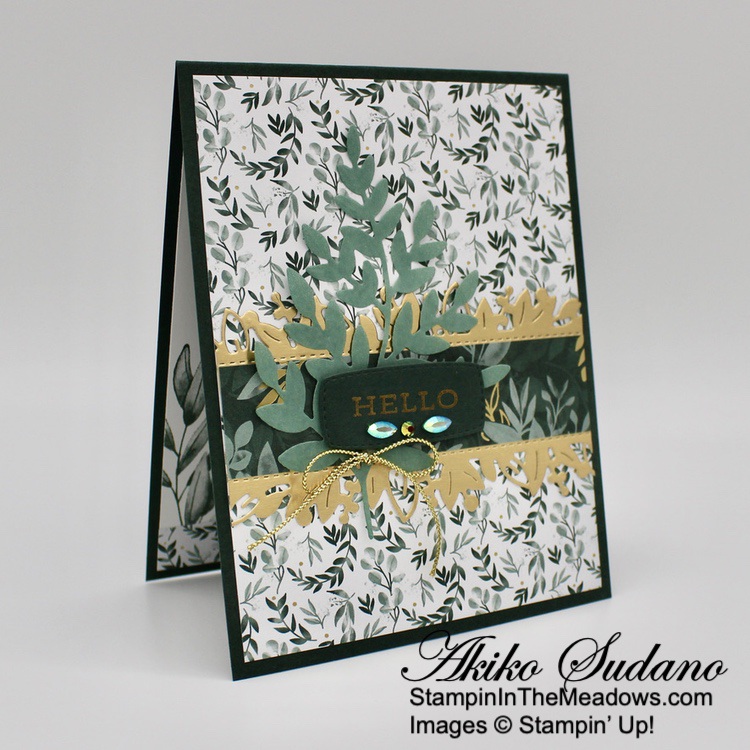
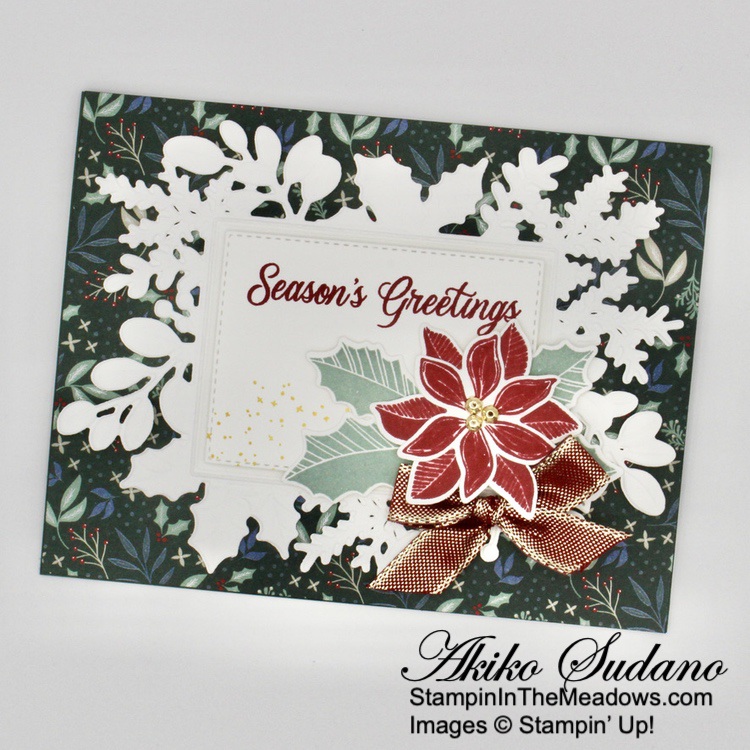
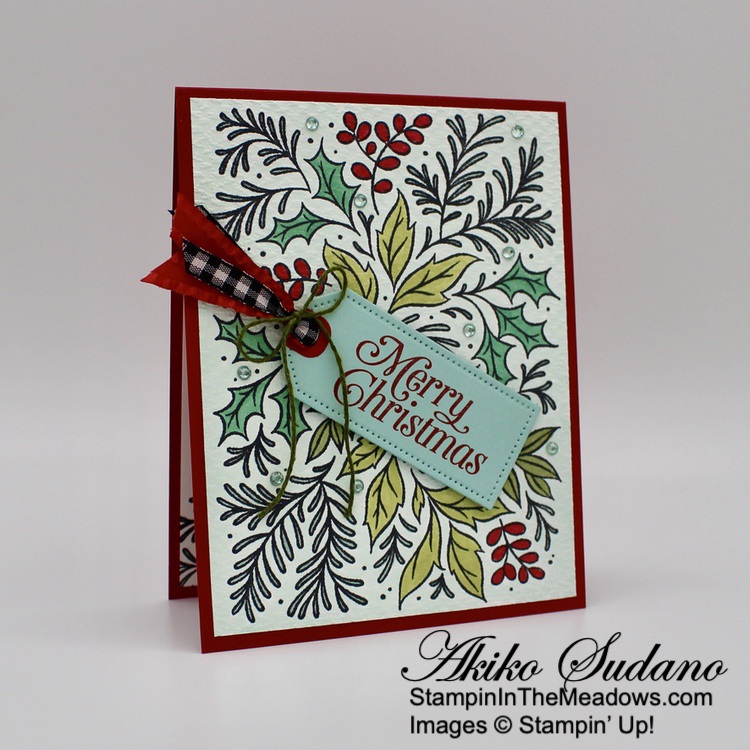
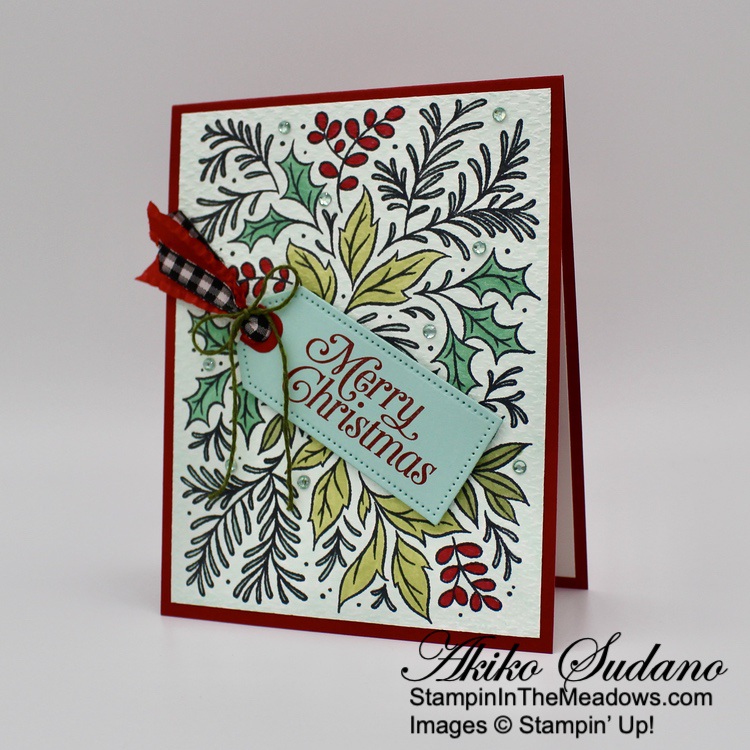
I cut the large fern from the Forever Flourishing dies using Soft Succulent cotton paper and adhered it to the card front with liquid glue. I stamped the sentiment from the Stampin’ Up! Forever Fern cling stamp set in Versamark ink and sprinkled it with gold embossing powder. I shook off the excess and heat set the powder with my heat tool. I cut the sentiment out with the Messages die.

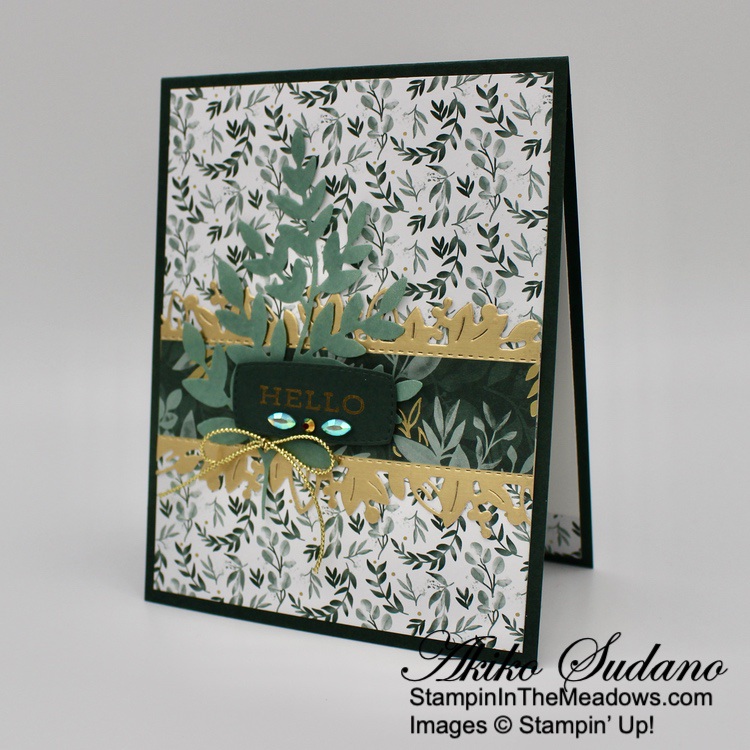
I adhered the label to the card front with dimensionals and decorated it with the beautiful Garden Gems and adhered a gold trim bow to the bottom of the fern stem with a glue dot.

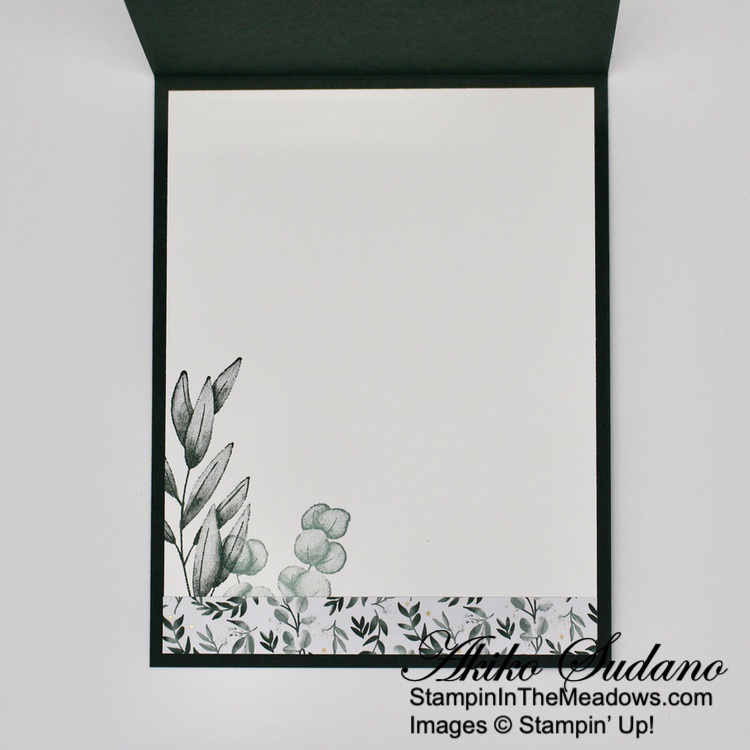
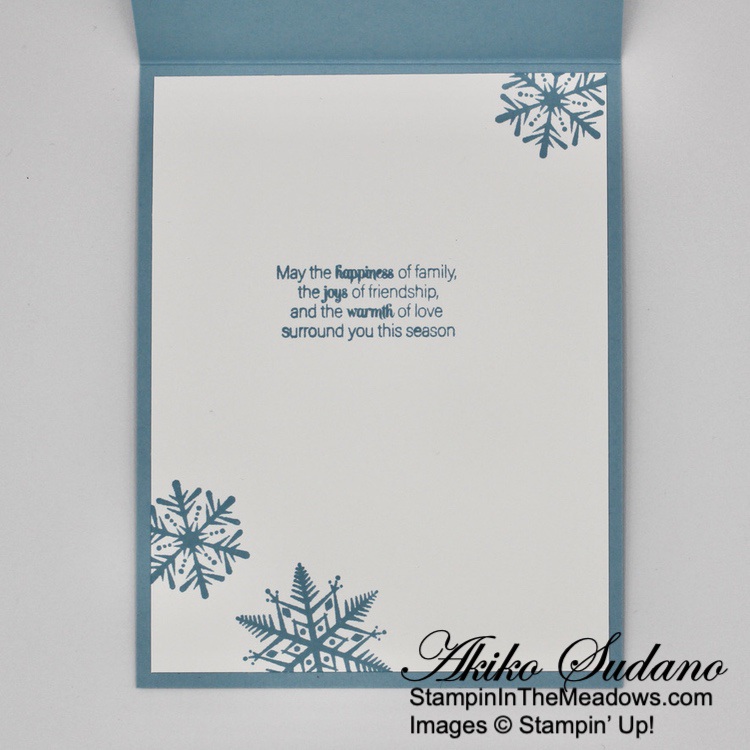
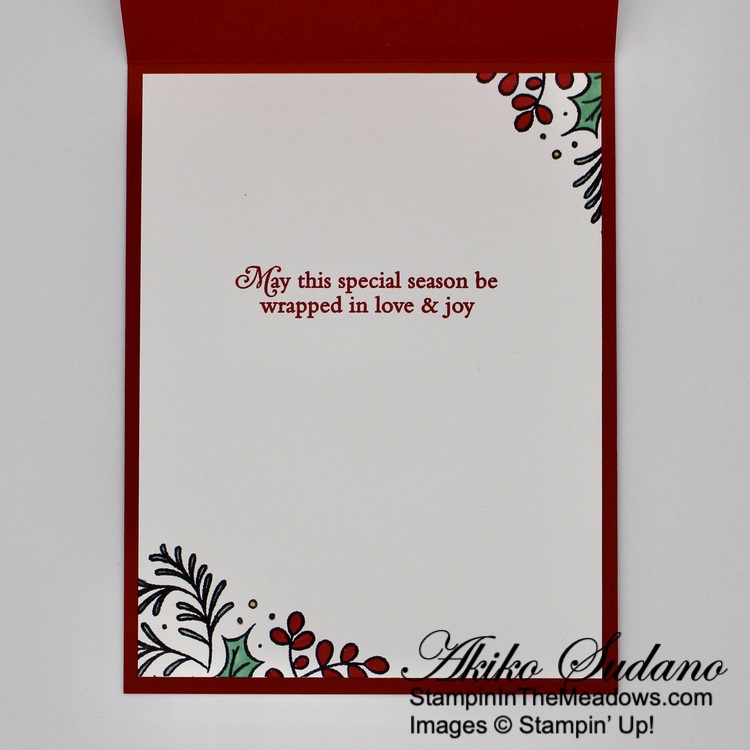
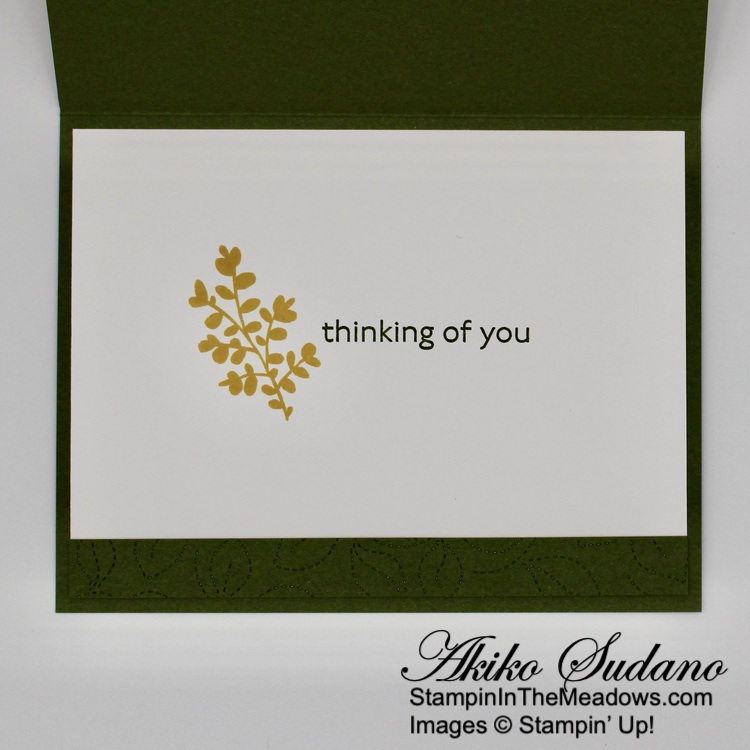
For the inside of the card, I stamped the leaf clusters from the Stampin’ Up! Forever Fern stamp set in Evening Evergreen and Soft Succulent on the bottom corner of a Basic White panel I adhered a strip of Ever Eden specialty DSP to the bottom and adhered the panel to the inside of the card.

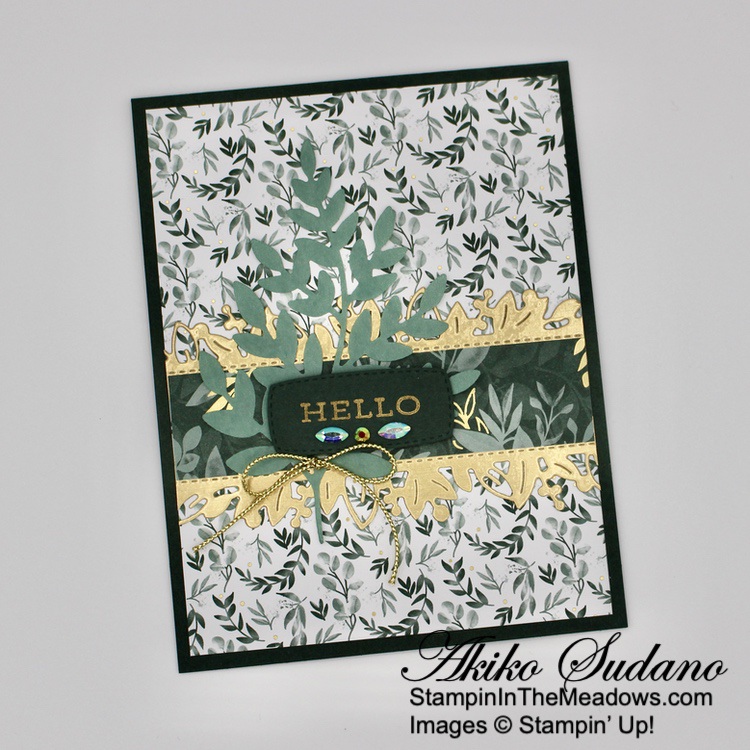
Don’t you think the Stampin’ Up! Forever Fern stamp set goes well with the pretty Ever Eden specialty DSP? You have similar shading in the stamped images and gentle flowing movement in the leaf sprigs – I think they’re wonderful together! And the touches of gold are so elegant! So be sure to check it out!


Eden’s Garden Collection is Available Now!

You can begin enjoying the new January – June 2021 Mini Catalog now wit the new Eden’s Garden Collection! This delightful and desirable collection includes early-release products from the January–June 2022 Mini Catalog—a bundle of stamps and dies that’s blooming with beauty and bounty. Plus, exclusive products you can’t uncover anywhere else—a pack of paper patterned with green and gold, a set of specialty sheets for gift-giving and textured touches, and a sparkling set of gleaming gems!

Click on the image below to download a flyer with all the details or click HERE to shop the Eden’s Garden Collection now in my Online Store.

The Eden’s Garden bundle is a beautiful Early Release from the upcoming January-June 2022 Mini Catalog. Other items in the collection are available through January 3, 2022, or while supplies last.


Last Chance Products Sale Starts December 1, 2021!

The July–December 2021 Mini Catalog will be retiring soon! It’s always bittersweet to see a classic Stampin’ Up! catalog take a trip to retirement. But, we’re looking forward to all the new products on their way—and we hope you are, too!

Stock up on your favorite products before they’re gone for good! After all, this selection of Last Chance Products is only available through January 3, 2022 or while supplies last.

Click Here to download a PDF with the retiring products.

Click Here to download a PDF with the carry over list of products.


A few more days left to Start with Savings!

Jump for join! There’s no better time than November to begin your Stampin’ Up! business. Why? If you sign up to be an Independent Stampin’ Up! demonstrator before the end of the month, you’ll get the $99 Starter Kit—filled with your pick of products—for only $75! Start your Stampin’ Up! business strong with big savings!

Enjoy early access to our amazing products, exclusive perks, an opportunity to earn additional income, and an incredible community of crafters. Whether you want to make the most of your papercrafting passion or build a business, there’s so much in store for you with Stampin’ Up! Check out my Join My Team Page to see more benefits and join now or contact me if you have any questions and I’ll be happy to tell you more!


Current Host Code: H6UDQF6U

Use this host code when you order $50 or more and receive a free gift from me!  The free gift is your choice of any item valued up to $10.00 in the 2021-2022 Annual Catalog or the July – December 2021 Mini Catalog!

If your order is over $150, please do not use the host code since you’ll receive your own Host Dollars plus I’ll still send you the free gift!  This host code can be used by anyone, no club or commitment required. Let me know if you have any questions.


If you need any stamping supplies, I’d be very happy to be your Demonstrator.  Just click on the Shop Now button on the right side of the screen to go directly to my online store or contact me if you have any questions.  Happy Stamping!

Thanks for stopping by and have a great week!

Akiko

  • Visit my online store here
  • See the current Stampin’ Up! clearance rack specials here
  • Earn FREE Stampin’ Up! products through my Wildflower Frequent Shopper Program – my way of saying thank you to my online frequent shopper customers.
  • Have any questions? I’d be happy to help, click here to contact me.

Cardstock Cuts for this project:

  • Evening Evergreen – 4-1/4″ x 11″ card base scored at 5-1/2″, 1″ x 2″ (label)
  • Brushed Gold Foil – two 1″ x 4″ strips (die cut leaf borders)
  • Soft Succulent Cotton – 3″ x 4-1/2″ (die cut fern)
  • Basic White – 4″ x 5-1/4″ (inside panel)
  • Ever Eden specialty DSP – 4″ x 5-1/4″ (front background), 1″ x 4″ (front stripe), 1/2″ x 4″ (inside trim)

Stampin’ Up! products used in this project:


Stampin’ Up! Merriest Moments Christmas Card

Good Morning! The Stampin’ Up! Merriest Moments stamp bundle is really cute and versatile and I finally got it and used it for today’s Christmas card. You can find the supplies I used at the bottom of my post along with the sizes of cardstock used.

I adhered a panel of Tidings of Christmas 6″ x 6″ designer series paper to the front of an Evening Evergreen card base. I cut a panel of Basic White with the detailed greenery frame die from the Merriest Frames Hybrid die. I carefully placed it in the Merriest Frames Hybrid embossing folder and ran it through my Stampin’ Cut & Emboss machine to get the wonderful leafy texture. I adhered it to the card front with liquid glue.

I stamped the sentiment from the Stampin’ Up! Merriest Moments photopolymer stamp set in Cherry Cobbler on a Basic White panel. I stamped the spatter in Bumblebee ink along the bottom and out it out with the label die. I adhered it to the card front with dimensionals.

I stamped the two flower stamps from the Stampin’ Up! Merriest Moments stamp set in Cherry Cobbler ink on Basic White and cut them out with the coordinating dies. I stamped four of the leaves in Soft Succulent ink and cut them out with the coordinating dies. I adhered the flowers together with liquid glue and popped them onto the card front with dimensionals. I adhered the leaves with glue dots, tucking them under the flower. I made a bow and adhered it with a glue dot and finished the flower center with three small gilded gems.

For the inside of the card, I stamped the sentiment from the Stampin’ Up! Merriest Moments stamp set in Cherry Cobbler. I stamped the corners with Cherry Cobbler flowers and Soft Succulent leaves and trimmed the bottom with a strip of Tidings of Christmas 6″ x 6″ DSP. I adhered the panel to the inside of the card.

The Stampin’ Up! Merriest Moments bundle is fantastic for elegant Christmas cards. the Hybrid embossing folder is great for both cutting and embossing at the same time, or embossing separately. This makes it so versatile in making different styles of cards and each one is really special!


Last Chance Products Sale Starts December 1, 2021!

The July–December 2021 Mini Catalog will be retiring soon! It’s always bittersweet to see a classic Stampin’ Up! catalog take a trip to retirement. But, we’re looking forward to all the new products on their way—and we hope you are, too!

Stock up on your favorite products before they’re gone for good! After all, this selection of Last Chance Products is only available through January 3, 2022 or while supplies last.

Click Here to download a PDF with the retiring products.

Click Here to download a PDF with the carry over list of products.


A few more days left to Start with Savings!

Jump for join! There’s no better time than November to begin your Stampin’ Up! business. Why? If you sign up to be an Independent Stampin’ Up! demonstrator before the end of the month, you’ll get the $99 Starter Kit—filled with your pick of products—for only $75! Start your Stampin’ Up! business strong with big savings!

Enjoy early access to our amazing products, exclusive perks, an opportunity to earn additional income, and an incredible community of crafters. Whether you want to make the most of your papercrafting passion or build a business, there’s so much in store for you with Stampin’ Up! Check out my Join My Team Page to see more benefits and join now or contact me if you have any questions and I’ll be happy to tell you more!


Current Host Code: H6UDQF6U

Use this host code when you order $50 or more and receive a free gift from me!  The free gift is your choice of any item valued up to $10.00 in the 2021-2022 Annual Catalog or the July – December 2021 Mini Catalog!

If your order is over $150, please do not use the host code since you’ll receive your own Host Dollars plus I’ll still send you the free gift!  This host code can be used by anyone, no club or commitment required. Let me know if you have any questions.


If you need any stamping supplies, I’d be very happy to be your Demonstrator.  Just click on the Shop Now button on the right side of the screen to go directly to my online store or contact me if you have any questions.  Happy Stamping!

Thanks for stopping by and have a great week!

Akiko

  • Visit my online store here
  • See the current Stampin’ Up! clearance rack specials here
  • Earn FREE Stampin’ Up! products through my Wildflower Frequent Shopper Program – my way of saying thank you to my online frequent shopper customers.
  • Have any questions? I’d be happy to help, click here to contact me.

Cardstock Cuts for this project:

  • Evening Evergreen – 5-1/2″ x 8-1/2″ card base scored at 4-1/4″
  • Basic White – 4-1/2″ x 5-1/2″ (die cut & embossed panel), 4″ x 5-1/4″ (inside panel), 2-1/2″ x 3-1/4″ (label), 2″ x 4″ (flowers), 1-1/2″ x 4″ (leaves)
  • Tidings of Christmas 6″ x 6″ DSP – 4-1/4″ x 5-1/2″ (front background), 1/2″ x 5-1/4″ (inside trim)

Stampin’ Up! products used in this project:


Stampin’ Up! Merry Snowflakes Christmas Card

Good Morning! Today I’m sharing another Christmas card made with the pretty Stampin’ Up! Merry Snowflakes bundle. This bundle has cling stamps with snowflakes and pretty holiday sentiments and wonderful dies with stitched snowflakes. You can find the supplies I used at the bottom of my post along with the sizes of cardstock used.

I embossed a panel of Balmy Blue with the pretty snowflake embossing folder in the Wintry 3D embossing folder. I embossed the panel twice to cover the entire panel, and it left a little seam that I easily covered with the label and bow. I adhered the panel to a Basic White mat and wrapped it with white glittered ribbon, making a bow on the side. I adhered the panel to the front of a Balmy Blue card base with dimensionals.

I cut the snowflakes from Shimmery White card stock using the Stitched Snowflakes dies. I arranged them on the card front and adhered them with liquid glue.

I stamped the sentiment from the Stampin’ Up! Merry Snowflakes stamp set in Versamark ink on a Balmy Blue panel and sprinkled in with white embossing powder. I shook off the excess and heat set the powder with my heat tool until it was shiny. I cut it out with the Stitched Rectangle die and adhered it to the card with dimensionals, finishing it off with a blue iridescent gem.

For the inside of the card, I stamped the snowflakes and sentiment from the Stampin’ Up! Merry Snowflakes stamp set in Balmy Blue ink on a Basic White panel. I adhered the panel to the inside of the card with liquid glue.

Snowflakes are one of my favorite Christmas card themes and the Stampin’ Up! Merry Snowflakes bundle has some pretty ones! And the snowflake embossing folder from the Wintry 3D embossing folders is so beautiful with both embossed and debossed snowflakes!


Eden’s Garden Collection is Available Now!

You can begin enjoying the new January – June 2021 Mini Catalog now wit the new Eden’s Garden Collection! This delightful and desirable collection includes early-release products from the January–June 2022 Mini Catalog—a bundle of stamps and dies that’s blooming with beauty and bounty. Plus, exclusive products you can’t uncover anywhere else—a pack of paper patterned with green and gold, a set of specialty sheets for gift-giving and textured touches, and a sparkling set of gleaming gems!

Click on the image below to download a flyer with all the details or click HERE to shop the Eden’s Garden Collection now in my Online Store.

The Eden’s Garden bundle is a beautiful Early Release from the upcoming January-June 2022 Mini Catalog. Other items in the collection are available through January 3, 2022, or while supplies last.


Join Stampin’ Up! With Savings During November!

Jump for join! There’s no better time than November to begin your Stampin’ Up! business. Why? If you sign up to be an Independent Stampin’ Up! demonstrator before the end of the month, you’ll get the $99 Starter Kit—filled with your pick of products—for only $75! Start your Stampin’ Up! business strong with big savings!

Enjoy early access to our amazing products, exclusive perks, an opportunity to earn additional income, and an incredible community of crafters. Whether you want to make the most of your papercrafting passion or build a business, there’s so much in store for you with Stampin’ Up! Check out my Join My Team Page to see more benefits and join now or contact me if you have any questions and I’ll be happy to tell you more!


Current Host Code: PYA3MMQ6

Use this host code when you order $50 or more and receive a free gift from me!  The free gift is your choice of any item valued up to $10.00 in the 2021-2022 Annual Catalog or the July – December 2021 Mini Catalog!

If your order is over $150, please do not use the host code since you’ll receive your own Host Dollars plus I’ll still send you the free gift!  This host code can be used by anyone, no club or commitment required. Let me know if you have any questions.


If you need any stamping supplies, I’d be very happy to be your Demonstrator.  Just click on the Shop Now button on the right side of the screen to go directly to my online store or contact me if you have any questions.  Happy Stamping!

Thanks for stopping by and have a great week!

Akiko

  • Visit my online store here
  • See the current Stampin’ Up! clearance rack specials here
  • Earn FREE Stampin’ Up! products through my Wildflower Frequent Shopper Program – my way of saying thank you to my online frequent shopper customers.
  • Have any questions? I’d be happy to help, click here to contact me.

Cardstock Cuts for this project:

  • Balmy Blue – 4-1/4″ x 11″ scored at 5-1/2″, 3-7/8″ x 5-1/8″ (embossed panel), 1-1/4″ x 3-1/2″ (label)
  • Shimmery White – 3″ x 5″ (die cut snowflakes)
  • Basic White – two 4″ x 5-1/4″ panels (front mat and inside panel)

Stampin’ Up! products used in this project:


Stampin’ Up! Festive Foliage Christmas Card

Good Morning! The Stampin’ Up! Festive Foliage cling stamp is a background stamp and one of those catalog hidden gems! It’s so festive and versatile – I’ve seen the pretty image embossed in silver and gold as well as colored like I did here. You can find the currently available supplies I used at the bottom of my post along with the sizes of cardstock used.

I stamped a panel of Basic White with the Stampin’ Up! Festive Foliage stamp using my Stamparatus and Memento Tuxedo Black ink. I used a larger panel so I could hold the panel down with the magnets and clear the stamp and I did stamp it a couple of times to get good coverage. Then I trimmed it down to 4″ x 5-1/4″.

I colored the foliage with Stampin’ Blends – Soft Succulent, Shaded Spruce, Old Olive, Mossy Meadow and Real Red. Using the different greens makes the image so rich! Then I colored the background with my light Pool Party Stampin’ Blend. I embossed the panel with the Tasteful Textile 3D embossing folder and adhered it to the front of a Real Red card base.

I stamped the sentiment from the Perfectly Plaid photopolymer stamp set in Real Red on Pool Party and cut it out with the Tailor Made Tags die. I cut out a tag reinforcer from Real Red and adhered it to the tag with liquid glue. I looped some ruffled Real Red and Black and White Gingham ribbon through the hole and tied the ribbon with baker’s twine that I colored with the Old Olive Stampin’ Blend. I adhered the tag to the card front and added some Pool Party rhinestones for some bling.

For the inside of the card, I stamped the corners of a Basic White panel with the Stampin’ Up! Festive Foliage stamp set in Memento Tuxedo Black and colored it to match the card front. I stamped the sentiment from Perfectly Plaid in Real Red and adhered the panel to the inside of the card with Stampin’ Seal.

I love this pretty holiday greenery image! The Stampin’ Up! Festive Foliage stamp set is also great for making quick and easy Christmas cards. And with Thanksgiving this week, time’s running out for finishing up those Christmas cards, so quick and easy is important!


Eden’s Garden Collection is Available Now!

You can begin enjoying the new January – June 2021 Mini Catalog now wit the new Eden’s Garden Collection! This delightful and desirable collection includes early-release products from the January–June 2022 Mini Catalog—a bundle of stamps and dies that’s blooming with beauty and bounty. Plus, exclusive products you can’t uncover anywhere else—a pack of paper patterned with green and gold, a set of specialty sheets for gift-giving and textured touches, and a sparkling set of gleaming gems!

Click on the image below to download a flyer with all the details or click HERE to shop the Eden’s Garden Collection now in my Online Store.

The Eden’s Garden bundle is a beautiful Early Release from the upcoming January-June 2022 Mini Catalog. Other items in the collection are available through January 3, 2022, or while supplies last.


Join Stampin’ Up! With Savings During November!

Jump for join! There’s no better time than November to begin your Stampin’ Up! business. Why? If you sign up to be an Independent Stampin’ Up! demonstrator before the end of the month, you’ll get the $99 Starter Kit—filled with your pick of products—for only $75! Start your Stampin’ Up! business strong with big savings!

Enjoy early access to our amazing products, exclusive perks, an opportunity to earn additional income, and an incredible community of crafters. Whether you want to make the most of your papercrafting passion or build a business, there’s so much in store for you with Stampin’ Up! Check out my Join My Team Page to see more benefits and join now or contact me if you have any questions and I’ll be happy to tell you more!


Current Host Code: PYA3MMQ6

Use this host code when you order $50 or more and receive a free gift from me!  The free gift is your choice of any item valued up to $10.00 in the 2021-2022 Annual Catalog or the July – December 2021 Mini Catalog!

If your order is over $150, please do not use the host code since you’ll receive your own Host Dollars plus I’ll still send you the free gift!  This host code can be used by anyone, no club or commitment required. Let me know if you have any questions.


If you need any stamping supplies, I’d be very happy to be your Demonstrator.  Just click on the Shop Now button on the right side of the screen to go directly to my online store or contact me if you have any questions.  Happy Stamping!

Thanks for stopping by and have a great week!

Akiko

  • Visit my online store here
  • See the current Stampin’ Up! clearance rack specials here
  • Earn FREE Stampin’ Up! products through my Wildflower Frequent Shopper Program – my way of saying thank you to my online frequent shopper customers.
  • Have any questions? I’d be happy to help, click here to contact me.

Cardstock Cuts for this project:

  • Real Red – 4-1/4″ x 11″ scored at 5-1/2″, 1″ x 1″ (tag reinforcer)
  • Pool Party 1-1/2″ x 3-1/4″ (sentiment tag)
  • Basic White – 4-1/4″ x 5-1/2″ (front background), 4″ x 5-1/4″ (inside panel)

Stampin’ Up! products used in this project:


Stampin’ Up! Gorgeous Leaves Masculine Birthday Card

Good Morning! The Stampin’ Up! Gorgeous Leaves bundle is one of the prettiest leaf sets with gorgeous leaf stamps and wonderful dies. There are no sentiments in the set, so I used the beautiful Best Year cling stamp set for my sentiments in this masculine fall birthday card. You can find the supplies I used at the bottom of my post along with the sizes of cardstock used.

I adhered a panel of Blackberry Beauty specialty designer series paper to the front of an Early Espresso card base. I cut a panel of Cork paper with the Stitched Rectangle die and adhered it to a copper foil mat with liquid glue.

I cut two branches with the Intricate Leaves dies from Early Espresso and adhered them to the cork panel with tiny dots of liquid glue. I cut the large leaf from copper foil and adhered it on top of the branches with tiny dots of liquid glue. I stamped the sentiment from the Best Year cling stamp set in Versamark ink and sprinkled it with copper embossing powder. I shook off the excess and heat set the powder with my heat tool. I cut the sentiment out with a Stitched Rectangle die and adhered it over the leaf and branches with dimensionals.

I adhered the decorated panel to the card front with dimensionals and finished it with three copper brushed metallic dots.

For the inside of the card, I stamped the sentiment from the Best Year stamp set in Early Espresso on a Very Vanilla panel. I inked up the leaf from the Stampin’ Up! Gorgeous Leaves cling stamp set with Cinnamon Cider ink and stamped it off before stamping a leaf on the inside panel. I adhered a strip of Blackberry Beauty DSP to the bottom and adhered the panel to the inside of the card.

The Stampin’ Up! Gorgeous Leaves bundle is perfect for making nature themed masculine birthday cards, and this one is a bit elegant with the copper foil and the Best Year sentiments. Really nice for the Fall birthdays!


Eden’s Garden Collection is Available Now!

You can begin enjoying the new January – June 2021 Mini Catalog now wit the new Eden’s Garden Collection! This delightful and desirable collection includes early-release products from the January–June 2022 Mini Catalog—a bundle of stamps and dies that’s blooming with beauty and bounty. Plus, exclusive products you can’t uncover anywhere else—a pack of paper patterned with green and gold, a set of specialty sheets for gift-giving and textured touches, and a sparkling set of gleaming gems!

Click on the image below to download a flyer with all the details or click HERE to shop the Eden’s Garden Collection now in my Online Store.

The Eden’s Garden bundle is a beautiful Early Release from the upcoming January-June 2022 Mini Catalog. Other items in the collection are available through January 3, 2022, or while supplies last.


Join Stampin’ Up! With Savings During November!

Jump for join! There’s no better time than November to begin your Stampin’ Up! business. Why? If you sign up to be an Independent Stampin’ Up! demonstrator before the end of the month, you’ll get the $99 Starter Kit—filled with your pick of products—for only $75! Start your Stampin’ Up! business strong with big savings!

Enjoy early access to our amazing products, exclusive perks, an opportunity to earn additional income, and an incredible community of crafters. Whether you want to make the most of your papercrafting passion or build a business, there’s so much in store for you with Stampin’ Up! Check out my Join My Team Page to see more benefits and join now or contact me if you have any questions and I’ll be happy to tell you more!


Current Host Code: PYA3MMQ6

Use this host code when you order $50 or more and receive a free gift from me!  The free gift is your choice of any item valued up to $10.00 in the 2021-2022 Annual Catalog or the July – December 2021 Mini Catalog!

If your order is over $150, please do not use the host code since you’ll receive your own Host Dollars plus I’ll still send you the free gift!  This host code can be used by anyone, no club or commitment required. Let me know if you have any questions.


If you need any stamping supplies, I’d be very happy to be your Demonstrator.  Just click on the Shop Now button on the right side of the screen to go directly to my online store or contact me if you have any questions.  Happy Stamping!

Thanks for stopping by and have a great week!

Akiko

  • Visit my online store here
  • See the current Stampin’ Up! clearance rack specials here
  • Earn FREE Stampin’ Up! products through my Wildflower Frequent Shopper Program – my way of saying thank you to my online frequent shopper customers.
  • Have any questions? I’d be happy to help, click here to contact me.

Cardstock Cuts for this project:

  • Early Espresso – 5-1/2″ x 8-1/2″ card base scored at 4-1/4″, 3″ x 4″ (die cut branches), 1-1/2″ x 3″ (label)
  • Copper Foil – 3-1/8″ x 4-1/2″ (cork mat), 2-1/2″ x 3-1/2″ (die cut leaf)
  • Cork – 3-1/4″ x 4-1/2″ (front background)
  • Very Vanilla- 4″ x 5-1/4″ (inside panel)
  • Blackberry Beauty specialty DSP – 4-1/4″ x 5-1/2″ (front background), 1/2″ x 4″ (inside trim)

Stampin’ Up! products used in this project:


Stampin’ Up! Snowman Season Christmas Card

Good Morning! The Stampin’ Up! Snowman Season photopolymer stamp set is one of the cutest snowman sets out there! The simple graphics and happy images are perfect for expressing the joy of the Christmas and Winter seasons. I mixed it up by using a very simple fun fold, which exposes the inside of the card. You can find the currently available supplies I used at the bottom of my post along with the sizes of cardstock used.

I embossed a panel of Beauty of the Earth designer series paper with the snowflakes folder from the Wintery 3D embossing folders and adhered it to the front flap of the card. I adhered the larger DSP panel to the inside of the card. I was careful to cut the DSP panels so that the trees were going in the right direction.

I stamped the little snowman from the Stampin’ Up! Snowman Season stamp set in Night of Navy ink on the Basic White panel and colored it with Granny Apple Green, Poppy Parade and Pumpkin Pie Stampin’ Blends. I colored the little tree with the Soft Succulent Blend. I stamped the sentiment next to the snowman in Night of Navy and adhered the panel to a Misty Moonlight mat. I used Tear & Tape to adhere the layered panel to the front flap and finished it with an iridescent bow and blue gems.

I stamped the sentiment from the Stampin’ Up! Snowman Season stamp set in Night of Navy on Basic White. I inked up the little tree in Night of Navy and stamped it in the corner and colored it with the Soft Succulent blend. I adhered the panel to the inside of the card.

A happy snowman to celebrate Christmas! Don’t forget Stampin’ Up! Snowman Season stamp for those last minute simple, fun holiday cards.


Seasonal Sale Going On Now!

Fold, snip, layer, and stamp! During the Seasonal Sale, you can stock up and save 10% on cardstock, 15% on ink pads, and 20% on dies. Build up your collection of crafting basics—and prepare for another year of top-tier projects—with a steal of a deal on papercrafting products!

Promotion Details:

  • The sale will run for three days only – November 16, 2021 – November 18, 2021.
  • The discount includes 10% off cardstock, 15% off ink pads (excluding ink pad bundles and third-party pads), and 20% off dies.
  • The discount applies to products featured in the 2021–2022 Annual Catalog only. Products from the July–December 2021 Mini Catalog are not included.

Click on the image below to download a flyer with details:


The December Paper Pumpkin Kit is Lots Of Pun!

What’s not to “loaf” about a punny joke? It never hurts to have a little laughter, light-heartedness, and humor sprinkled into your schedule. If you’re a fan of fun, get a kick out of clever crafts, and can’t keep it together when you hear a classic knee-slapper, you’ll go bananas over this month’s cute ‘n’ quirky kit!

The Lots of Pun Paper Pumpkin Kit includes enough egg-citing elements to create nine cards and coordinating envelopes. From giddy gingham to splatters and stripes, this playful Paper Pumpkin kit features a fun and fresh look with one-of-a-kind patterns and designs! Egg-cellent for any occasion, reason, or season throughout the year, the kit’s pun-packed stamp set provides completely customizable characters for a very versatile crafting experience. Pair each stamp with its matching die-cut snack, then mix up the faces and accessories for an absolutely adorable accent!

Pick up your friends and family with pun-filled projects. December’s delightful kit is sure to make ‘em smile!

Here are the Details:

  • The kit contains enough elements to create 9 cards—3 each of 3 designs—and 9 coordinating envelopes. 
    • Card size: 4-1/4″ x 5-1/2″
    • Envelope size: 4-1/2″ x 5-3/4″
  • This all-inclusive kit includes printed card bases, die-cut paper pieces, embellishments, adhesive, and more!
  • The Lots of Pun Stamp Set is a builder stamp set! This means the included images can be mixed and matched to build a variety of unique characters with different looks and features.
  • Includes an exclusive stamp set and a Classic Stampin’ Spot

Coordinating Colors: Crumb Cake, Daffodil Delight, Early Espresso, Granny Apple Green, Pool Party, Poppy Parade

If you’re interested in subscribing to Paper Pumpkin, you can either sign up for a subscription where you are billed monthly for your kit or you can purchase a prepaid subscription in my Online Store. To see more information and to sign up for the monthly subscription click here. To see the options for prepaid subscriptions in my Online Store, click here.

Sign up deadline for the December 2021 kit is December 10, 2021.  Note: Supplies may be limited toward the end of the subscription period.


Current Host Code: PYA3MMQ6

Use this host code when you order $50 or more and receive a free gift from me!  The free gift is your choice of any item valued up to $10.00 in the 2021-2022 Annual Catalog or the July – December 2021 Mini Catalog!

If your order is over $150, please do not use the host code since you’ll receive your own Host Dollars plus I’ll still send you the free gift!  This host code can be used by anyone, no club or commitment required. Let me know if you have any questions.


If you need any stamping supplies, I’d be very happy to be your Demonstrator.  Just click on the Shop Now button on the right side of the screen to go directly to my online store or contact me if you have any questions.  Happy Stamping!

Thanks for stopping by and have a great week!

Akiko

  • Visit my online store here
  • See the current Stampin’ Up! clearance rack specials here
  • Earn FREE Stampin’ Up! products through my Wildflower Frequent Shopper Program – my way of saying thank you to my online frequent shopper customers.
  • Have any questions? I’d be happy to help, click here to contact me.

Cardstock Cuts for this project:

  • Misty Moonlight – 4-1/4″ x 11″ scored at 5-1/2″ and cut again at 2-3/4 for the front flap
  • Basic White – 2-1/4″ x 4″ (front panel), 2-5/8″ x 4-1/8″ (inside panel)
  • Beauty of the Earth DSP – 4″ x 5-1/4″ (inside panel), 2-1/2″ x 4″ (front background)

Stampin’ Up! products used in this project:


Stampin’ Up! Poinsettia Christmas To Remember Card

Happy Saturday! I pulled out the pretty Stampin’ Up! Poinsettia dies along with the Stampin’ Up! Christmas To Remember cling stamp set to make today’s Christmas card. You can find the supplies I used at the bottom of my post along with the sizes of cardstock used.

Today’s card was inspired by a couple of challenges and was a lot of fun! First is the pretty sketch challenge in Hand Stamped Sentiments #374:

But I was also intrigued by the wonderful color challenge in the Global Design Project #313:

I adhered a panel of Sahara Sand Tidings of Christmas 6″ x 6″ designer series paper to a Basic Black mat. I adhered another strip of the same DSP to another mat and adhered them both to a panel of black and white gingham Pattern Party Host designer series paper. I adhered the layered panel to the larger Sahara Sand DSP panel and popped it on the front of a Real Red card base.

I die cut another Real Red panel with the Stampin’ Up! Poinsettia dies – the largest petal cluster, the medium cluster and the tiny petal cluster. I used the embossing petal die inserts to give the flower texture when die cutting. I adhered the petal clusters together with glue dots. I cut one of each of the poinsettia leaves with the leaf dies and their embossing insets and adhered the leaves to the back of the flower with glue dots. I adhered the flower to the card front with glue dots.

I stamped the sentiment from the Stampin’ Up! Christmas To Remember stamp set in Memento Tuxedo Black on Basic white and cut it out with the label from the Seasonal Labels dies. I adhered it to the card front, overlapping the flower with dimensionals and glue dots. I added Bumblebee matte dots to the flower center, black dots to the card front and a bow made from black and white gingham to finish the card front.

For the inside of the card, I stamped the sentiment from the Stampin’ Up! Christmas To Remember stamp set in Real Red on a Basic White panel. I stamped a leaf sprig from the Tidings and Trimmings photopolymer stamp set in Mossy Meadow under the sentiment and adhered a strip of Tidings of Christmas DSP to the bottom of the panel. I adhered the panel to a Basic Black mat and then to the inside of the card.

I love the rustic feel that the Sahara Sand and black and white gingham give this card! Reminds me of handmade Christmas ornaments and popcorn garland on a Christmas tree. And I love the flowers that the Stampin’ Up! Poinsettia dies make – they are the best ever!! But let’s have fun with Halloween first!


Current Host Code: 29VEKU9M

Use this host code when you order $50 or more and receive a free gift from me!  The free gift is your choice of any item valued up to $10.00 in the 2021-2022 Annual Catalog or the July – December 2021 Mini Catalog!

If your order is over $150, please do not use the host code since you’ll receive your own Host Dollars plus I’ll still send you the free gift!  This host code can be used by anyone, no club or commitment required. Let me know if you have any questions.


If you need any stamping supplies, I’d be very happy to be your Demonstrator.  Just click on the Shop Now button on the right side of the screen to go directly to my online store or contact me if you have any questions.  Happy Stamping!

Thanks for stopping by and have a great week!

Akiko

  • Visit my online store here
  • See the current Stampin’ Up! clearance rack specials here
  • Earn FREE Stampin’ Up! products through my Wildflower Frequent Shopper Program – my way of saying thank you to my online frequent shopper customers.
  • Have any questions? I’d be happy to help, click here to contact me.

Cardstock Cuts for this project:

  • Real Red – 4-1/4″ x 11″ card base scored at 5-1/2″, 3-1/4″ x 4-3/4″ (poinsettia die cuts)
  • Basic Black – 3-3/8″ x 4-5/8″ (DSP mat), 1-1/4″ x 3-1/2″ (DSP stripe mat), 4″ x 5-1/4″ (inside mat)
  • Mossy Meadow – 2-1/4″ x 2-1/2″ (die cut leaves)
  • Basic White – 3-7/8″ x 5-1/8″ (inside panel), 1″ x 3″ (label)
  • Tidings of Christmas 6″ x 6″ DSP – 3-1/4″ x 4-1/2″ (front background), 1-1/8″ x 3-1/2″ (front stripe), 1/2″ x 3-7/8″ (inside trim)
  • Pattern Party Host DSP – 2″ x 3-1/2″ (gingham panel)

Stampin’ Up! products used in this project:

Christmas To Remember Cling Stamp Set (English)
$22.00
Tidings & Trimmings Photopolymer Stamp Set (English)
$18.00
Poinsettia Dies
$36.00
Tidings Of Christmas 6" X 6" (15.2 X 15.2 Cm) Designer Series Paper
$11.50
Pattern Party 12" X 12" (30.5 X 30.5 Cm) Host Designer Series Paper
$18.00
Real Red 8-1/2" X 11" Cardstock
$8.75
Basic Black 8-1/2" X 11" Cardstock
$8.75
Mossy Meadow 8-1/2" X 11" Cardstock
$8.75
Basic White 8 1/2" X 11" Cardstock
$9.75
Decorative Matte Dots
$8.00
Matte Black Dots
$7.00
Black & White 1/4" (6.4 Mm) Gingham Ribbon
$7.00
Multipurpose Liquid Glue
$4.00
Stampin' Dimensionals
$4.00
Stampin' Seal
$8.00
Mini Glue Dots
$5.25
Stampin' Cut & Emboss Machine
$120.00

Stampin’ Up! Lovely You for the Happy Inkin’ Thursday Blog Hop

Good morning and welcome to the Happy Inkin’ Thursday Blog Hop! I used the Stampin’ Up! Lovely You cling stamp set to make a simple, elegant thinking of you card for today. You can find the supplies I used at the bottom of my post along with the sizes of cardstock used.

We have a sketch challenge this week and here is the pretty sketch we are using:

I embossed a panel of Mossy Meadow with the Timber 3D embossing folder and adhered it to the front of a Mossy Meadow card base with liquid glue.

I cut a panel of Brushed Gold metallic foil with the Stitched Rectangle die. I used the Stitched Greenery die on another Mossy Meadow panel to get the die cut leafy texture on the center panel. I cut it down to 2-13/16″ x 4-3/16″ making sure I had a 5-1/4″ strip for the inside trim and adhered it to the Brushed Gold panel with liquid glue. I adhered the layered panel to the card front with dimensionals.

I stamped the sentiment from the Stampin’ Up! Lovely You stamp set on a Basic White panel and cut it out with the long label from the Stitched Rectangles dies. I adhered it to the card front with glue dots and cut the small leaf from cork paper using the stitched leaves dies. I adhered the leaf with a glue dot, tucking it under the label. I finished the card front with Gold Metallic dots and a Linen Thread bow.

For the inside of the card, I stamped the branch from the Stampin’ Up! Lovely You stamp set in Bumblebee on a Basic White panel. I stamped part of the sentiment from the Art Gallery stamp set in Mossy Meadow next to the branch. I cut down the remaining die cut leafy Mossy Meadow panel to 1/2″ x 5-1/4″ and adhered it to the bottom. I adhered the panel to the inside of the card.

Don’t you think the embossed background goes really well with the die cut panel? And I love the sentiments in the Stampin’ Up! Lovely You stamp set. I think this design would also make a wonderful masculine birthday card with the appropriate sentiments.

On with the Hop! Click on the Next Blog button to move forward to see the beautiful project Karen Ksenzakovic has created.

If you get lost along the way, here are the participants for the hop:


Current Host Code: 29VEKU9M

Use this host code when you order $50 or more and receive a free gift from me!  The free gift is your choice of any item valued up to $10.00 in the 2021 – 2022 Annual Catalog or the July – December 2021 Mini Catalog including some of the host stamp sets!

If your order is over $150, please do not use the host code since you’ll receive your own Host Dollars plus I’ll still send you the free gift!  This host code can be used by anyone, no club or commitment required. Let me know if you have any questions.


If you need any stamping supplies, I’d be very happy to be your Demonstrator.  Just click on the Shop Now button on the right side of the screen to go directly to my online store or contact me if you have any questions. 

Thanks for stopping by and Happy Stamping!

Akiko

  • Visit my online store here
  • See the current Stampin’ Up! clearance rack specials here
  • Earn FREE Stampin’ Up! products through my Wildflower Frequent Shopper Program – my way of saying thank you to my online frequent shopper customers.
  • Have any questions? I’d be happy to help, click here to contact me.

Cardstock Cuts for this project:

  • Mossy Meadow – 5-1/2″ x 8-1/2″ card base scored at 4-1/4″, 4-1/4″ x 5-1/2″ (embossed Background), 4″ x 5-1/4″ (die cut background and inside trim)
  • Brushed Gold Foil – 3-1/4″ x 4-3/4″ (die cut stitched frame)
  • Cork Specialty Paper – 1-1/2″ x 1-1/2″ (die cut leaf)
  • Basic White – 4″ x 5-1/4″ (inside panel), 1-1/4″ x 3-1/4″ (label)

Stampin’ Up! products used in this project:

Lovely You Cling Stamp Set (English)
$24.00
Art Gallery Photopolymer Stamp Set
$22.00
Stitched Rectangles Dies
$35.00
Stitched Greenery Die
$32.00
Timber 3 D Embossing Folder
$10.00
Mossy Meadow 8-1/2" X 11" Cardstock
$8.75
Cork 12" X 12" (30.5 X 30.5 Cm) Specialty Paper
$7.50
Brushed Metallic Cardstock
$15.00
Basic White 8 1/2" X 11" Cardstock
$9.75
Bumblebee Classic Stampin' Pad
$7.50
Mossy Meadow Classic Stampin' Pad
$7.50
Brushed Metallic Adhesive Backed Dots
$9.00
Linen Thread
$5.00
Multipurpose Liquid Glue
$4.00
Mini Glue Dots
$5.25
Stampin' Dimensionals
$4.00
Stampin' Seal
$8.00
Stampin' Cut & Emboss Machine
$120.00

Stampin’ Up! Inspired Thoughts Christmas Card

Good Morning! It’s been such a busy week, I haven’t been able to keep up with my cards, but I was finally able to sneak in a quick card for today. I used the Stampin’ Up! Inspired Thoughts bundle to make this sparkly Christmas Card that is full of texture with the Ombre specialty paper and White Velvet sheets. You can find the supplies I used at the bottom of my post along with the sizes of cardstock used.

I used the smallest Layering Circle die to cut out a moon with the lightest yellow Ombre specialty paper and adhered it to the dark blue Ombre specialty paper panel with liquid glue. I applied adhesive sheets to the back of a Basic white panel and used the Inspiring Canopy dies from the Stampin’ Up! Inspired Thoughts bundle to cut out the trees. I inked up the trees with Versamark ink directly from the pad and sprinkled them with white embossing powder. I shook off the excess and heat set the powder with my heat tool. I removed the backing from the adhesive sheet and adhered the trees to the panel over the moon. This results in a shiny white trees that really pop against the sparkly background night sky.

I used the ground die from the Inspiring Canopy dies to cut the ground from a strip of Snowy White velvet paper and adhered it to the bottom of the panel. I adhered the panel to a Smoky Slate mat and wrapped a length of silver cord around the bottom and made a bow.

I stamped the sentiment from the Stampin’ Up! Inspired Thoughts cling stamp set in Night of Navy on a Basic White panel. I cut it out with the pretty Encircled in Beauty die and popped it on the panel with dimensionals. I popped the panel on the front of a Night of Navy card base. I accented the sentiment with two Night of Navy Holiday Rhinestones.

For the inside of the card, I stamped the tree from the Beauty of Friendship stamp set in Night of Navy ink on the side of a Basic White panel. I stamped the sentiment from the Stampin’ Up! Inspired Thoughts stamp set in Smoky Slate next to the tree and adhered the panel to the inside of the card.

Nighttime snowy scenes are one of my favorite themes for Christmas Cards. In this card, there is so much contrasting texture from the sparkly background to the shiny trees to the velvety snow. I was surprised how easy it was to emboss the trees – I just held them at the bottom where they are covered up with the snow – but they really make a statement with the embossed shine. The sentiments from the Stampin’ Up! Inspired Thoughts stamp set are simple and elegant and complement the scene perfectly.


Current Host Code: 29VEKU9M

Use this host code when you order $50 or more and receive a free gift from me!  The free gift is your choice of any item valued up to $10.00 in the 2021-2022 Annual Catalog or the July – December 2021 Mini Catalog!

If your order is over $150, please do not use the host code since you’ll receive your own Host Dollars plus I’ll still send you the free gift!  This host code can be used by anyone, no club or commitment required. Let me know if you have any questions.


If you need any stamping supplies, I’d be very happy to be your Demonstrator.  Just click on the Shop Now button on the right side of the screen to go directly to my online store or contact me if you have any questions.  Happy Stamping!

Thanks for stopping by and have a great week!

Akiko

  • Visit my online store here
  • See the current Stampin’ Up! clearance rack specials here
  • Earn FREE Stampin’ Up! products through my Wildflower Frequent Shopper Program – my way of saying thank you to my online frequent shopper customers.
  • Have any questions? I’d be happy to help, click here to contact me.

Cardstock Cuts for this project:

  • Night of Navy – 5-1/2″ x 8-1/2″ card base scored at 4-1/4″
  • Ombre Specialty – 3-5/8″ x 4-7/8″ (front background), 1-3/8″ x 1-3/8″ (moon)
  • Smoky Slate – 3-3/4″ x 5″ (front mat)
  • Basic White – 3-3/4″ x 5″ (inside panel), 3-1/2″ x 3-1/2″ (die cut trees), 2″ x 2″ (label)
  • Snowy White Velvet – 3/4″ x 4-7/8″ (snowy ground)

Stampin’ Up! products used in this project:

Inspired Thoughts Bundle
$45.75
Inspired Thoughts Cling Stamp Set
$19.00
Inspiring Canopy Dies
$32.00
Beauty Of Friendship Photopolymer Stamp Set
$22.00
Layering Circles Dies
$35.00
Encircled In Beauty Dies
$34.00
Night Of Navy 8-1/2" X 11" Cardstock
$8.75
Smoky Slate 8-1/2" X 11" Cardstock
$8.75
Ombre 12" X 12" (30.5 X 30.5 Cm) Specialty Paper
$10.00
Snowy White 12" X 12" (30.5 X 30.5 Cm) Velvet Sheets
$5.00
Basic White 8 1/2" X 11" Cardstock
$9.75
Night Of Navy Classic Stampin' Pad
$7.50
Smoky Slate Classic Stampin' Pad
$7.50
Versamark Pad
$9.50
Basics Embossing Powders
$18.00
Holiday Rhinestone Basic Jewels
$6.00
Simply Elegant Trim
$7.50
Heat Tool (Us And Canada)
$30.00
Stampin' Dimensionals
$4.00
Multipurpose Liquid Glue
$4.00
Adhesive Sheets
$10.00
Stampin' Seal
$8.00
Stampin' Cut & Emboss Machine
$120.00

Stampin’ Up! Love Of Leaves Fall Card Video Tutorial

Good Morning! Yesterday afternoon I pulled out the pretty Stampin’ Up! Love Of Leaves photopolymer stamp set and the beautiful Stitched Leaves dies to make a pair of fall cards. The Stitched leaves dies have pretty stitching on the outside of the die so you can create a pretty stitched leaf and an outline for the leaves with a pretty stitched edge. So I used the dies to make two cards from one cut. You can find the supplies I used at the bottom of my post along with the sizes of cardstock used.

Here is the Facebook Live video showing how I made the cards:

I posted a copy of the video in my YouTube channel here so you can view it there if you prefer.

For the first card, I embossed a panel of Cinnamon Cider with the Timber 3D embossing folder and adhered it to the front of a Cinnamon Cider card base. I cut a panel of Beauty of the Earth designer series paper with the third largest Stitched Rectangle die and adhered it to the card front with liquid glue. I cut the large leaf from the Stitched leaves dies with the inset from a Cajun Craze panel and used the outside frame for this card. I wrapped it with Linen Thread and made a bow and adhered it to the card front with dimensionals.

I finished it off with a label stamped with the sentiment from the Stampin’ Up! Love of Leaves stamp set stamped in Misty Moonlight on Cinnamon Cider. I cut it out with the small, long stitched rectangle die using the two step method and adhered it to the card front.

For the second card, I embossed a Soft Suede panel with the Bard 3D embossing folder and adhered it to the front of a Soft Suede card base. I cut panels of Beauty of the Earth DSP and Bumblebee DSP with the fourth largest Stitched Rectangle die and adhered them to the card front with liquid glue. I cut out the long leaf from the Stitched Leaves dies in Mossy Meadow and the small leaf from Cork paper using the dies with their insets. I adhered these leaves with the Cajun Craze leaf from the first card to the card front.

I finished off the card with a label stamped with the sentiment from the In Bloom photopolymer stamp set stamped in Soft Suede on Cinnamon Cider and cut out with the Stitched Rectangles die. I adhered the label to the card front with dimensionals. I finished off both card fronts with Brushed Metallic Dots.

For the inside of the cards, I inked up the large leaf stamp from the Stampin’ Up! Love Of Leaves stamp set with Cajun Craze ink and stamped off twice. Then I stamped the leaf in the middle of a Basic White panel. I adhered a strip of Beauty of the Earth DSP to the bottom of the panel and adhered the panel to the inside of the card. I made the insides of both cards the same, but you could easily add inside sentiments that go with the occasion – or not.

The outside die stitching makes the Stitched Leaves dies very special because you don’t always get the nice decorative edging. This makes it easy to creatively use negative space in card making – you could even use it for a shaker card! The coordinating Stampin’ Up! Love Of Leaves stamp set has stamps for pretty shaded leaves and wonderful sentiments. We’re so lucky to have so many options for beautiful Fall stamp sets right now! I can’t decide on which I love best!


Current Host Code: U6K4RBB4

Use this host code when you order $50 or more and receive a free gift from me!  The free gift is your choice of any item valued up to $10.00 in the 2021-2022 Annual Catalog or the July – December 2021 Mini Catalog!

If your order is over $150, please do not use the host code since you’ll receive your own Host Dollars plus I’ll still send you the free gift!  This host code can be used by anyone, no club or commitment required. Let me know if you have any questions.


If you need any stamping supplies, I’d be very happy to be your Demonstrator.  Just click on the Shop Now button on the right side of the screen to go directly to my online store or contact me if you have any questions.  Happy Stamping!

Thanks for stopping by and have a great week!

Akiko

  • Visit my online store here
  • See the current Stampin’ Up! clearance rack specials here
  • Earn FREE Stampin’ Up! products through my Wildflower Frequent Shopper Program – my way of saying thank you to my online frequent shopper customers.
  • Have any questions? I’d be happy to help, click here to contact me.

Cardstock Cuts for this project:

  • Thank You Card
    • Cinnamon Cider – 5-1/2″ x 8-1/2″ card base scored at 4-1/4″, 4-1/4″ x 5-1/2″ (embossed panel), 3/4″x 2-1/2″ (label)
    • Cajun Craze – 3-1/2″ x 3-1/2″ (die cut leaf panel)
    • Basic White – 4″ x 5-1/4″ (inside panel)
    • Beauty of the Earth DSP – 3-1/4″ x 4-3/4″ (die cut rectangle), 1/2″ x 4″ (inside trim)
  • Birthday Card
    • Soft Suede – 4-1/4″ x 11″ card base scored at 5-1/2″, 4-1/4″ x 5-1/2″ (embossed panel)
    • Cinnamon Cider – 1-1/4″x 3-1/2″ (label)
    • Cajun Craze – Die cut leaf from Thank You Card
    • Mossy Meadow – 1″ x 3-1/2″ (die cut long leaf)
    • Bumblebee – 3″ x 4-1/4″ (die cut rectangle)
    • Cork – 1″ x 1-1/2″ (small die cut leaf)
    • Basic White – 4″ x 5-1/4″ (front mat), 3-7/8″ x 5-1/8″ (inside panel), 2-1/8″ x 3-7/8″ (die cut lacy edges), 2″ x 3-3/4″ (tree panel)
    • Basic White – 4″ x 5-1/4″ (inside panel)
    • Beauty of the Earth DSP – 3″ x 4-1/4″ (die cut rectangle), 1/2″ x 4″ (inside trim)

Stampin’ Up! products used in this project:

Love Of Leaves Photopolymer Stamp Set (English)
$18.00
Stitched Leaves Dies
$35.00
Stitched Rectangles Dies
$35.00
In Bloom Photopolymer Stamp Set
$17.00
Timber 3 D Embossing Folder
$10.00
Bark 3 D Embossing Folder
$10.00
Beauty Of The Earth 12" X 12" (30.5 X 30.5 Cm) Designer Series Paper
$11.50
Cinnamon Cider 8-1/2" X 11" Cardstock
$8.75
Soft Suede 8-1/2" X 11" Cardstock
$8.75
Cajun Craze 8-1/2" X 11" Cardstock
$8.75
Bumblebee 8-1/2X11 Cardstock
$8.75
Mossy Meadow 8-1/2" X 11" Cardstock
$8.75
Basic White 8 1/2" X 11" Cardstock
$9.75
Cork 12" X 12" (30.5 X 30.5 Cm) Specialty Paper
$7.50
Cajun Craze Classic Stampin' Pad
$7.50
Misty Moonlight Classic Stampin' Pad
$7.50
Soft Suede Classic Stampin' Pad
$7.50
Linen Thread
$5.00
Brushed Metallic Adhesive Backed Dots
$9.00
Multipurpose Liquid Glue
$4.00
Stampin' Dimensionals
$4.00
Stampin' Seal
$8.00
Stampin' Cut & Emboss Machine
$120.00