Stampin’ Up! Timeless Arrangements Thank You Card

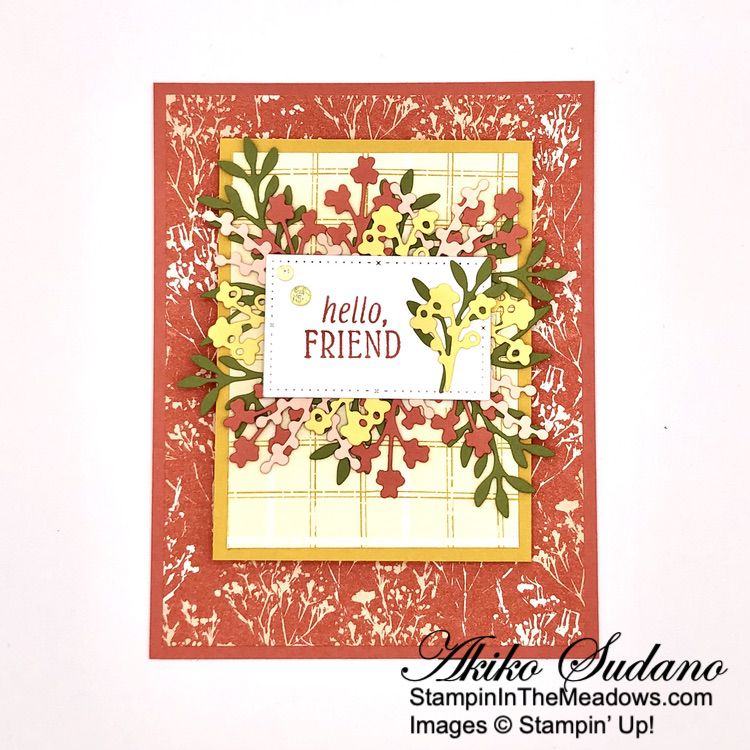
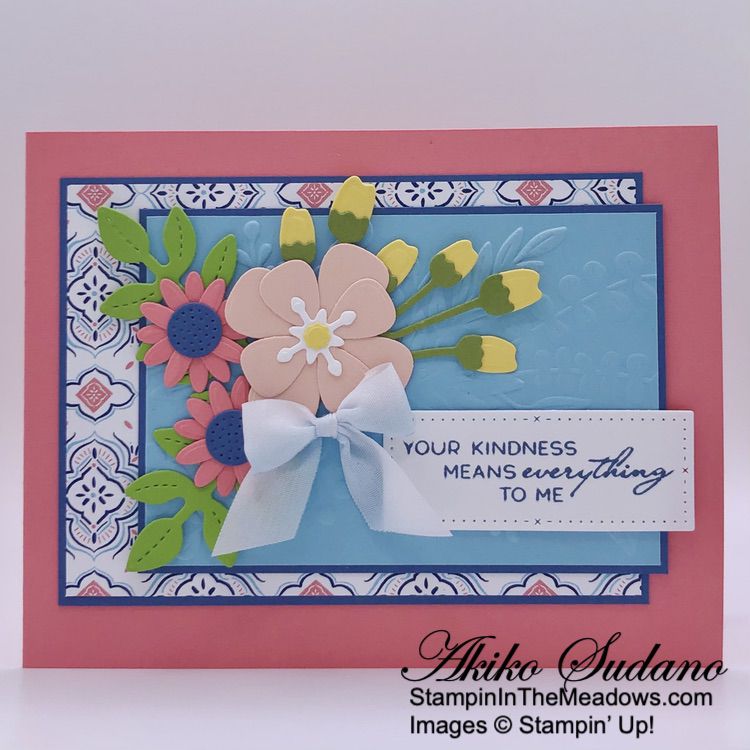
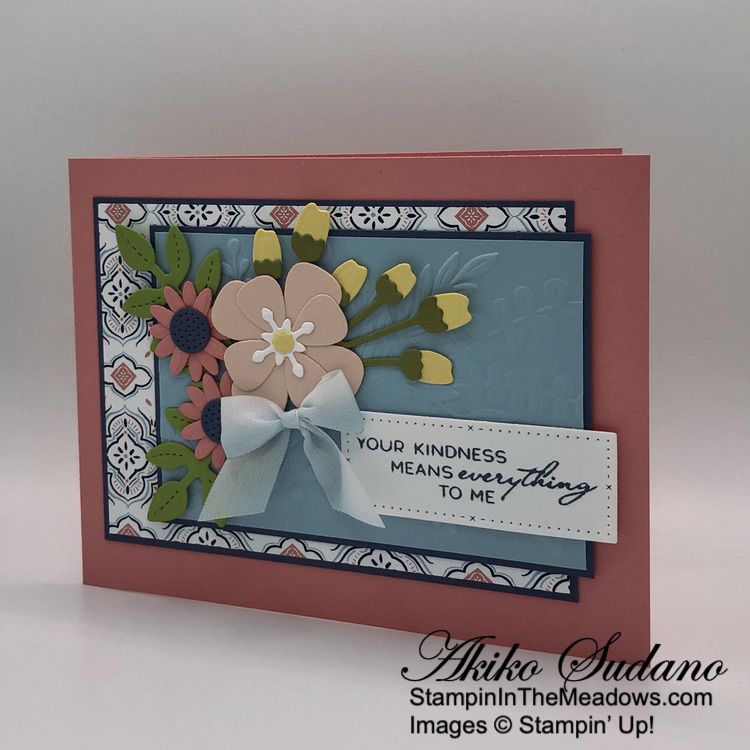
Good Morning! The Stampin’ Up! Timeless Arrangements bundle is such a pretty set with it’s die cut flowers and leaves that go with the pretty labels and all the wonderful sentiments! I paired it with the pretty Countryside Inn designer series paper and Countryside Blossoms embossing folder to make a sweet Thank You card. You can find the supplies I used at the bottom of my post along with the sizes of cardstock used.

I embossed a panel of Boho Blue card stock with the pretty Countryside Blossoms embossing folder and adhered it to the front of a Night of Navy card base with liquid glue. I cut a panel of Countryside Inn DSP with the largest circle from the Stylish Shapes dies and adered it to the card front.

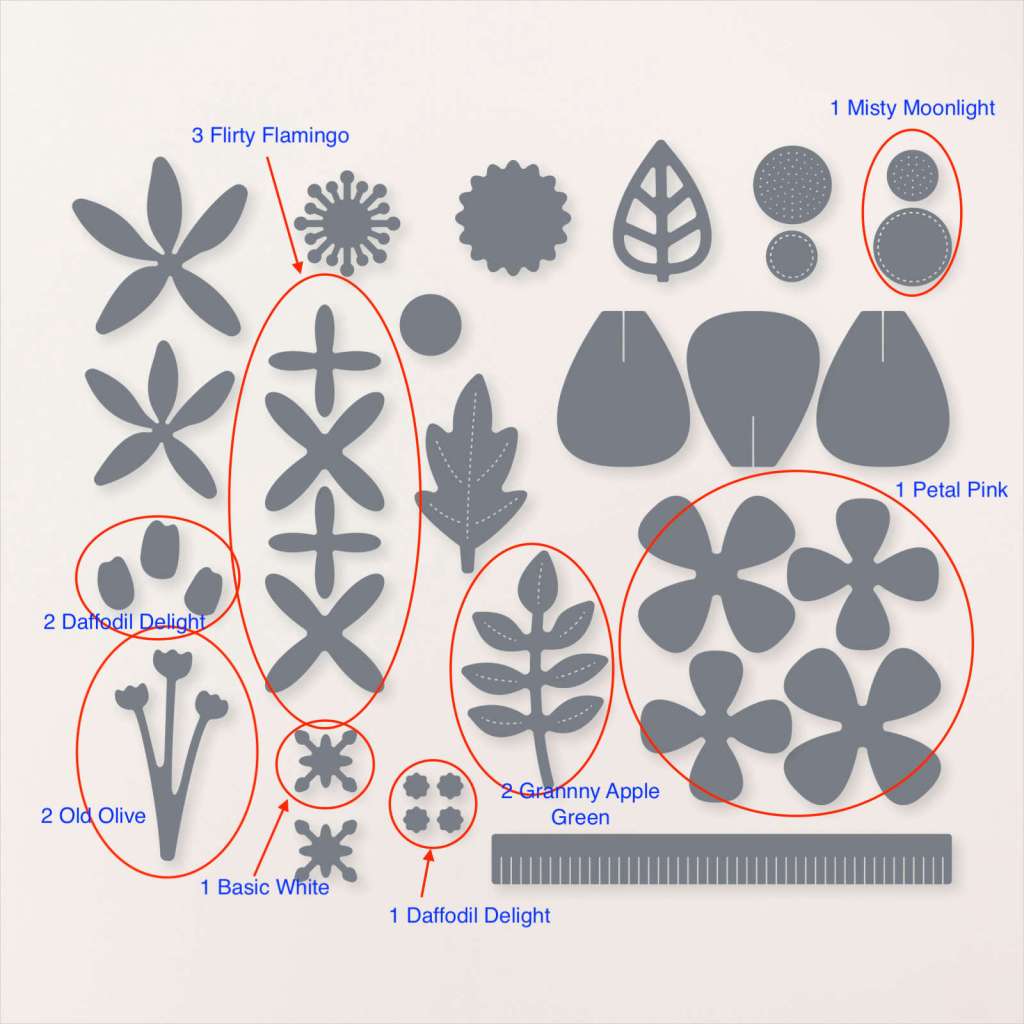
I cut a Night of Navy panel with the large leaf sprig die from the Stampin’ Up! Timeless Arrangements dies. I cut two of the small leaf sprigs from Night of Navy and adhered them to the large die cut bar. I used a blending brush to apply Boho Blue ink to BasicWhite panel and cut three flower clusters. I adhered the flower clusters to the Night of Navy leaf sprig die cuts with liquid glue. I stamped two flowers in Boho Blue ink on Basic White and cut them out with the coordinating die. I adhered them to the ends of the die cut and adhered the die cut to the card front with glue dots.

I stamped the sentiment from the Stampin’ Up! Timeless Arrangements stamp set in Night of Navy ink on Basic White and cut it out with the small label die. I adhered the die to the card with dimensionals over the die foliage. I made a bow with Night of Navy ribbon and adhered it to the card with glue dots.

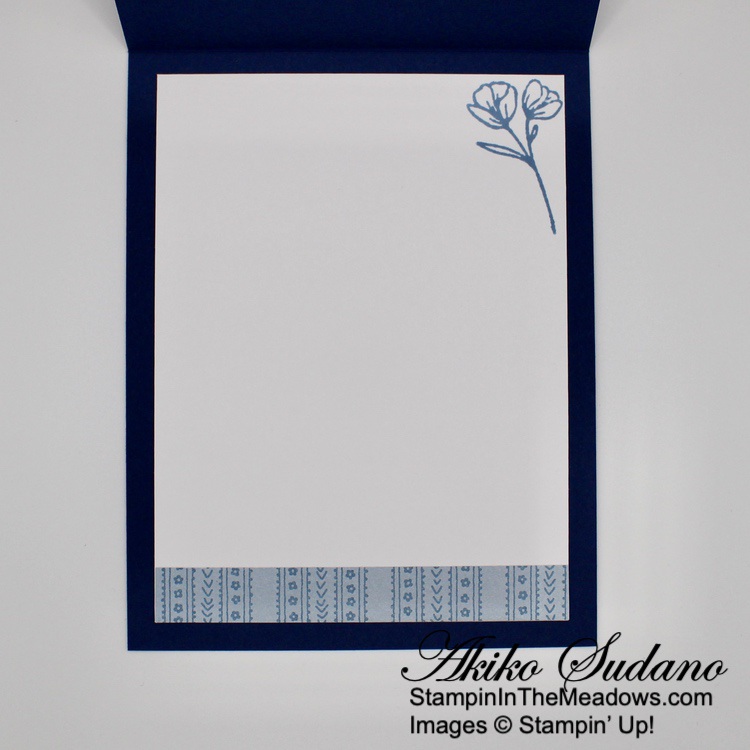
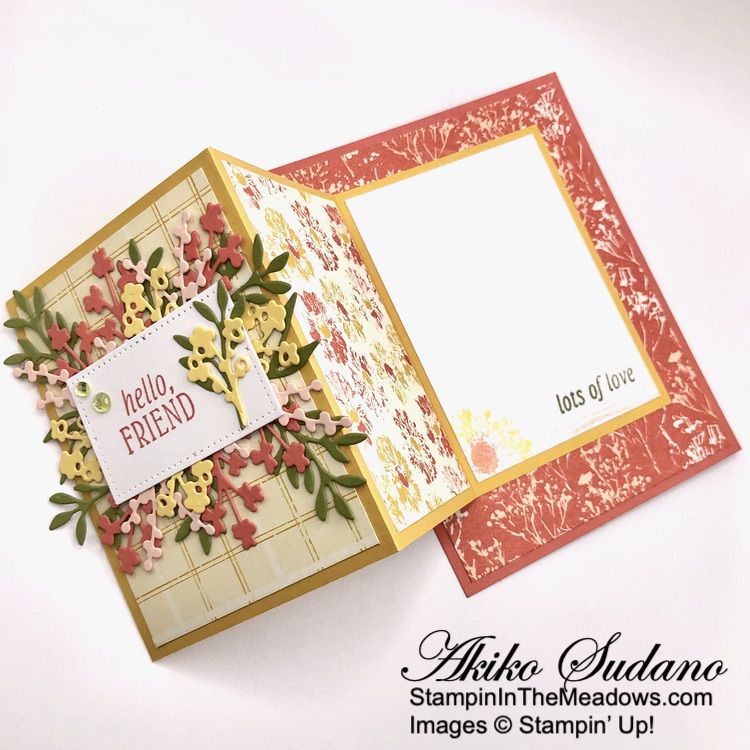
For the inside of the card, I stamped the flower from the Stampin’ Up! Timeless Arrangements stamp set in Boho Blue ink in the corner of a Basic White panel. I trimmed the bottom with a strip of Countryside Inn DSP and adhered the panel to the inside of the card with Stampin’ Seal.

The Stampin’ Up! Timeless Arrangements bundle easily makes a fancy and beautiful card! Add a little patterned paper and embossing and you have a beautiful card that anyone would love to receive.


Bonus Days Redemption Period Going on Now!

Time to redeem those Bonus Days coupons! Make sure you save all your coupons because you can redeem them (and we mean ALL of them) between August 1 – August 31, 2023. There’s no limit to how many coupons you can earn!

Promotion Details:

Redemption Period: August 1 – August 31, 2023

  • There is no limit to the number of coupon codes participants can redeem on an order during the redemption period. If using multiple codes, they must be separated by a space. 
  • Coupons may be redeemed one time only.
  • Coupon codes may be redeemed for any product (excluding Starter Kits, demonstrator supply items, and Paper Pumpkin month-to-month subscriptions).
  • New prepaid Paper Pumpkin codes may be discounted using Bonus Days coupon codes.

Let me know if you have any questions, and have fun shopping!


The August Paper Pumpkin is Meaningful Flowers!

Discover messages of friendship and loyalty in the flowers from the August Paper Pumpkin Kit! This kit includes 8 cards, 4 each of 2 designs, and 8 coordinating envelopes. The kit is special because of the way it uses the meaning of flowers. On each card, you’ll find a small inscription of what the flowers represent. As you craft with the included vellum and watercolor paper pieces, you’ll know you’re sending a message of encouragement and loyalty to your recipients. 

And don’t wait, because anyone who subscribes to this month’s kit will get a FREE stamp set! This Distinktive stamp set is perfect for a variety of occasions! 

The August Kit Includes:

  • All the supplies you need to create 8 cards: 4 each of 2 designs; and 8 coordinating envelopes. 
    • Finished card size: 5-1/2″ x 4-1/4″
  • A photopolymer stamp set.
  • A Pretty Peacock Stampin’ Spot.
  • Linen Thread.
  • Vellum and precut paper pieces.
  • Free Distinktive stamp set.
  • Adhesives

Coordinating Colors: Bubble Bath, Crushed Curry, Garden Green, Melon Mambo, Misty Moonlight, Orchid Oasis, Pretty Peacock, Tahitian Tide

If you’re interested in subscribing to Paper Pumpkin, you can either sign up for a subscription where you are billed monthly for your kit or you can purchase a prepaid subscription in my Online Store. To see more information and to sign up for the monthly subscription click here. To see the options for prepaid subscriptions in my Online Store, click here.

Sign up deadline for the August 2023 kit is August 10, 2023. Note: Supplies may be limited toward the end of the subscription period.


Introducing the new Festive Tags Kit!

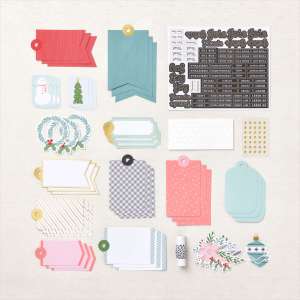
’Tis the season to start your holiday crafting! It’s easy with this all-inclusive kit. Just adhere the die cuts and embellishments and finish with a twine tie. You’ll have tags in minutes, ready for adding a handmade touch to your gifts. Here are the tags you can create and the kit supplies:

The Kits Collection Festive Tags Kit is Item# 162485 and the price is $13 (it’s on sale now for $11.70).

This Kit includes:

  • Enough supplies to make 15 tags: 3 each of 5 designs
  • Size Range: 1-1/2″ x 2″– 2-1/2″ x 3″
  • Die cut stickers and accents
  • Peel-and-stick gold dots
  • Baker’s twine

Coordinating colors: Basic Black, Flirty Flamingo, Garden Green, Lost Lagoon, Pool Party, Real Red


Current Host Code: MK3GJ47F

Use this host code when you order $50 or more and receive a Thank You gift from me!  The free gift is your choice of any item currently available valued up to $10.00 .

If your order is over $150, please do not use the host code since you’ll receive your own Host Dollars plus I’ll still send you the Thank You gift!  This host code can be used by anyone, no club or commitment required. Let me know if you have any questions.


If you need any stamping supplies, I’d be very happy to be your Demonstrator.  Just click on the Shop Now button on the right side of the screen to go directly to my online store or contact me if you have any questions.  Happy Stamping!

Thanks for stopping by and have a great weekend!

Akiko

  • Visit my online store here
  • See the current Stampin’ Up! clearance rack specials here
  • Earn FREE Stampin’ Up! products through my Wildflower Frequent Shopper Program – my way of saying thank you to my online frequent shopper customers.
  • Have any questions? I’d be happy to help, click here to contact me.

Cardstock Cuts for this project:

  • Night of Navy – 4-1/4″ x 11″ card base scored at 5-1/2″, 2-1/4″ x 3-1/2″ (leaf sprig die cuts)
  • Boho Blue – 3-3/4″ x 5″ (embossed background)
  • Basic White – 3-3/4″ x 5″ (inside panel), 1-1/4″ x 3-1/2″ (die cut flower clusters), 1-1/4″ x 4″ (die cut stamped flowers)
  • Countryside Inn DSP – 3-1/4″ x 3-1/4″ (die cut circle), 1/2″ x 3-3/4″ (inside trim)

Stampin’ Up! products used in this project:


Stampin’ Up! Inked and Tiled for the Inkin’ Krew Blog Hop

Good Morning! Welcome to the July Inkin’ Krew Team Blog Hop! The theme for this month’s hop is “Fun Fold” and I used the Stampin’ Up! Inked and Tiled cling stamp set to make a simple accordion tri-fold friendship card for our hop!

I adhered a Calypso Coral panel of Inked Botanicals 6″ x 6″ designer series paper to a Calypso Coral card base. I scored a Crushed Curry mini card base in a mountain/valley manner to create the tri-fold accordion and adhered it to the center of card base with liquid glue. I adhered the smaller panels of Inked Botanicals DSP to the left and middle panels of the mini card.

I used the dies from the Timeless Arrangements die set to cut foliage for the mini card front. I applied liquid adhesive to the bars connecting the sprigs to build the layers. I cut two long leaf sprig sets and two leaf clusters from Old Olive. I adhered the leaf clusters to the right side of the sprig sets with liquid glue.

I cut two floral sets from Calypso Coral and adhered them on top of the Old Olive leaf sets with liquid glue. I cut two berry sprig sets from Petal Pink and adhered them to the layered die cuts with liquid glue. I love how easy it is to build up the floral bouquets with the solid bars – the spacing is perfect!

I adhered the two sets of layered die cuts to the mini card, centering them and spacing the bars 1/2″ apart. I cut 4 floral sprigs (with holes) from Daffodil Delight and adhered them to the layered die cuts with liquid glue.

I stamped the sentiment from the Stampin’ Up! Inked and Tiled cling stamp set in Calypso Coral ink on Basic White and cut it out with the large label die from the Timeless Arrangements dies. I cut a leaf sprig from Old Olive and a floral sprig from Daffodil Delight and adhered them to the side of the sentiment with liquid glue and adhered the label to the mini card with dimensionals and glue dots. I finished the card with Lemon Lime Twist tinsel gems.

For the inside of the card, I inked up the flower from the Stampin’ Up! Inked and Tiled stamp set in Daffodil Delight ink. i used a Sponge Dauber to apply Calypso Coral ink to the center and stamped the flower on a Basic White panel. I stamped the sentiment in Old Olive ink next to the flower and used stamped off Petal Pink to stamp a light wood grain design under the sentiment.

The Timeless Arrangements dies make such sweet arrangements and they go so well with the Stampin’ Up! Inked and Tiled stamp set and Inked Botanicals designer series paper.

On With The Hop! Click on the Next Blog button to move forward to Mary Deatherage’s project or click the Previous Blog button to move back to see the project that Karen Ksenzakovic created.

If you get lost along the way, here are the participants for the hop:


Current Host Code: P7SWY6DS

Use this host code when you order $50 or more and receive a Thank You gift from me!  The free gift is your choice of any currently available item valued up to $10.00.

If your order is over $150, please do not use the host code since you’ll receive your own Host Dollars plus I’ll still send you the Thank You gift!  This host code can be used by anyone, no club or commitment required. Let me know if you have any questions.


If you need any stamping supplies, I’d be very happy to be your Demonstrator.  Just click on the Shop Now button on the right side of the screen to go directly to my online store or contact me if you have any questions.  Happy Stamping!

Thanks for stopping by and have a great week!

Akiko

  • Visit my online store here
  • See the current Stampin’ Up! clearance rack specials here
  • Earn FREE Stampin’ Up! products through my Wildflower Frequent Shopper Program – my way of saying thank you to my online frequent shopper customers.
  • Have any questions? I’d be happy to help, click here to contact me.

Cardstock Cuts for this project:

  • Calypso Coral – 4-1/4″ x 5-1/2″ card base, 3″ x 3″ (die cut flowers)
  • Crushed Curry – 4″ x 9″ mini card base scored at 3″ and 6″
  • Old Olive – 3″ x 5″ (die cut leaves)
  • Petal Pink -3″ x 3″ (die cut berry sprigs)
  • Daffodil Delight – 1-1/4″ x 4″ (die cut flowers)
  • Basic White – 2-3/4″ x 3-3/4″ (inside panel), 2″ x 2-3/4″ (label)
  • Inked Botanicals DSP – 4″ x 5-1/4″ (background), two 2-3/4″ x 3-3/4″ panels (mini card panels)

Stampin’ Up! products used in this project:


Stampin’ Up! Layering Leaves for the Happy Inkin’ Thursday Blog Hop

Good Morning and welcome to the Happy Inkin’ Thursday Blog Hop! Today’s card features the pretty Countryside Inn designer series paper with the gorgeous Stampin’ Up! Layering Leaves photopolymer stamp set. You can find the supplies I used along with card stock cuts at the bottom of my post.

We have a color challenge for our Blog Hop this week:

I embossed a panel of Countryside Inn designer series paper with the Countryside Blossoms embossing folder and adhered it to a Misty Moonlight mat. This pattern fits perfectly in the embossing folder, so you add the embossed texture to the paper and it comes out so pretty! I adhered the layered panel to the front of a Boho Blue card base.

I cut a leaf cluster with the Bough punch from Misty Moonlight and cut the top section again so I had 1-1/2 leaf clusters. I stamped the flowers from the Stampin’ Up! Layering Leaves stamp set in Balmy Blue on Basic White and punched them out with the Bough Punch. I adhered the stem of the flowers to the full leaf cluster with liquid glue and adhered all the leaves to the card with glue dots.

I stamped the sentiment from the Stampin’ Up! Layering Leaves stamp set in Misty Moonlight ink on Boho Blue card stock. I cut it out with the fat, long banner die from the Stylish Shapes dies using the two step die cutting method, so that it was shorter and fit the sentiment. I adhered a length of Night of Navy ribbon to the back with glue dots and adhered it to the card front with dimensionals. I finished the card front with Boho Blue dots.

For the inside of the card, I stamped the branches from the Stampin’ Up! Layering Leaves stamp set in Boho Blue ink in the corners of a Basic White panel. I adhered the panel to the inside of the card with Stampin’ Seal.

I love how the Bough punch coordinates perfectly with the Stampin’ Up! Layering Leaves florals! And the sentiments in the stamp set are really beautiful!

On with the Hop! Click on the Next Blog button to move forward to see the beautiful project Karen Ksenzakovic has created.

If you get lost along the way, here are the participants for the hop:


Current Host Code: P7SWY6DS

Use this host code when you order $50 or more and receive a free gift from me!  The free gift is your choice of any item currently available valued up to $10.00!

If your order is over $150, please do not use the host code since you’ll receive your own Host Dollars plus I’ll still send you the free gift!  This host code can be used by anyone, no club or commitment required. Let me know if you have any questions.


If you need any stamping supplies, I’d be very happy to be your Demonstrator.  Just click on the Shop Now button on the right side of the screen to go directly to my online store or contact me if you have any questions. 

Thanks for stopping by and Happy Stamping!

Akiko

  • Visit my online store here
  • See the current Stampin’ Up! clearance rack specials here
  • Earn FREE Stampin’ Up! products through my Wildflower Frequent Shopper Program – my way of saying thank you to my online frequent shopper customers.
  • Have any questions? I’d be happy to help, click here to contact me.

Cardstock Cuts for this project:

  • Boho Blue – 4-1/4″ x 11″ card base scored at 5-1/2″, 1-1/2″ x 4″ (label)
  • Misty Moonlight – 3-3/4″ x 5″ (DSP mat), 1-1/2″ x 4″ (die cut leaves)
  • Basic White – 4″ x 5-1/4″ (inside panel), 1″ x 2-1/2″ (punched flower)
  • Countryside Inn DSP – 3-1/2″ x 4-3/4″ (front background)

Stampin’ Up! products used in this project:


Stampin’ Up! Timeless Arrangements for the Happy Inkin’ Thursday Blog Hop

Good Morning and welcome to the Happy Inkin’ Thursday Blog Hop! I am still playing with the Paper Florist dies and the Stampin’ Up! Timeless Arrangements bundle and today I combined them with the cute Les Shoppes designer series paper. You can find the supplies I used along with card stock cuts at the bottom of my post.

We have a pretty sketch challenge for our Blog Hop this week:

I adhered a panel of Les Shoppes designer series paper to a Misty Moonlight mat and adhered it to the front of a Flirty Flamingo card base with liquid glue. I embossed a panel of Balmy Blue with spray from the Elegant Eucalyptus 3D embossing folder and adhered it to a Misty Moonlight mat before adhering it to the card front with liquid glue.

I used the Paper Florist dies to cut flower petals and leaves from Petal Pink, Daffodil Delight, Flirty Flamingo, Misty Moonlight, Basic White, Granny Apple Green and Old Olive card stock. I assembled the flowers with liquid glue and adhered them to the card with glue dots. See the picture below for the dies.

Be sure to save the extra die cuts for future projects!

I stamped the sentiment from the Stampin’ Up! Timeless Arrangements photopolymer stamp set in Misty Moonlight ink on Basic White. I cut it out with the label die and adhered it to the card front with glue dots. I adhered a Balmy Blue and White bow with a glue dot.

For the inside of the card, I stamped the sentiment from the Stampin’ Up! Timeless Arrangements stamp set in Misty Moonlight ink on a Basic White panel. I stamped the flower next to the sentiment in Misty Moonlight and colored it with the dark Petal Pink and Granny Apple Green Stampin’ Blends. I adhered a strip of Les Shoppes DSP to the bottom of the panel and adhered the panel to the inside of the card with Stampin’ Seal.

The Stampin’ Up! Timeless Arrangements sentiments are perfect to coordinate with the Paper Florist dies!

On with the Hop! Click on the Next Blog button to move forward to see the beautiful project Karen Ksenzakovic has created.

If you get lost along the way, here are the participants for the hop:


Designer Series Paper Sale Going on Now!

We all love beautiful Designer Series Paper, and in June, you can enjoy a 15% discount on select Designer Series Papers from our new 2023–2024 Annual Catalog and Online Exclusives. Whether you’re a scrapbooker, a card maker or simply a paper lover, this is a great time to stock up and save on gorgeous paper so you have artistic and versatile paper designs on hand for your next projects!

Here are the Details:

  • Sales Period: June 1, 2021 – June 30, 2023
  • All order types qualify for this promotion. 
  • There is no limit to how many packages of Designer Series Paper may be purchased during this promotion.
  • Only select Designer Series Papers are available at a 15% discount during this promotion.
  • Orders must be placed—and closed—during the promotion period for the 15% discount to apply.
  • Designer Series Paper ordered as part of a Starter Kit or with Stampin’ Rewards qualify for the 15% discount.
  • Designer Series Papers are from the new 2023–2024 Annual Catalog (p. 129–132) and Online Exclusives

Click on the image below to download a PDF with the list of designer series papers that are on sale and their sale prices:


Starter Kit+ Joining Special Going on Now!

It’s a fabulous time to join Stampin’ Up! New team members will get even more FREE products in their customizable Starter Kit. Between 1–30 June, those who sign up can get $125 $155 USD worth of products for only $99 + free business supplies + free shipping + all the fun being a part of Stampin’ Up!

Starter Kit+ Promotion Details:

  • Promotion Dates: 1–30 JUNE 2023
  • When new team members purchase their Starter Kit, they will be able to redeem $125 $155 of Starter Kit eligible products for just $99.
  • New demonstrators who submit their Independent Demonstrator Agreement (IDA) before June 1 or after June 30 will not be eligible for this offer.

You can read about the benefits of being a Demonstrator on my Join My Team page. These include a minimum 20% discount on products and access to new products a month before the catalog release. Contact me if you have any questions about the benefits of being a Demonstrator and I’ll be happy to tell you all about it!


Current Host Code: 9SKETT74

Use this host code when you order $50 or more and receive a free gift from me!  The free gift is your choice of any item valued up to $10.00 from the 2023-2024 Annual Catalog!

If your order is over $150, please do not use the host code since you’ll receive your own Host Dollars plus I’ll still send you the free gift!  This host code can be used by anyone, no club or commitment required. Let me know if you have any questions.


If you need any stamping supplies, I’d be very happy to be your Demonstrator.  Just click on the Shop Now button on the right side of the screen to go directly to my online store or contact me if you have any questions. 

Thanks for stopping by and Happy Stamping!

Akiko

  • Visit my online store here
  • See the current Stampin’ Up! clearance rack specials here
  • Earn FREE Stampin’ Up! products through my Wildflower Frequent Shopper Program – my way of saying thank you to my online frequent shopper customers.
  • Have any questions? I’d be happy to help, click here to contact me.

Cardstock Cuts for this project:

  • Flirty Flamingo – 4-1/4″ x 11″ card base scored at 5-1/2″, 3-3/4″ x 4″ (flower die cuts)
  • Misty Moonlight – 3-3/8″ x 4-5/8″ (DSP mat), 2-7/8″ x 4-1/8″ (embossed panel mat), 1″ x 3″ (flower centers)
  • Balmy Blue – 2-3/4″ x 4″ (embossed panel)
  • Petal Pink – 3″ x 3″ (flower die cuts)
  • Daffodil Delight – 1″ x 4″ (flower die cuts)
  • Granny Apple Green – 1-1/2″ x 4″ (leaf die cuts)
  • Old Olive – 1-1/4″ x 3-1/2″ (stem die cuts)
  • Basic White – 4″ x 5-1/4″ (inside panel), 1″ x 3″ (label), 1″ x 1″ (flower center)
  • Les Shoppes DSP – 3-1/4″ x 4-1/4″ (front background), 1/2″ x 5-1/4″ (inside trim)

Stampin’ Up! products used in this project:


Stampin’ Up! Timeless Arrangements Thank You Card with Video Tutorial

Good Morning! The Stampin’ Up! Timeless Arrangements bundle is a great little flora bundle with wonderful sentiments to express gratitude and love. It has the sweetest label dies and is perfectly designed to surround a sentiment label with a spray of flowers and greenery. I paired the bundle with a dainty floral print from the Delightfully Eclectic designer series paper pack for a simple Thank You card for my Facebook Live yesterday afternoon. You can find the supplies I used at the bottom of my post along with the sizes of cardstock used.

You can watch my FB Live video on my Facebook page HERE. I also posted the video to my YouTube Channel and you can view it HERE.

I adhered a panel of Delightfully Eclectic designer series paper to an Old Olive mat and cut a circle from polka dot vellum with the largest circle from the Stylish Shapes dies. I adhered the vellum to the panel with Stampin’ Seal. I stamped the sentiment from the Stampin’ Up! Timeless Arrangements photopolymer stamp set in Old Olive ink on Basic White and cut it out with the smallest label die.

I stamped the flower from the Stampin’ Up! Timeless Arrangements stamp set in Memento Tuxedo Black ink on Basic White and cut it out with the coordinating die. I colored it with light Bubble Bath and light Old Olive Stampin’ Blends. I adhered the flower to the back of the label with a glue dot.

I cut the leaf spray from the Stampin’ Up! Timeless Arrangements dies from Old Olive and adhered it to the back of the label with glue dots. I adhered a bow made with the Sweet Sorbet metallic ribbon to the panel with a glue dot and adhered the layered label on top with dimensionals. I adhered the panel to the front of a Bubble Bath card base and finished it with three tinsel gems.

For the inside of the card, I stamped the sentiment from the Stampin’ Up! Timeless Arrangements stamp set in Old Olive ink on a Basic White panel. I stamped the circles in Bubble Bath ink around the sentiment and trimmed the bottom with a strip of Delightfully Eclectic DSP. I adhered the panel to the inside of the card with Stampin’ Seal.

The Stampin’ Up! Timeless Arrangements bundle is perfect for making beautifully framed sentiments, but it’s also great for a simple embellishment to make a sentiment extra special.


Current Host Code: TUMGKET9

Use this host code when you order $50 or more and receive a Thank You gift from me!  The free gift is your choice of any item VALUED UP TO $10 from the 2023-2024 Annual Catalog!

If your order is over $150, please do not use the host code since you’ll receive your own Host Dollars plus I’ll still send you the Thank You gift!  This host code can be used by anyone, no club or commitment required. Let me know if you have any questions.


If you need any stamping supplies, I’d be very happy to be your Demonstrator.  Just click on the Shop Now button on the right side of the screen to go directly to my online store or contact me if you have any questions.  Happy Stamping!

Thanks for stopping by and have a great week!

Akiko

  • Visit my online store here
  • See the current Stampin’ Up! clearance rack specials here
  • Earn FREE Stampin’ Up! products through my Wildflower Frequent Shopper Program – my way of saying thank you to my online frequent shopper customers.
  • Have any questions? I’d be happy to help, click here to contact me.

Cardstock Cuts for this project:

  • Bubble Bath – 4-1/4″ x 11″ card base scored at 5-1/2″
  • Old Olive – 4″ x 5-1/4″ (front mat), 2-1/2″ x 3-1/4″ (die cut leaf spray)
  • Basics Vellum – 3-1/4″ x 3-1/4″ (die cut circle)
  • Basic White – 4″ x 5-1/4″ (inside panel), 1″ x 2-1/2″ (label), 1-1/4″ x 2″ (die cut flower)
  • Delightfully Eclectic DSP – 3-7/8″ x 5-1/8″ (front background), 1/2″ x 4″ (inside trim)

Stampin’ Up! products used in this project: