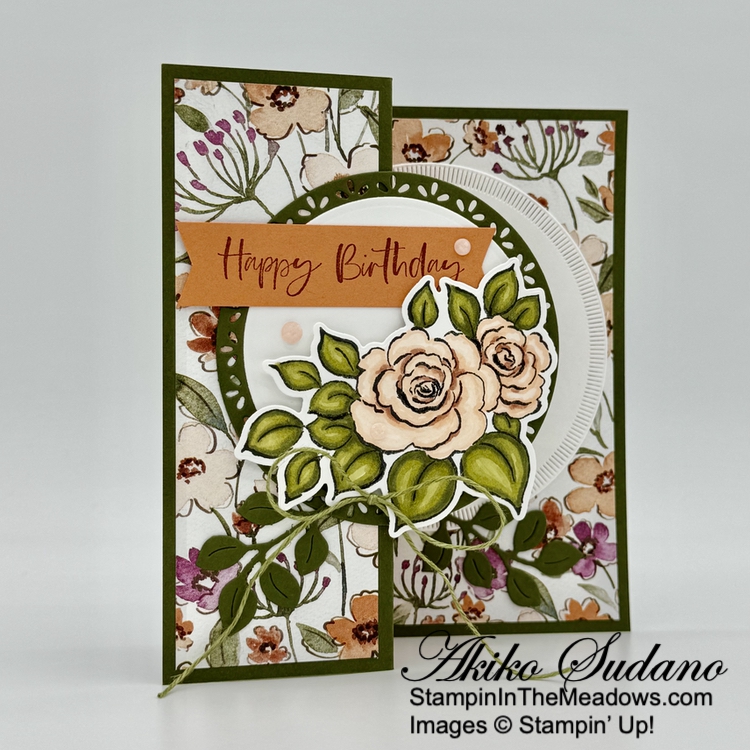
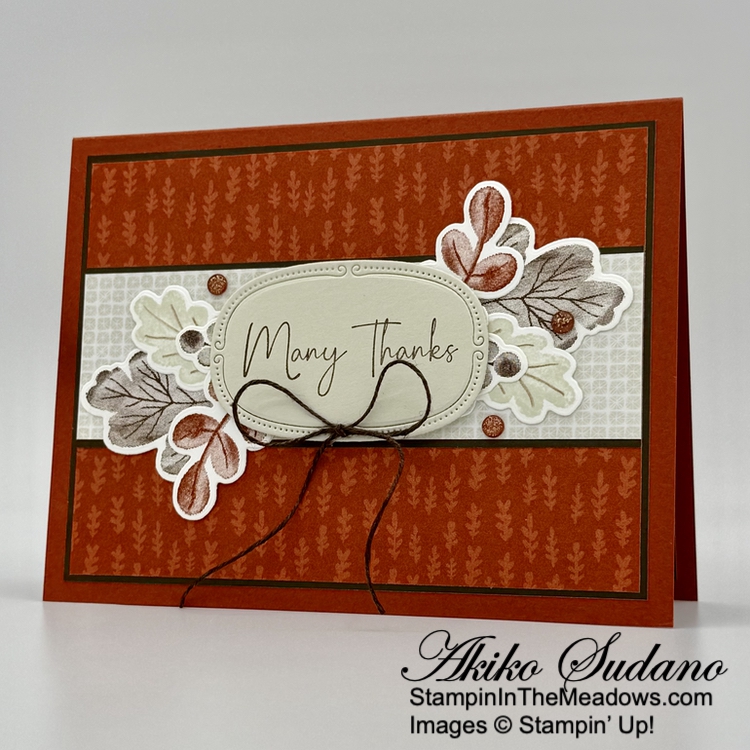
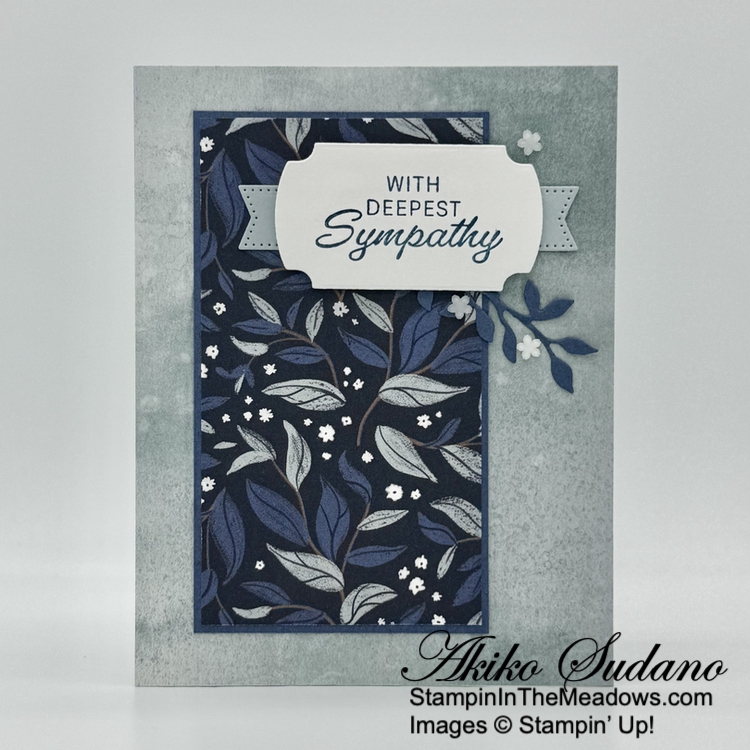
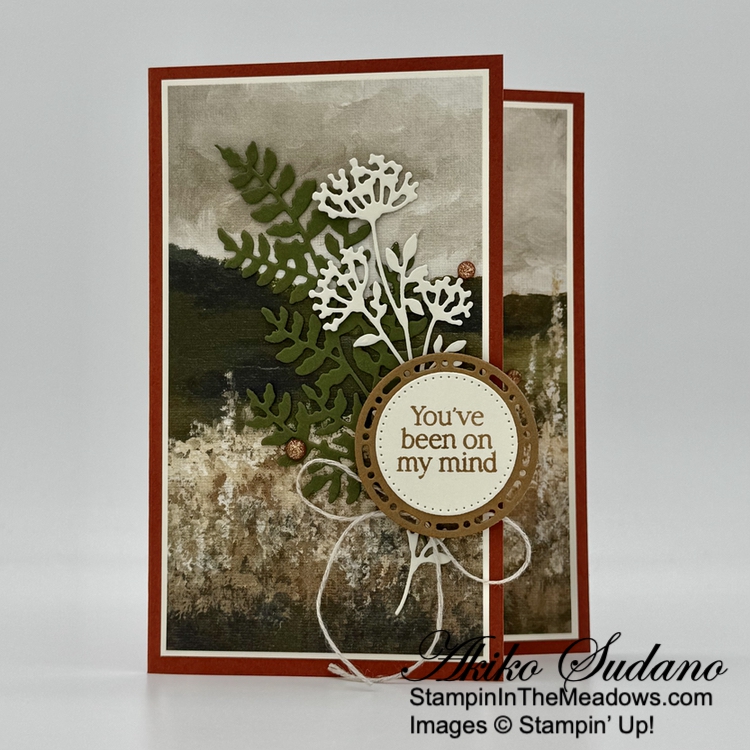
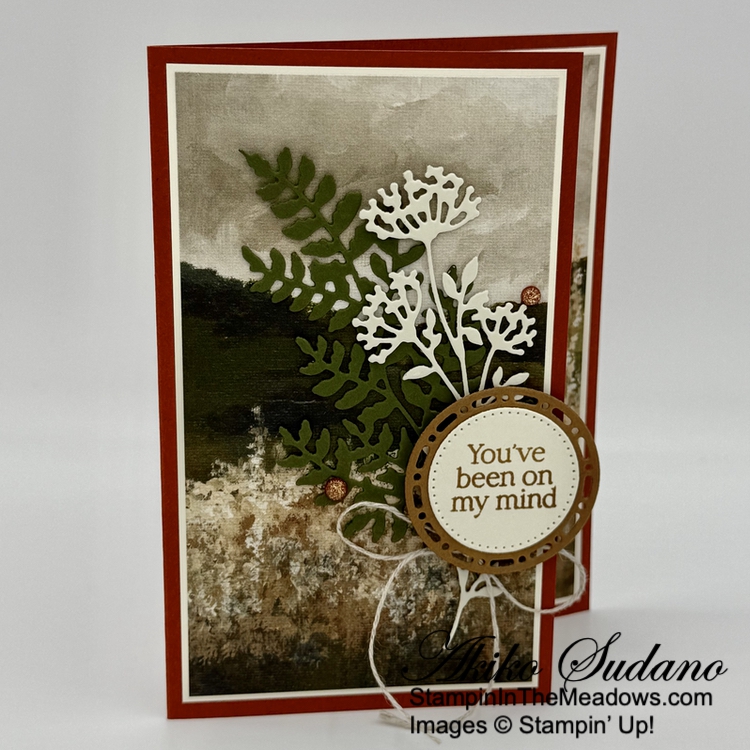
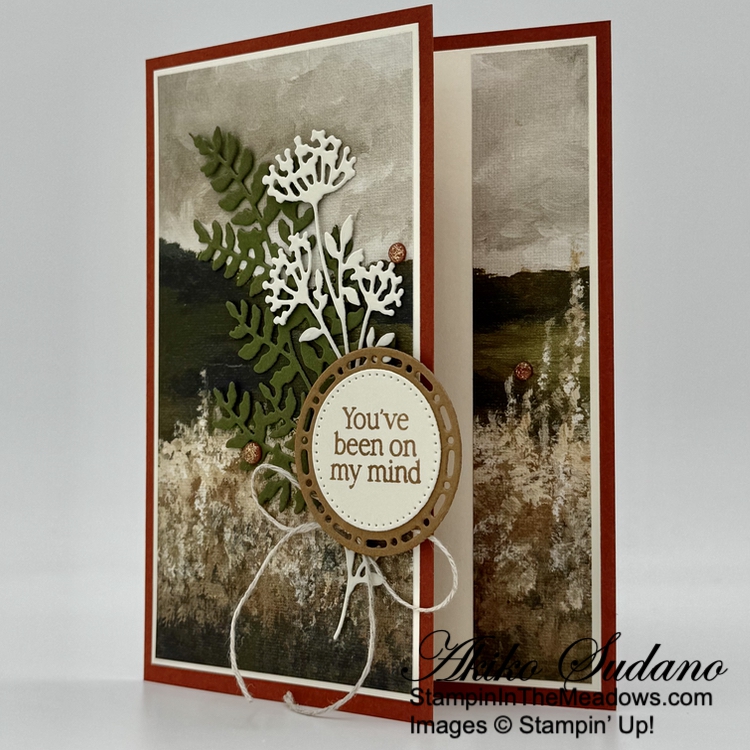
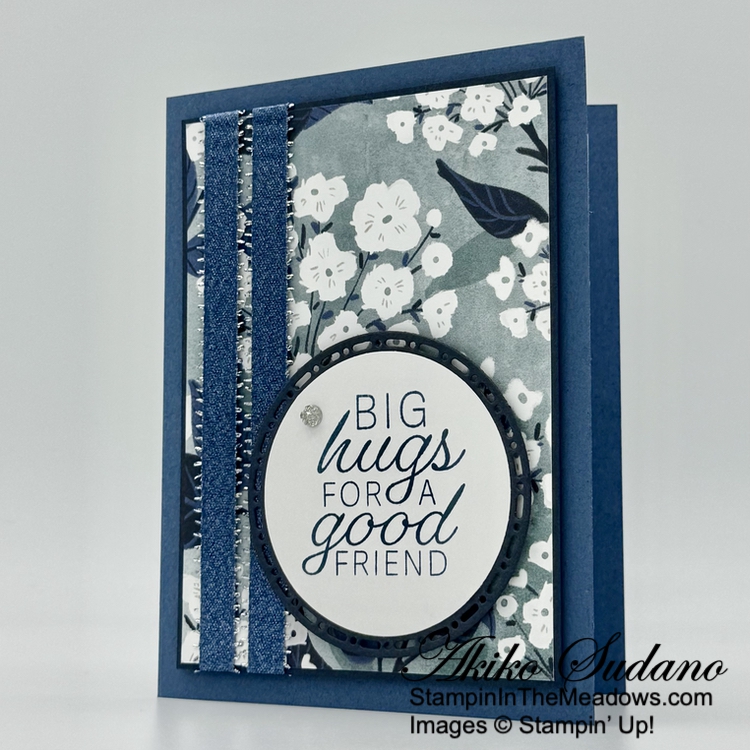
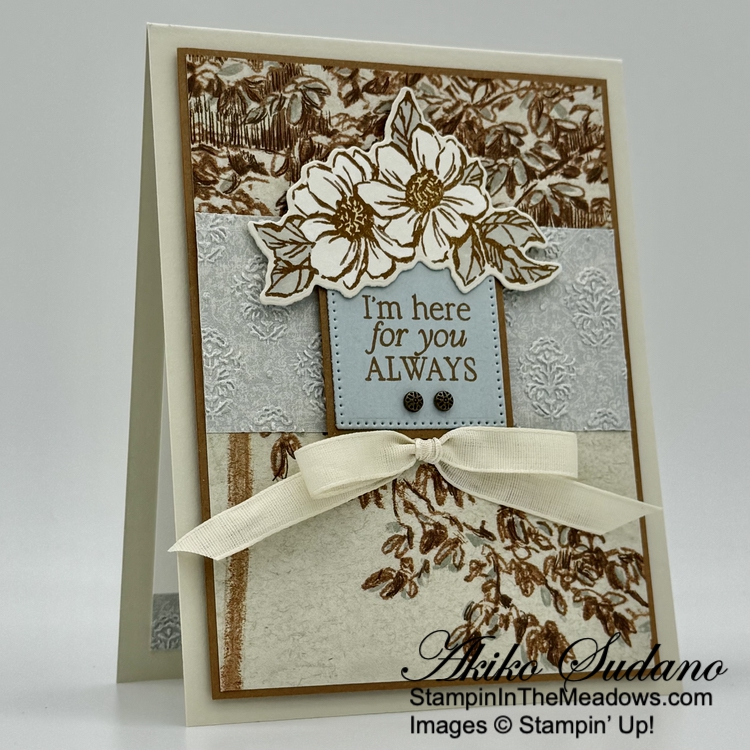
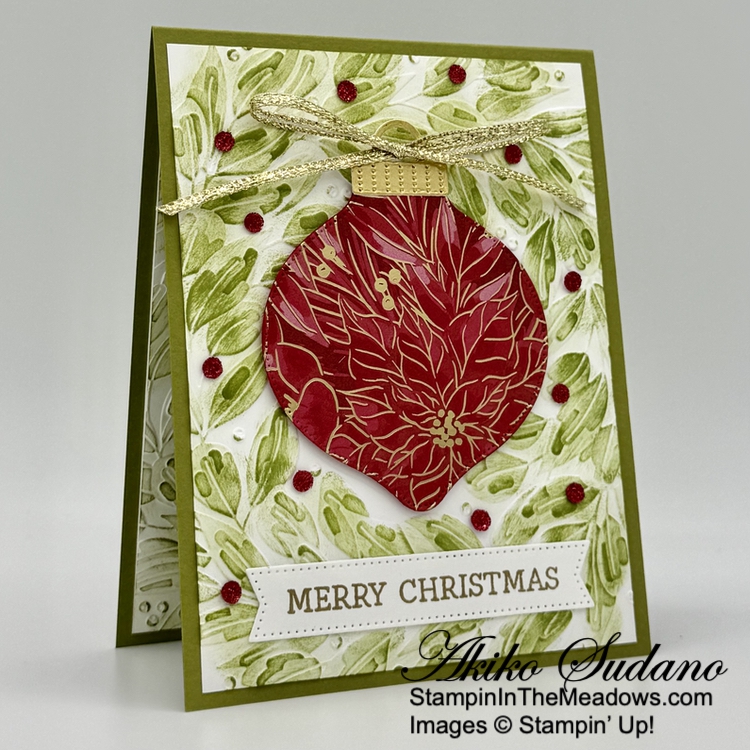
Good Morning! Here’s a floral birthday card using the Stampin’ Up! Charming Day bundle and the pretty Floral Charm designer series paper. This DSP has pretty Fall colors, so it’s great for birthdays this time of year and it’s Z-fold card, so it’s perfect for someone extra special. You can find the card stock cuts along with the currently available supplies at the bottom of my post.
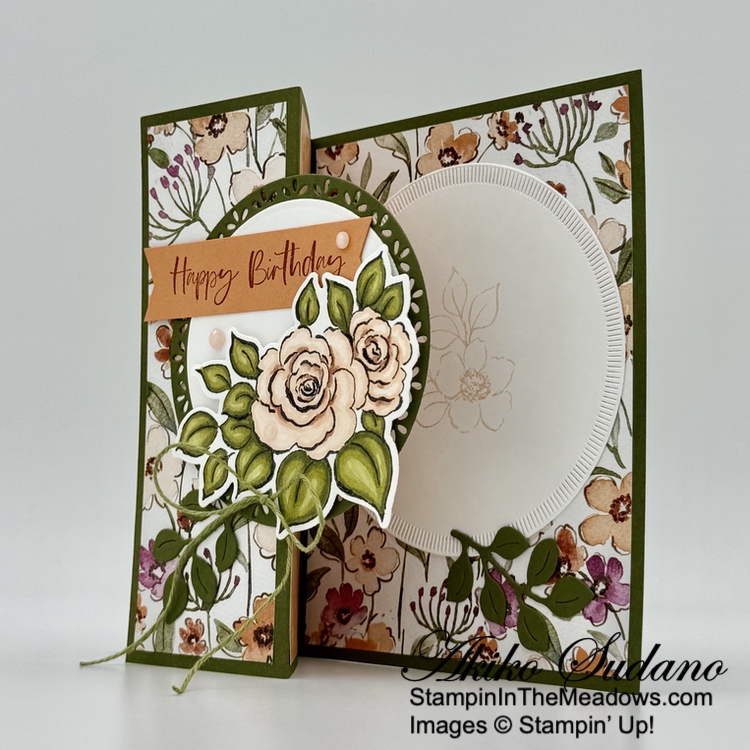
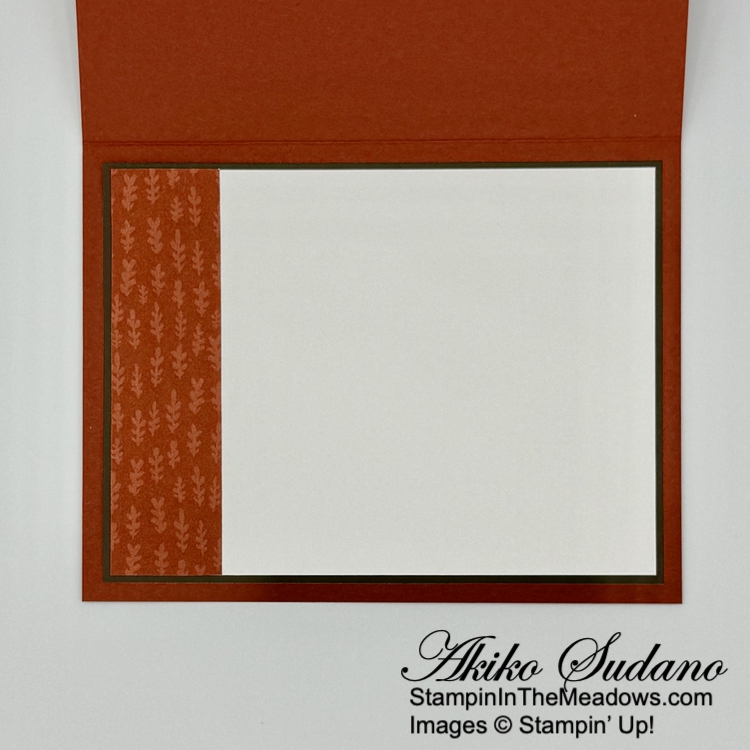
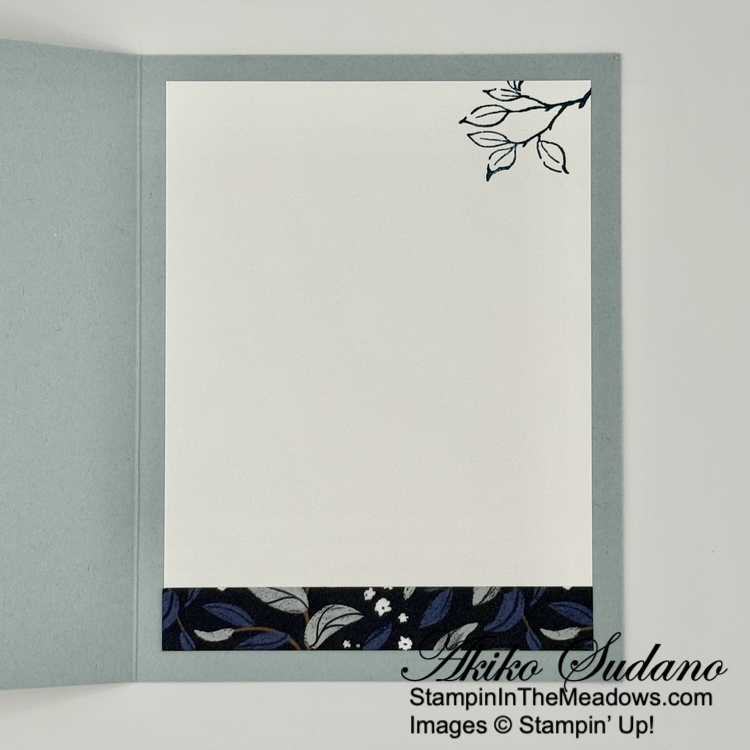
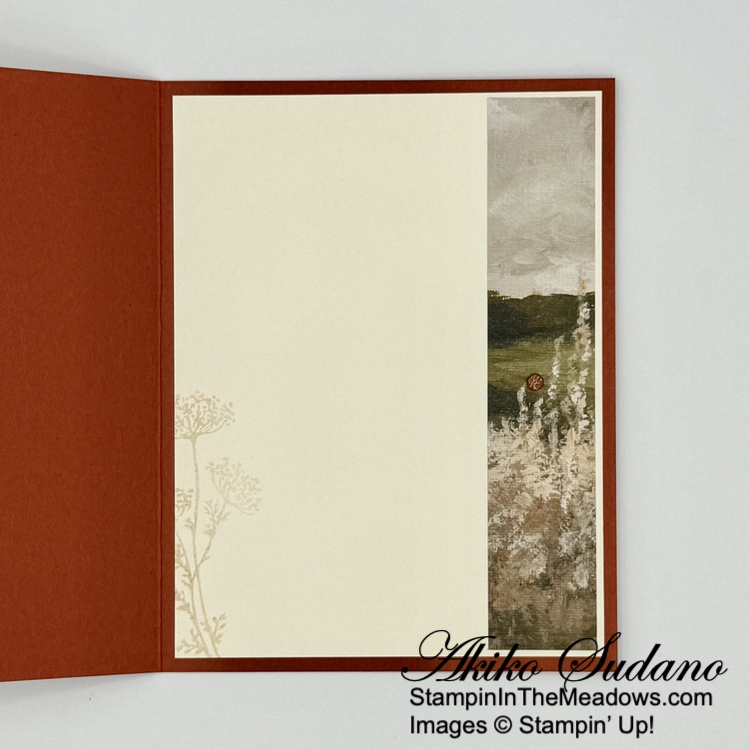
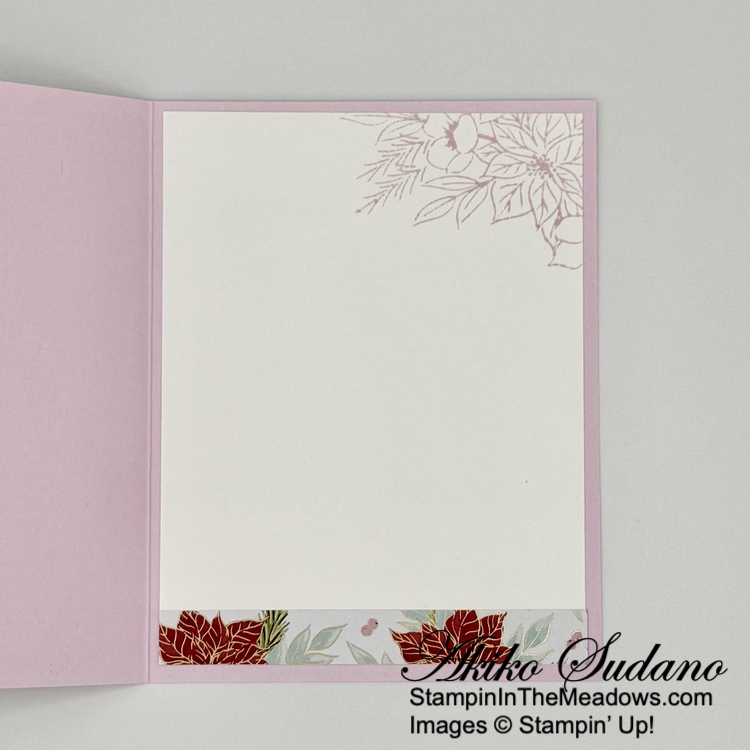
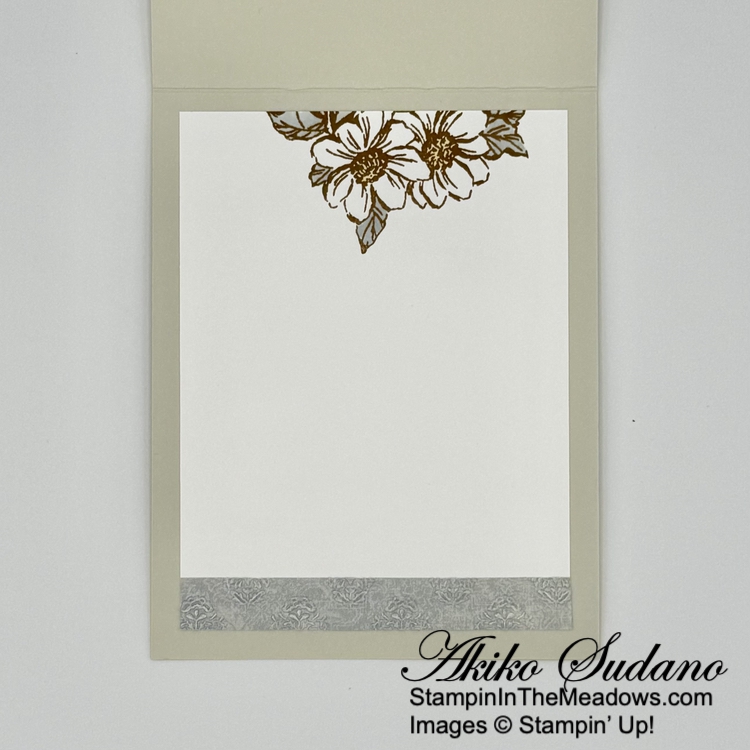
Score and burnish the Mossy Meadow card base and adhere panels of Floral Charm designer series paper to each section. Cut a large circle from Basic White using the large die from the Spotlight On Nature dies and stamp the small flower from the Stampin’ Up! Charming Day stamp set in the middle using stamped off Petal Pink ink. Adhere it to the large inside panel with liquid glue – this will provide the writing area.
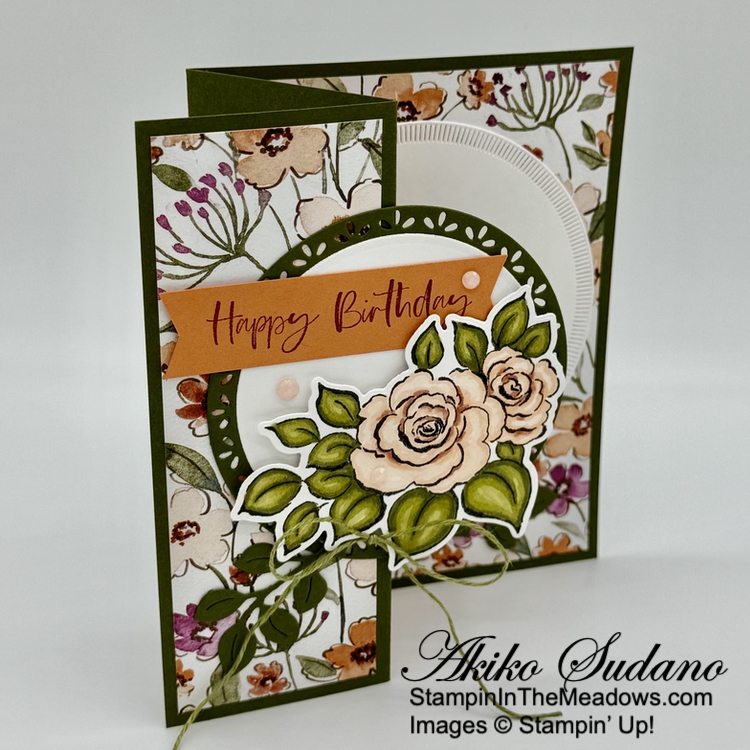
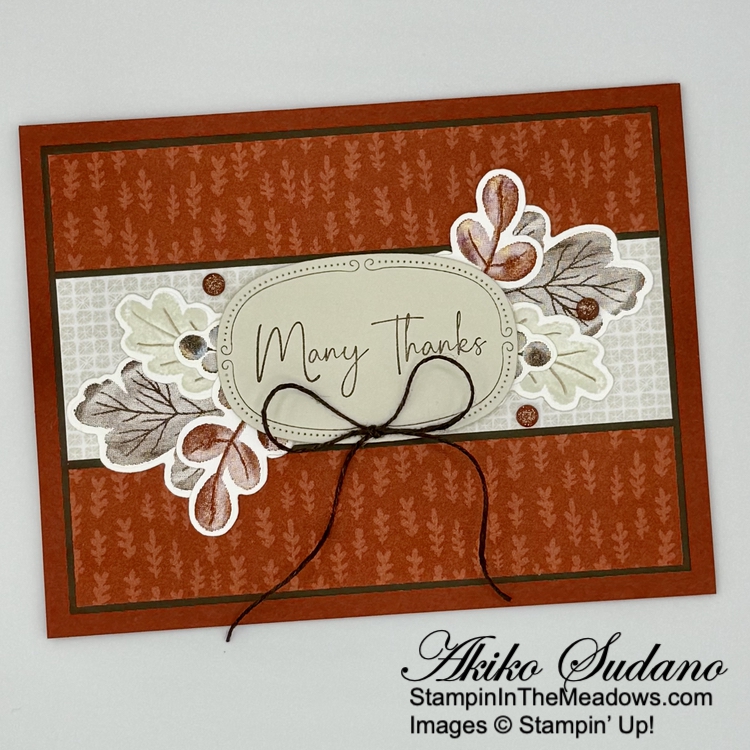
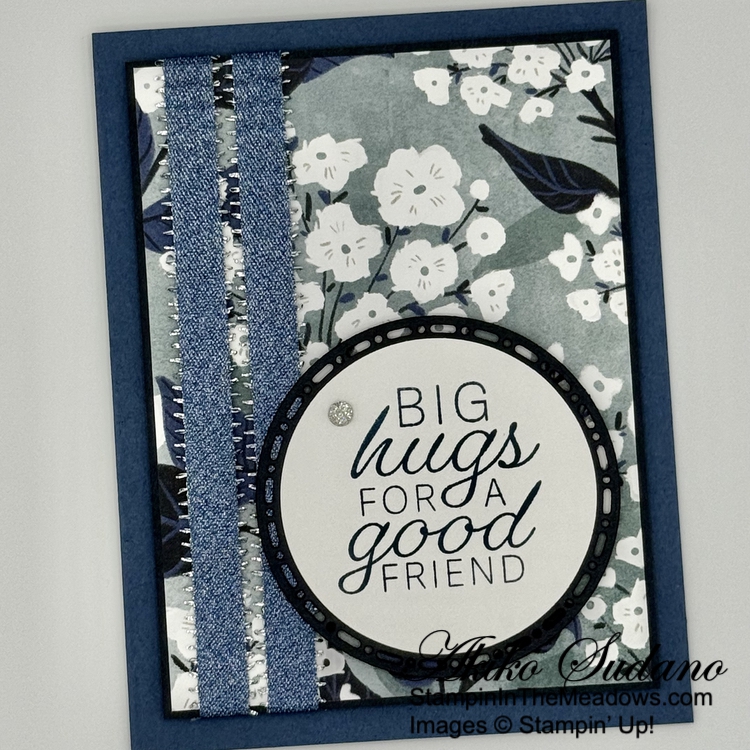
Using the second largest circle die from the Spotlight On Nature dies, cut a Mossy Meadow circle. Cut a Basic White circle using Stylish Shapes dies and adhere it to the inside of the Mossy Meadow circle (I was playing around with a 2-3/4″ circle punch from my stash that is no longer available and used it instead). Adhere the layered circles to the card front with liquid glue, aligning it with the Basic White circle on the inside panel. Be careful to only apply glue to the section attached to the front flap.
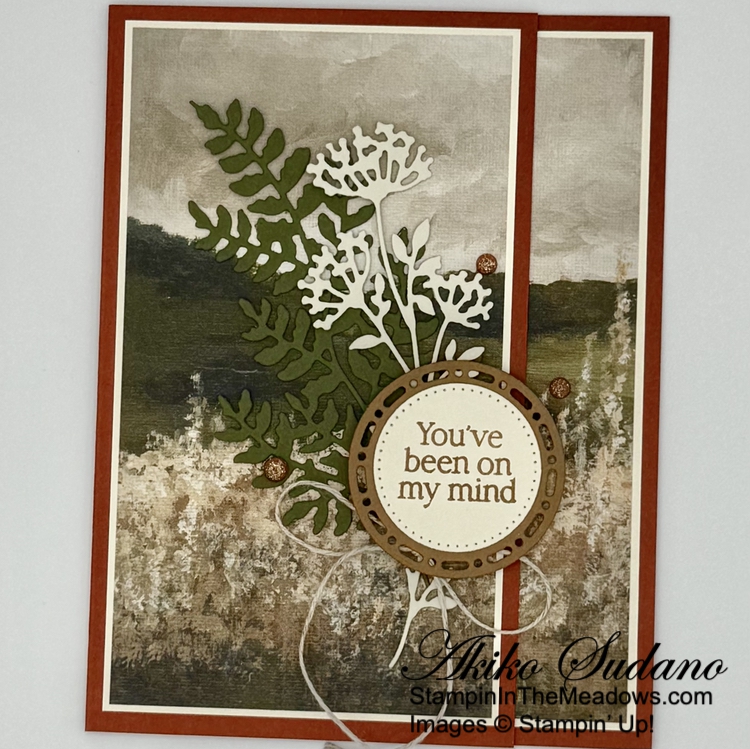
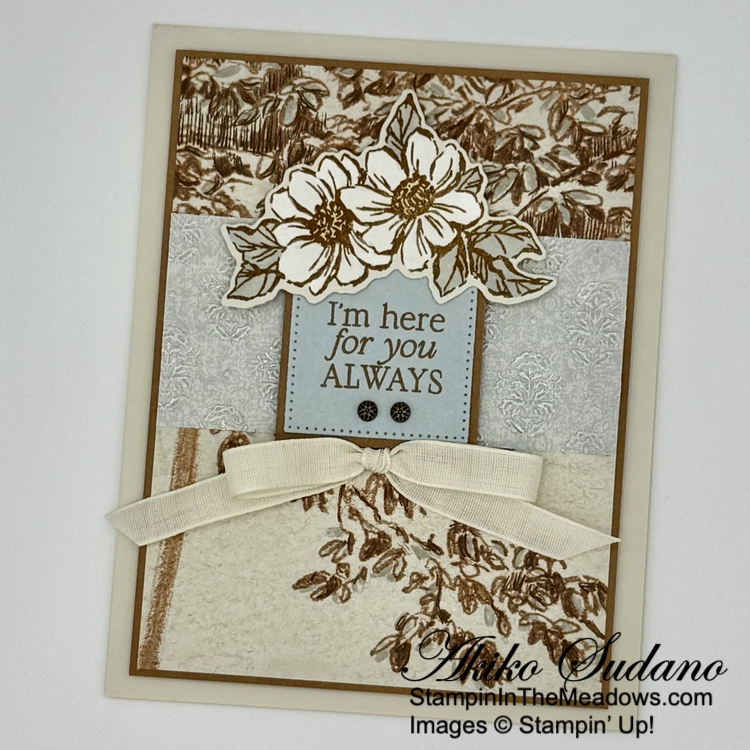
Stamp the large flower from the Stampin’ Up! Charming Day stamp set on Basic White and color it with the Petal Pink, light Old Olive, light Mossy Meadow and light Cajun Craze Stampin’ Blends. Use blending techniques for the greens on the leaves and the Petal Pinks on the flowers and then add s few light Cajun Craze touches to the corners of the flowers. cut the flower out with the coordinating die and adhere it to the circle with dimensionals.
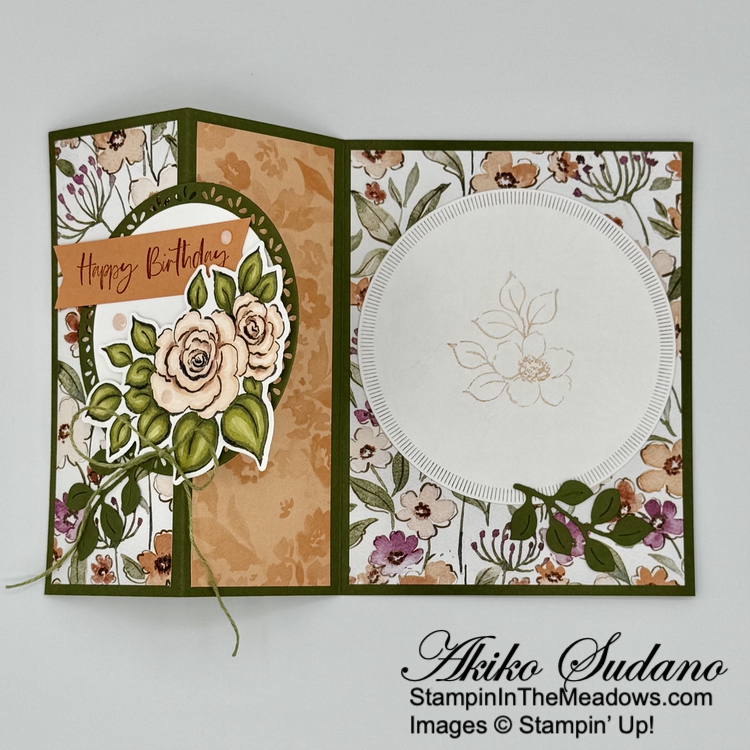
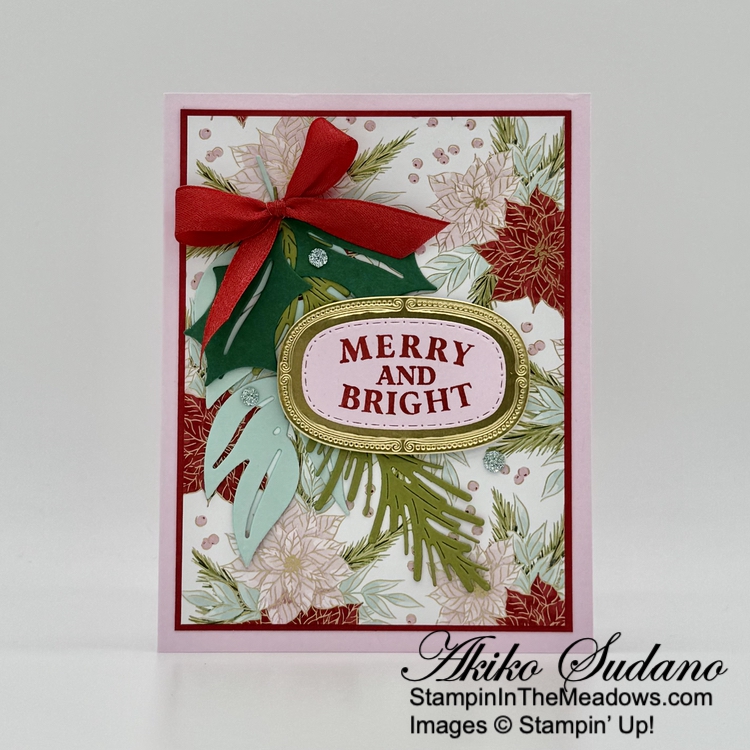
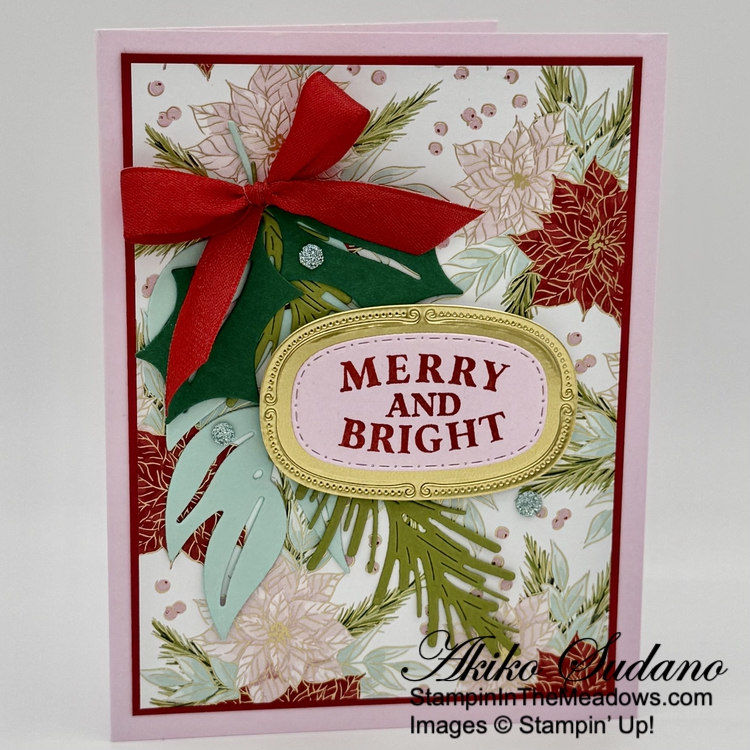
Stamp the sentiment using Cajun Craze ink on Timid Tiger and trim the ends into fishtails using your paper snips. Adhere the label to the card with glue dots. Cut two Mossy Meadow leaf clusters using the small leaf die from the Stampin’ Up! Charming Day dies and adhere them to the front and inside of the card. Finish with an Old Olive linen thread bow and Petal Pink shimmer dots.
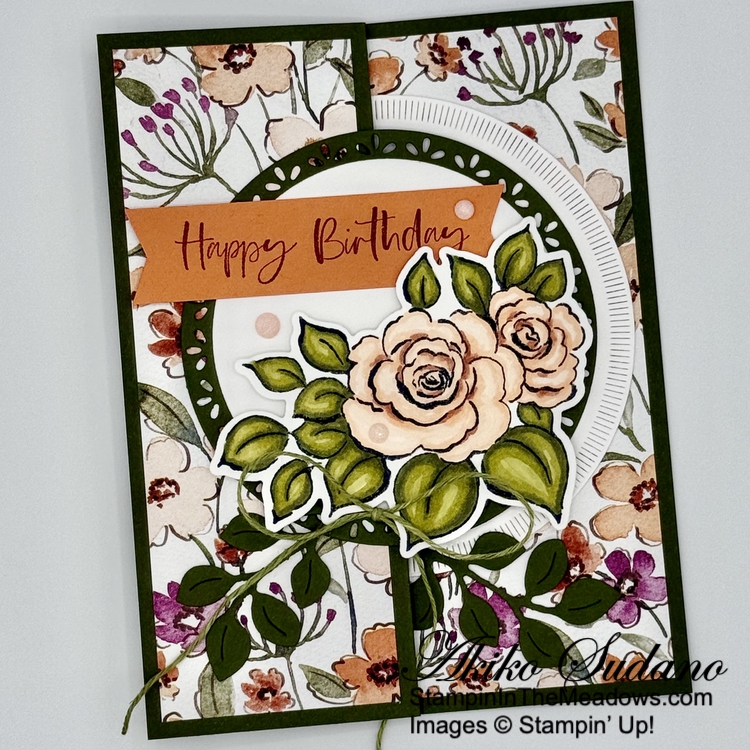
The florals in the Stampin’ Up! Charming Day bundle are so easy and fun to color and I love the sentiments and coordinating dies. A fun fold always makes a birthday card extra special and the Z-fold is a fairly easy card to make. Give it a try!
Thanks so much for stopping by and Happy Stamping!!
Akiko
Cardstock Cuts for this project:
- Mossy Meadow – 5-1/2″ – 8-1/2″ card base, scored at 2-1/8″ and 4-1/4″, 3-1/2″ x 3-1/2″ (die cut circle), 2″ x 2-1/2″ (die cut leaves)
- Timid Tiger – 3/4″ x 3″ (label)
- Basic White – 4″ x 4″ (inside die cut circle), 3″ x 3″ (die cut circle), 3-1/2″ x 4″ (stamped flowers)
- Floral Charm DSP – 4″ x 5-1/4″ (inside background), two 1-7/8″ x 5-1/4″ (front and middle panels)
Stampin’ Up! products used in this project:
![Charming Day Bundle (English) [ 166136 ]](https://assets1.tamsnetwork.com/images/EC042017NF/166136s.jpg "Charming Day Bundle (English) [ 166136 ]")
![Spotlight On Nature Dies [ 163580 ]](https://assets1.tamsnetwork.com/images/EC042017NF/163580s.jpg "Spotlight On Nature Dies [ 163580 ]")
![Stylish Shapes Dies [ 159183 ]](https://assets1.tamsnetwork.com/images/EC042017NF/159183s.jpg "Stylish Shapes Dies [ 159183 ]")
![Floral Charm 12" X 12" (30.5 X 30.5 Cm) Designer Series Paper [ 166125 ]](https://assets1.tamsnetwork.com/images/EC042017NF/166125s.jpg "Floral Charm 12\" X 12\" (30.5 X 30.5 Cm) Designer Series Paper [ 166125 ]")
![Mossy Meadow 8-1/2" X 11" Cardstock [ 133676 ]](https://assets1.tamsnetwork.com/images/EC042017NF/133676s.jpg "Mossy Meadow 8-1/2\" X 11\" Cardstock [ 133676 ]")
![Timid Tiger 8 1/2" X 11" Cardstock [ 165626 ]](https://assets1.tamsnetwork.com/images/EC042017NF/165626s.jpg "Timid Tiger 8 1/2\" X 11\" Cardstock [ 165626 ]")
![Basic White 8 1/2" X 11" Cardstock [ 166780 ]](https://assets1.tamsnetwork.com/images/EC042017NF/166780s.jpg "Basic White 8 1/2\" X 11\" Cardstock [ 166780 ]")
![Tuxedo Black Memento Ink Pad [ 132708 ]](https://assets1.tamsnetwork.com/images/EC042017NF/132708s.jpg "Tuxedo Black Memento Ink Pad [ 132708 ]")
![Cajun Craze Classic Stampin' Pad [ 147085 ]](https://assets1.tamsnetwork.com/images/EC042017NF/147085s.jpg "Cajun Craze Classic Stampin' Pad [ 147085 ]")
![Petal Pink Classic Stampin' Pad [ 147108 ]](https://assets1.tamsnetwork.com/images/EC042017NF/147108s.jpg "Petal Pink Classic Stampin' Pad [ 147108 ]")
![Petal Pink Stampin' Blends Combo Pack [ 154893 ]](https://assets1.tamsnetwork.com/images/EC042017NF/154893s.jpg "Petal Pink Stampin' Blends Combo Pack [ 154893 ]")
![Mossy Meadow Stampin' Blends Combo Pack [ 154890 ]](https://assets1.tamsnetwork.com/images/EC042017NF/154890s.jpg "Mossy Meadow Stampin' Blends Combo Pack [ 154890 ]")
![Old Olive Stampin' Blends Combo Pack [ 154892 ]](https://assets1.tamsnetwork.com/images/EC042017NF/154892s.jpg "Old Olive Stampin' Blends Combo Pack [ 154892 ]")
![Cajun Craze Stampin' Blends Combo Pack [ 154879 ]](https://assets1.tamsnetwork.com/images/EC042017NF/154879s.jpg "Cajun Craze Stampin' Blends Combo Pack [ 154879 ]")
![Charming Shimmer Faceted Dots [ 166139 ]](https://assets1.tamsnetwork.com/images/EC042017NF/166139s.jpg "Charming Shimmer Faceted Dots [ 166139 ]")
![Early Espresso & Old Olive Linen Thread Pack [ 165986 ]](https://assets1.tamsnetwork.com/images/EC042017NF/165986s.jpg "Early Espresso & Old Olive Linen Thread Pack [ 165986 ]")
![Multipurpose Liquid Glue [ 110755 ]](https://assets1.tamsnetwork.com/images/EC042017NF/110755s.jpg "Multipurpose Liquid Glue [ 110755 ]")
![Stampin' Dimensionals [ 104430 ]](https://assets1.tamsnetwork.com/images/EC042017NF/104430s.jpg "Stampin' Dimensionals [ 104430 ]")
![Mini Glue Dots [ 103683 ]](https://assets1.tamsnetwork.com/images/EC042017NF/103683s.jpg "Mini Glue Dots [ 103683 ]")
![Stampin' Cut & Emboss Machine [ 149653 ]](https://assets1.tamsnetwork.com/images/EC042017NF/149653s.jpg "Stampin' Cut & Emboss Machine [ 149653 ]")
![Stampin' Seal [ 152813 ]](https://assets1.tamsnetwork.com/images/EC042017NF/152813s.jpg "Stampin' Seal [ 152813 ]")


![Gathering Moments Bundle (English) [ 165980 ]](https://assets1.tamsnetwork.com/images/EC042017NF/165980s.jpg "Gathering Moments Bundle (English) [ 165980 ]")
![Traditional Labels Dies [ 165864 ]](https://assets1.tamsnetwork.com/images/EC042017NF/165864s.jpg "Traditional Labels Dies [ 165864 ]")
![Gathering Together 12" X 12" (30.5 X 30.5 Cm) Specialty Designer Series Paper [ 165969 ]](https://assets1.tamsnetwork.com/images/EC042017NF/165969s.jpg "Gathering Together 12\" X 12\" (30.5 X 30.5 Cm) Specialty Designer Series Paper [ 165969 ]")
![Cajun Craze 8-1/2" X 11" Cardstock [ 119684 ]](https://assets1.tamsnetwork.com/images/EC042017NF/119684s.jpg "Cajun Craze 8-1/2\" X 11\" Cardstock [ 119684 ]")
![Early Espresso 12" X 12" (30.5 X 30.5 Cm) Two Tone Cardstock [ 166668 ]](https://assets1.tamsnetwork.com/images/EC042017NF/166668s.jpg "Early Espresso 12\" X 12\" (30.5 X 30.5 Cm) Two Tone Cardstock [ 166668 ]")
![Basic Beige 8 1/2" X 11" Cardstock [ 164511 ]](https://assets1.tamsnetwork.com/images/EC042017NF/164511s.jpg "Basic Beige 8 1/2\" X 11\" Cardstock [ 164511 ]")
![Early Espresso Classic Stampin' Pad [ 147114 ]](https://assets1.tamsnetwork.com/images/EC042017NF/147114s.jpg "Early Espresso Classic Stampin' Pad [ 147114 ]")
![Basic Beige Classic Stampin Pad [ 163806 ]](https://assets1.tamsnetwork.com/images/EC042017NF/163806s.jpg "Basic Beige Classic Stampin Pad [ 163806 ]")
![Cajun Craze & Gold Dots [ 165984 ]](https://assets1.tamsnetwork.com/images/EC042017NF/165984s.jpg "Cajun Craze & Gold Dots [ 165984 ]")

![Spooky Halloween Bundle (English) [ 166199 ]](https://assets1.tamsnetwork.com/images/EC042017NF/166199s.jpg "Spooky Halloween Bundle (English) [ 166199 ]")
![Basic Gray 8-1/2" X 11" Cardstock [ 121044 ]](https://assets1.tamsnetwork.com/images/EC042017NF/121044s.jpg "Basic Gray 8-1/2\" X 11\" Cardstock [ 121044 ]")
![Basic Black 8-1/2" X 11" Cardstock [ 121045 ]](https://assets1.tamsnetwork.com/images/EC042017NF/121045s.jpg "Basic Black 8-1/2\" X 11\" Cardstock [ 121045 ]")
![Pumpkin Pie Classic Stampin' Pad [ 147086 ]](https://assets1.tamsnetwork.com/images/EC042017NF/147086s.jpg "Pumpkin Pie Classic Stampin' Pad [ 147086 ]")
![Versamark Pad [ 102283 ]](https://assets1.tamsnetwork.com/images/EC042017NF/102283s.jpg "Versamark Pad [ 102283 ]")
![Gray Granite Stampin' Blends Combo Pack [ 154886 ]](https://assets1.tamsnetwork.com/images/EC042017NF/154886s.jpg "Gray Granite Stampin' Blends Combo Pack [ 154886 ]")
![Crumb Cake Stampin' Blends Combo Pack [ 154882 ]](https://assets1.tamsnetwork.com/images/EC042017NF/154882s.jpg "Crumb Cake Stampin' Blends Combo Pack [ 154882 ]")
![Pumpkin Pie Stampin' Blends Combo Pack [ 154897 ]](https://assets1.tamsnetwork.com/images/EC042017NF/154897s.jpg "Pumpkin Pie Stampin' Blends Combo Pack [ 154897 ]")
![Granny Apple Green Stampin' Blends Combo Pack [ 154885 ]](https://assets1.tamsnetwork.com/images/EC042017NF/154885s.jpg "Granny Apple Green Stampin' Blends Combo Pack [ 154885 ]")
![Highland Heather Stampin' Blends Combo Pack [ 154887 ]](https://assets1.tamsnetwork.com/images/EC042017NF/154887s.jpg "Highland Heather Stampin' Blends Combo Pack [ 154887 ]")
![Pecan Pie Stampin’ Blends Combo Pack [ 161674 ]](https://assets1.tamsnetwork.com/images/EC042017NF/161674s.jpg "Pecan Pie Stampin’ Blends Combo Pack [ 161674 ]")
![Basics Wow! Embossing Powder [ 165679 ]](https://assets1.tamsnetwork.com/images/EC042017NF/165679s.jpg "Basics Wow! Embossing Powder [ 165679 ]")
![Shimmer Star Foam Stickers [ 166202 ]](https://assets1.tamsnetwork.com/images/EC042017NF/166202s.jpg "Shimmer Star Foam Stickers [ 166202 ]")

![Peace On Earth Bundle (English) [ 165925 ]](https://assets1.tamsnetwork.com/images/EC042017NF/165925s.jpg "Peace On Earth Bundle (English) [ 165925 ]")
![Charming Day Cling Stamp Set (English) [ 166126 ]](https://assets1.tamsnetwork.com/images/EC042017NF/166126s.jpg "Charming Day Cling Stamp Set (English) [ 166126 ]")
![Labeled With Love Punch [ 163569 ]](https://assets1.tamsnetwork.com/images/EC042017NF/163569s.jpg "Labeled With Love Punch [ 163569 ]")
![Birch Wood 3 D Embossing Folder [ 164069 ]](https://assets1.tamsnetwork.com/images/EC042017NF/164069s.jpg "Birch Wood 3 D Embossing Folder [ 164069 ]")
![Peaceful Garden 12" X 12" (30.5 X 30.5 Cm) Designer Series Paper [ 165917 ]](https://assets1.tamsnetwork.com/images/EC042017NF/165917s.jpg "Peaceful Garden 12\" X 12\" (30.5 X 30.5 Cm) Designer Series Paper [ 165917 ]")
![Cloud Cover 8 1/2" X 11" Cardstock [ 165621 ]](https://assets1.tamsnetwork.com/images/EC042017NF/165621s.jpg "Cloud Cover 8 1/2\" X 11\" Cardstock [ 165621 ]")
![Misty Moonlight 8-1/2" X 11" Cardstock [ 153081 ]](https://assets1.tamsnetwork.com/images/EC042017NF/153081s.jpg "Misty Moonlight 8-1/2\" X 11\" Cardstock [ 153081 ]")
![Misty Moonlight Classic Stampin' Pad [ 153118 ]](https://assets1.tamsnetwork.com/images/EC042017NF/153118s.jpg "Misty Moonlight Classic Stampin' Pad [ 153118 ]")
![Hues Of Blue Flowers [ 165930 ]](https://assets1.tamsnetwork.com/images/EC042017NF/165930s.jpg "Hues Of Blue Flowers [ 165930 ]")

![Gallery Blooms Bundle [ 165213 ]](https://assets1.tamsnetwork.com/images/EC042017NF/165213s.jpg "Gallery Blooms Bundle [ 165213 ]")
![Beautiful Motifs Bundle (English) [ 165206 ]](https://assets1.tamsnetwork.com/images/EC042017NF/165206s.jpg "Beautiful Motifs Bundle (English) [ 165206 ]")
![Beautiful Gallery 6" X 6" (15.2 X 15.2 Cm) Designer Series Paper [ 165196 ]](https://assets1.tamsnetwork.com/images/EC042017NF/165196s.jpg "Beautiful Gallery 6\" X 6\" (15.2 X 15.2 Cm) Designer Series Paper [ 165196 ]")
![Pecan Pie 8 1/2" X 11" Cardstock [ 161717 ]](https://assets1.tamsnetwork.com/images/EC042017NF/161717s.jpg "Pecan Pie 8 1/2\" X 11\" Cardstock [ 161717 ]")
![Very Vanilla 8 1/2" X 11" Cardstock [ 166784 ]](https://assets1.tamsnetwork.com/images/EC042017NF/166784s.jpg "Very Vanilla 8 1/2\" X 11\" Cardstock [ 166784 ]")
![Pecan Pie Classic Stampin' Pad [ 161665 ]](https://assets1.tamsnetwork.com/images/EC042017NF/161665s.jpg "Pecan Pie Classic Stampin' Pad [ 161665 ]")
![Linen Thread [ 104199 ]](https://assets1.tamsnetwork.com/images/EC042017NF/104199s.jpg "Linen Thread [ 104199 ]")


![2 3/8" (6 Cm) Circle Punch [ 161354 ]](https://assets1.tamsnetwork.com/images/EC042017NF/161354s.jpg "2 3/8\" (6 Cm) Circle Punch [ 161354 ]")
![Secret Sea 8 1/2" X 11" Cardstock [ 165624 ]](https://assets1.tamsnetwork.com/images/EC042017NF/165624s.jpg "Secret Sea 8 1/2\" X 11\" Cardstock [ 165624 ]")
![Drusy Adhesive Backed Embellishments [ 164223 ]](https://assets1.tamsnetwork.com/images/EC042017NF/164223s.jpg "Drusy Adhesive Backed Embellishments [ 164223 ]")
![Misty Moonlight & Silver Edged 1/2" (1.3 Cm) Ribbon [ 165931 ]](https://assets1.tamsnetwork.com/images/EC042017NF/165931s.jpg "Misty Moonlight & Silver Edged 1/2\" (1.3 Cm) Ribbon [ 165931 ]")


![Christmas Greenery Bundle [ 165873 ]](https://assets1.tamsnetwork.com/images/EC042017NF/165873s.jpg "Christmas Greenery Bundle [ 165873 ]")
![Traditional Labels Bundle (English) [ 165865 ]](https://assets1.tamsnetwork.com/images/EC042017NF/165865s.jpg "Traditional Labels Bundle (English) [ 165865 ]")
![Traditions Of Christmas 12" X 12" (30.5 X 30.5 Cm) Specialty Designer Series Paper [ 165853 ]](https://assets1.tamsnetwork.com/images/EC042017NF/165853s.jpg "Traditions Of Christmas 12\" X 12\" (30.5 X 30.5 Cm) Specialty Designer Series Paper [ 165853 ]")
![Bubble Bath 8 1/2" X 11" Cardstock [ 161718 ]](https://assets1.tamsnetwork.com/images/EC042017NF/161718s.jpg "Bubble Bath 8 1/2\" X 11\" Cardstock [ 161718 ]")
![Real Red 8-1/2" X 11" Cardstock [ 102482 ]](https://assets1.tamsnetwork.com/images/EC042017NF/102482s.jpg "Real Red 8-1/2\" X 11\" Cardstock [ 102482 ]")
![Pool Party 8-1/2" X 11" Cardstock [ 122924 ]](https://assets1.tamsnetwork.com/images/EC042017NF/122924s.jpg "Pool Party 8-1/2\" X 11\" Cardstock [ 122924 ]")
![Shaded Spruce 8-1/2" X 11" Cardstock [ 146981 ]](https://assets1.tamsnetwork.com/images/EC042017NF/146981s.jpg "Shaded Spruce 8-1/2\" X 11\" Cardstock [ 146981 ]")
![Old Olive 8-1/2" X 11" Cardstock [ 100702 ]](https://assets1.tamsnetwork.com/images/EC042017NF/100702s.jpg "Old Olive 8-1/2\" X 11\" Cardstock [ 100702 ]")
![Gold Foil Sheets [ 132622 ]](https://assets1.tamsnetwork.com/images/EC042017NF/132622s.jpg "Gold Foil Sheets [ 132622 ]")
![Real Red Classic Stampin' Pad [ 147084 ]](https://assets1.tamsnetwork.com/images/EC042017NF/147084s.jpg "Real Red Classic Stampin' Pad [ 147084 ]")
![Bubble Bath Classic Stampin' Pad [ 161664 ]](https://assets1.tamsnetwork.com/images/EC042017NF/161664s.jpg "Bubble Bath Classic Stampin' Pad [ 161664 ]")
![Real Red 1/2" (1.3 Cm) Shiny Ribbon [ 165876 ]](https://assets1.tamsnetwork.com/images/EC042017NF/165876s.jpg "Real Red 1/2\" (1.3 Cm) Shiny Ribbon [ 165876 ]")
![Traditional Sparkling Sequins [ 165875 ]](https://assets1.tamsnetwork.com/images/EC042017NF/165875s.jpg "Traditional Sparkling Sequins [ 165875 ]")


![Beautiful Motifs Photopolymer Stamp Set (English) [ 165198 ]](https://assets1.tamsnetwork.com/images/EC042017NF/165198s.jpg "Beautiful Motifs Photopolymer Stamp Set (English) [ 165198 ]")
![Damask Designs Embossing Folder [ 165214 ]](https://assets1.tamsnetwork.com/images/EC042017NF/165214s.jpg "Damask Designs Embossing Folder [ 165214 ]")
![Uninked Stampin’ Craft Pad & Whisper White Refill [ 147277 ]](https://assets1.tamsnetwork.com/images/EC042017NF/147277s.jpg "Uninked Stampin’ Craft Pad & Whisper White Refill [ 147277 ]")
![Cloud Cover Stampin’ Blends Combo Pack [ 165287 ]](https://assets1.tamsnetwork.com/images/EC042017NF/165287s.jpg "Cloud Cover Stampin’ Blends Combo Pack [ 165287 ]")
![Daffodil Delight Stampin' Blends Combo Pack [ 154883 ]](https://assets1.tamsnetwork.com/images/EC042017NF/154883s.jpg "Daffodil Delight Stampin' Blends Combo Pack [ 154883 ]")
![Adhesive Backed Textured Dots [ 163338 ]](https://assets1.tamsnetwork.com/images/EC042017NF/163338s.jpg "Adhesive Backed Textured Dots [ 163338 ]")
![Basic Beige 3/8" (1 Cm) Classic Ribbon [ 165216 ]](https://assets1.tamsnetwork.com/images/EC042017NF/165216s.jpg "Basic Beige 3/8\" (1 Cm) Classic Ribbon [ 165216 ]")


![Haunted Home Kit [ 164376 ]](https://assets1.tamsnetwork.com/images/EC042017NF/164376s.jpg "Haunted Home Kit [ 164376 ]")


![Bauble Blooms Bundle (English) [ 166096 ]](https://assets1.tamsnetwork.com/images/EC042017NF/166096s.jpg "Bauble Blooms Bundle (English) [ 166096 ]")
![Traditional Wreath 3 D Embossing Folder [ 165874 ]](https://assets1.tamsnetwork.com/images/EC042017NF/165874s.jpg "Traditional Wreath 3 D Embossing Folder [ 165874 ]")
![Old Olive Classic Stampin' Pad [ 147090 ]](https://assets1.tamsnetwork.com/images/EC042017NF/147090s.jpg "Old Olive Classic Stampin' Pad [ 147090 ]")
![Metallics Wow! Embossing Powder [ 165678 ]](https://assets1.tamsnetwork.com/images/EC042017NF/165678s.jpg "Metallics Wow! Embossing Powder [ 165678 ]")
![Gold & Silver 1/8" (3.2 Mm) Trim Combo Pack [ 161633 ]](https://assets1.tamsnetwork.com/images/EC042017NF/161633s.jpg "Gold & Silver 1/8\" (3.2 Mm) Trim Combo Pack [ 161633 ]")
![Sponge Daubers [ 133773 ]](https://assets1.tamsnetwork.com/images/EC042017NF/133773s.jpg "Sponge Daubers [ 133773 ]")

