Good Morning! Here’s a simple Fall get well card made with the wonderful Stampin’ Up! Unbounded Love bundle and the beautiful new Splendid Autumn 6″ x 6″ designer series paper from the upcoming September-December Mini Catalog. You can find the currently available products I used at the bottom of my post along with the card stock sizes.
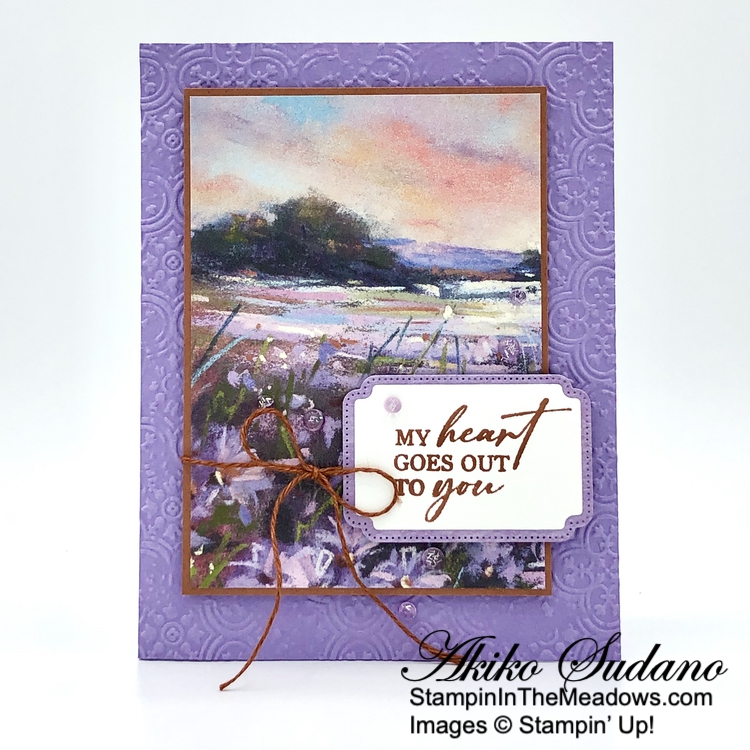
I embossed a panel of Highland Heather card stock with the Distressed Tile 3D embossing folder and adhered it to the front of a Highland Heather card base with liquid glue.
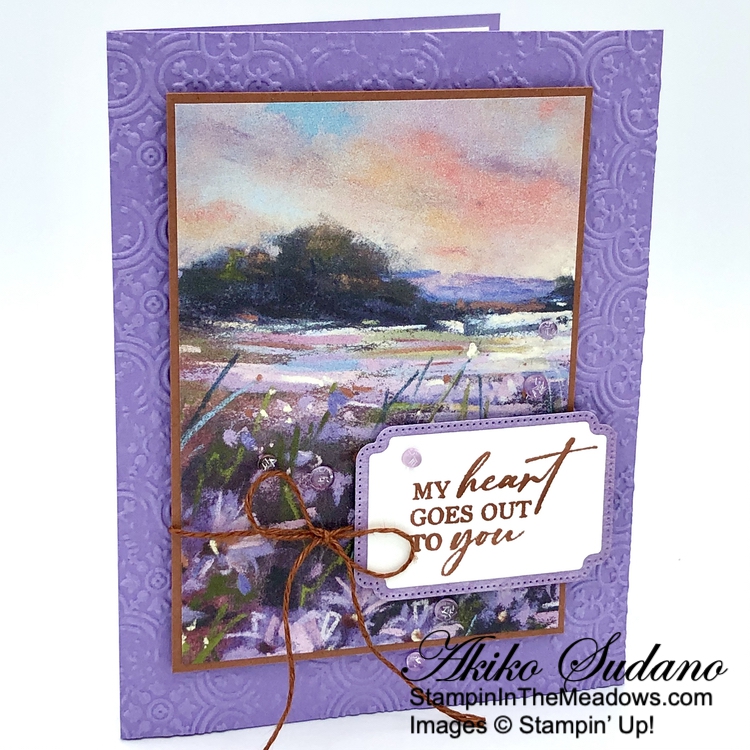
I adhered a panel of Splendid Autumn DSP to a Copper Clay mat. I wrapped it with Copper Clay Linen Thread (available Sept 4) and made a bow. I popped the panel on the front of the card with dimensionals.
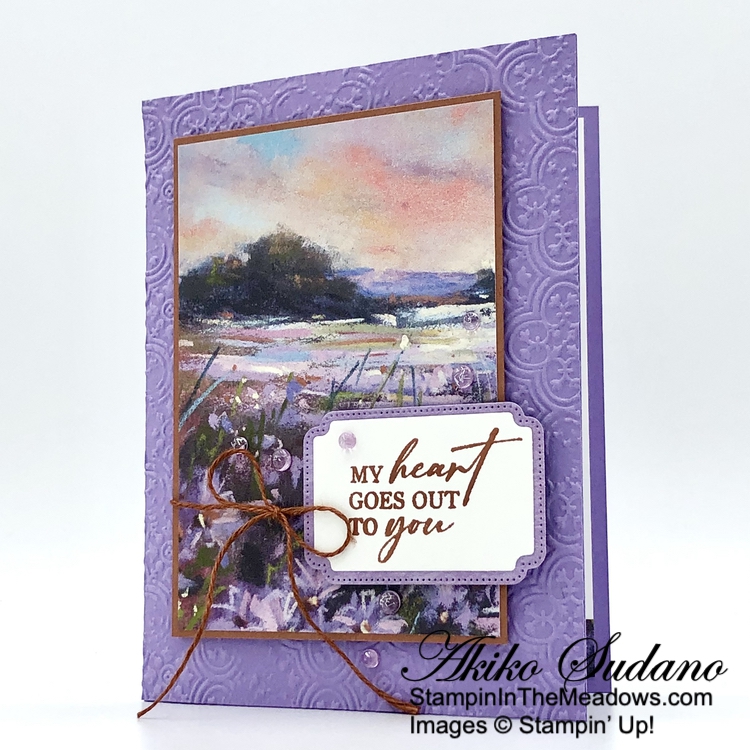
I stamped the sentiment from the Stampin’ Up! Unbounded Love stamp set in Copper Clay ink on Basic White and cut it out with the rectangle die. I cut a mat from a Highland Heather panel of Splendid Autumn DSP and adhered it to the back of the sentiment. I adhered the label to the card with dimensionals, doubling up on the overlap. I finished the card with Fresh Freesia tinsel gems.
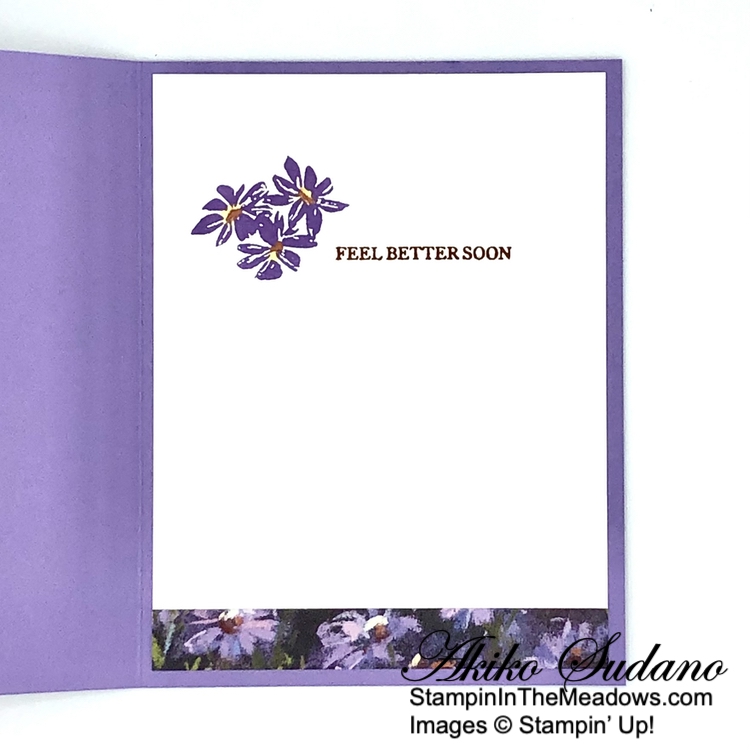
For the inside of the card, I stamped the triple flower from the Cheerful Daisies stamp set using Highland Heather ink and stamped the sentiment from the Stampin’ Up! Unbounded Love stamp set next to the flowers using Copper Clay ink. I used the light Copper Clay and light Lemon Lolly Stampin’ Blends to accent the flower centers. I trimmed the bottom with DSP and adhered the panel to the inside of the card with Stampin’ Seal.

The Stampin’ Up! Unbounded Love bundle has so many beautiful sentiments and goes well with designer series papers filled with beautiful painted landscapes like the Splendid Autumn 6″ x 6″ DSP (available on Sept 4). These papers make card making so easy and the gorgeous label dies give your cards an extra special touch!

The September Paper Pumpkin Kit – Autumn Abundance!
Share your love for all things Autumn with the September Paper Pumpkin kit!
- Makes 9 cards: 3 each of 3 designs with 9 coordinating envelopes
- Project includes printed card bases, coordinating envelopes, and labels
- Laser cut card fronts, a watercolored ephemera pack, and embellishments
- Cajun Craze Classic Stampin’ Spot
Coordinating Colors: Cajun Craze, Crushed Curry, Poppy Parade, Pumpkin Pie, Very Vanilla, Wild Wheat
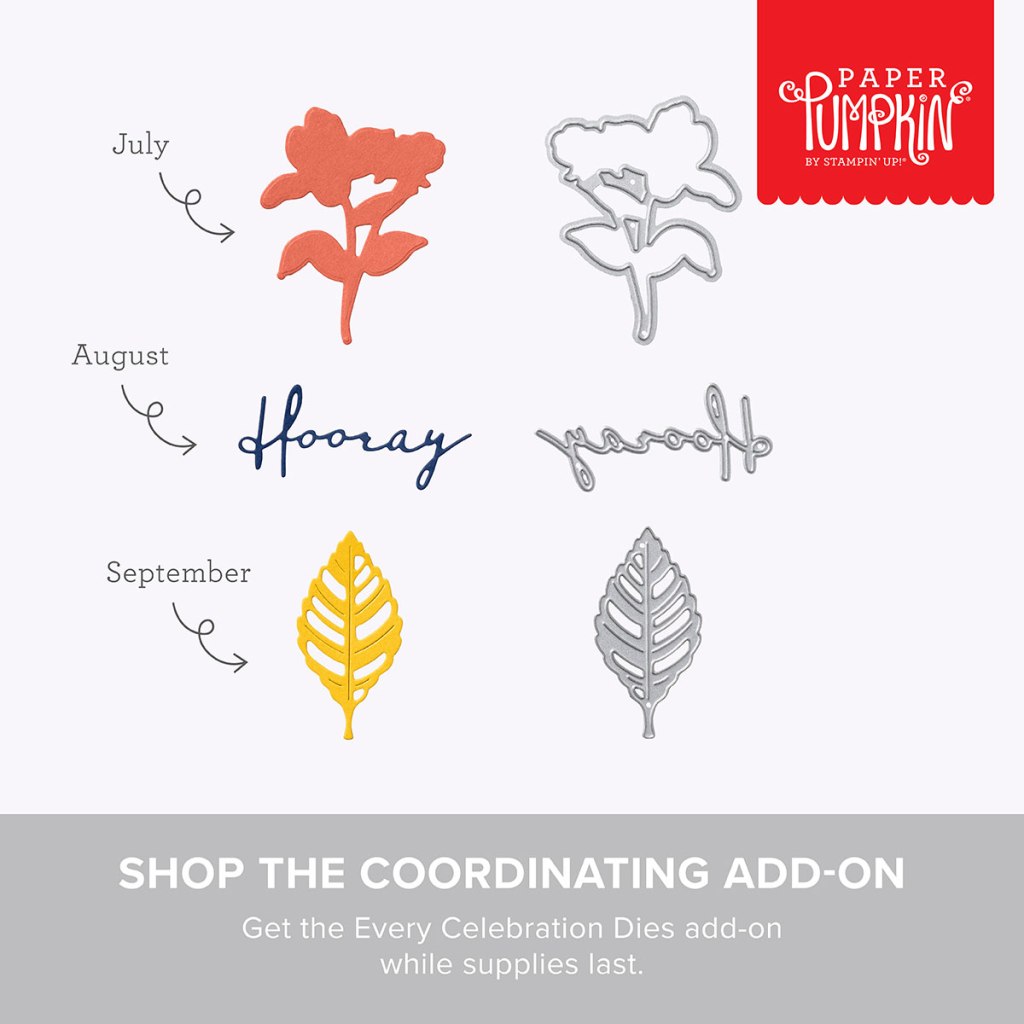
And the coordinating add-on is the Every Celebration dies – item #164991 for $12.
If you’re interested in subscribing to Paper Pumpkin, you can either sign up for a subscription where you are billed monthly for your kit or you can purchase a prepaid subscription in my Online Store. To see more information and to sign up for the monthly subscription click here. To see the options for prepaid subscriptions in my Online Store, click here.
Sign up deadline for the August 2024 kit is August 10, 2024. Note: Supplies may be limited toward the end of the subscription period.
Current Host Code: 37AE7ZXV
Use this host code when you order $50 or more and receive a Thank You gift from me! The free gift is your choice of any item currently available valued up to $10.00.
If your order is over $150, please do not use the host code since you’ll receive your own Host Dollars plus I’ll still send you the Thank You gift! This host code can be used by anyone, no club or commitment required. Let me know if you have any questions.
If you need any stamping supplies, I’d be very happy to be your Demonstrator. Just click on the Shop Now Button on the right side of the screen to go directly to my Online store or contact me if you have any questions. Happy Stamping!
Thanks for stopping by and have a great day!
Akiko
- Visit my online store here
- See the current Stampin’ Up! clearance rack specials here
- Earn FREE Stampin’ Up! products through my Wildflower Frequent Shopper Program – my way of saying thank you to my online frequent shopper customers.
- Have any questions? I’d be happy to help, click here to contact me.
Cardstock Cuts for this project:
- Highland Heather – 5-1/2″ x 8-1/2″ card base, scored at 4-1/4″, 4-1/4″ x 5-1/2″ (embossed background)
- Copper Clay – 3-1/4″ x 4-1/4″ (DSP mat)
- Basic White – 4″ x 5-1/4″ (inside panel), 1-3/4″ x 2-1/2″ (label)
- Splendid Autumn – 6″ x 6″ DSP – 3-1/8″ x 4-1/8″ (front panel), 1/2″ x 4″ (inside trim), 1-3/4″ x 2-1/2″ (label mat)
Stampin’ Up! products used in this project:
Product List")