Stampin’ Up! Toile Christmas for the Happy Inkin’ Thursday Blog Hop

Good Morning! Welcome to another Happy Inkin’ Thursday Blog Hop! I used the beautiful Stampin’ Up! Toile Christmas cling stamp set along with the Toile Tidings designer series paper to make a nostalgic Christmas Card. Here is my card:

We have a sketch challenge this week, and here is the sketch we are using:

I used the second largest circle in the Layering Circles dies to cut a circle in a panel of Garden Green card stock and then ran it through the Subtle embossing folder. I used the largest scalloped circle in the Layering Circles dies to cut a scalloped circle from Real Red card stock. I cut a circle in the middle of the scalloped circle with the second largest circle die to create a scalloped frame. I adhered the frame to the embossed panel with liquid glue. I added a strip of the striped Toile Tidings DSP to the card front and added a length of the Garden Green ribbon on top, securing it on the back.

I stamped the double banner sentiment from the Stampin’ Up! Toile Christmas in Garden Green on a panel of Very Vanilla and cut it out with the coordinating die. I adhered it to the panel with dimensionals. I tied another strip of the ribbon in a knot and adhered it to the panel with glue dots.

I cut a circle of the countryside Toile Tidings DSP with the largest circle of the Layering circles dies and attached it to a Thick Very Vanilla Card base with liquid glue. I was careful to select a portion that had an interesting scene, such as this with the children playing in front of the barn. I then adhered the embossed Garden Green panel to the card base with dimensionals, so that the little scene would show through behind the frame. I finished off the card front with 3 red glitter enamel dots.

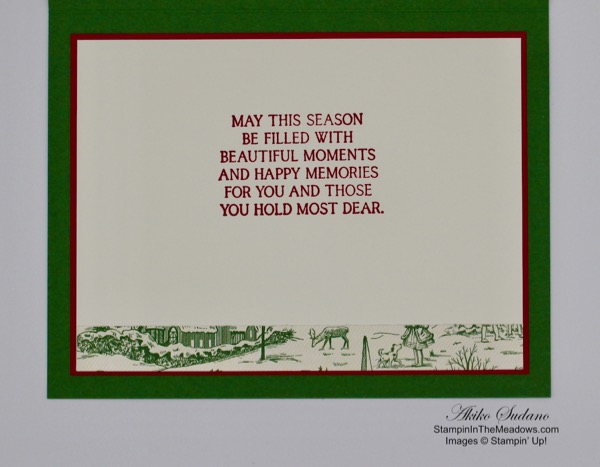
On the inside of the card, I stamped the sentiment from the Stampin’ Up! Toile Christmas stamp set using Garden Green ink on a panel of Very Vanilla. I added a strip of the countryside Toile Tidings DSP to the bottom of the panel and stamped the flourish in Real Red ink under the sentiment. I added a Garden Green mat and adhered it to the inside of the card. I adhered a panel of the countryside Toile Tidings DSP to the flap of a Very Vanilla medium envelope with liquid glue and trimmed it with paper snips.

The nostalgic images of the countryside Toile Tidings DSP bring back memories of winter fun and Christmases past. They are sure to make this Christmas Merry and Bright!

On with the Hop! Click the Next button below to visit Karen Ksenzakovic’s blog.

And just in case you get lost along the way, here’s a list of the team members participating in the hop today:


We are in the middle of Stampin’ Up! Online Extravaganza. See my Stampin’ Up! Promotions page for details.


November 16 – 30 Host Code: 462PVWKY

Use this host code when you order $50 or more and receive a free gift from me!  The gift is your choice of any item valued up to $10.00 in the 2019-20 Annual Catalog or in the 2019 Holiday Catalog!  That includes some of the Host Exclusive stamp sets!

If your order is over $150, please do not use the host code since you’ll receive your own Host Dollars plus I’ll send you the free gift!  This host code can be used by anyone, no commitment required.  Let me know if you have any questions.


If you need any stamping supplies, I’d be very happy to be your Demonstrator.  Just click on the Shop Now button on the right side of the screen to go directly to my online store or contact me if you have any questions.  Happy Stamping!

Thanks for visiting!

Akiko

  • Visit my online store here
  • See the current Stampin’ Up! clearance rack specials here
  • Earn FREE Stampin’ Up! products through my Wildflower Frequent Shopper Program – my way of saying thank you to my frequent shopper online customers.
  • Sign up for my weekly newsletter here
  • Have any questions? I’d be happy to help, click here to contact me.

Cardstock Cuts for this project:

  • Thick Very Vanilla – 4 1/4″ x 11″
  • Real Red – 3 1/2″ x 3 1/2″
  • Very Vanilla – 3 5/8″ x 4 7/8″ (inside), 2 1/4″ x 3 1/2″ (label)
  • Garden Green – 4″ x 5 1/4″ (front), 3 3/4″ x 5″ (inside mat)
  • Toile Tidings DSP – 3 1/2″ x 3 1/2″ (front), 1/2″ x 3 5/8″ (inside), 2 1/2″ x 6″ (envelope flap), 3/4″ x 3 3/4″ (red stripe)

Stampin’ Up! products used in this project:


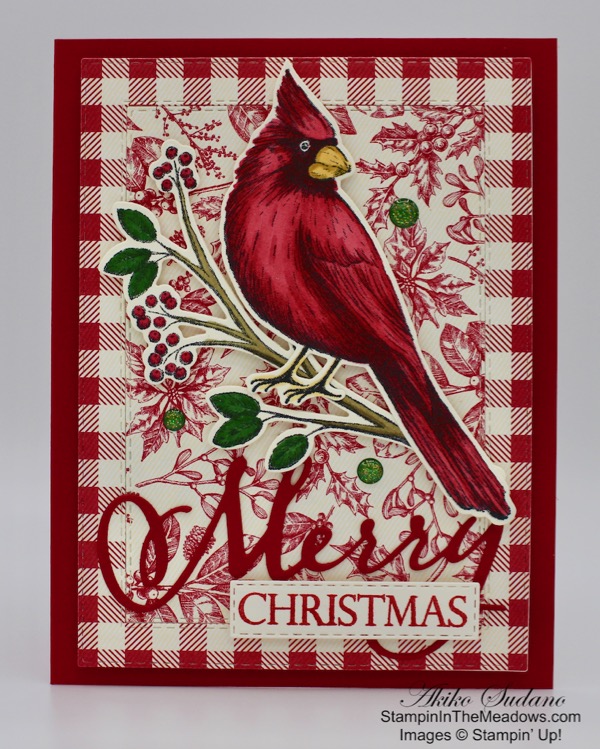
Stampin’ Up! Toile Christmas Cardinal Card

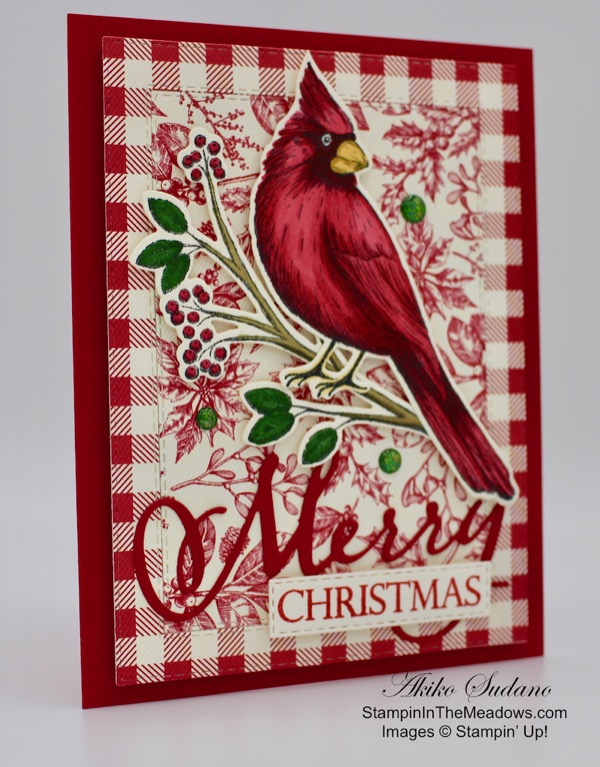
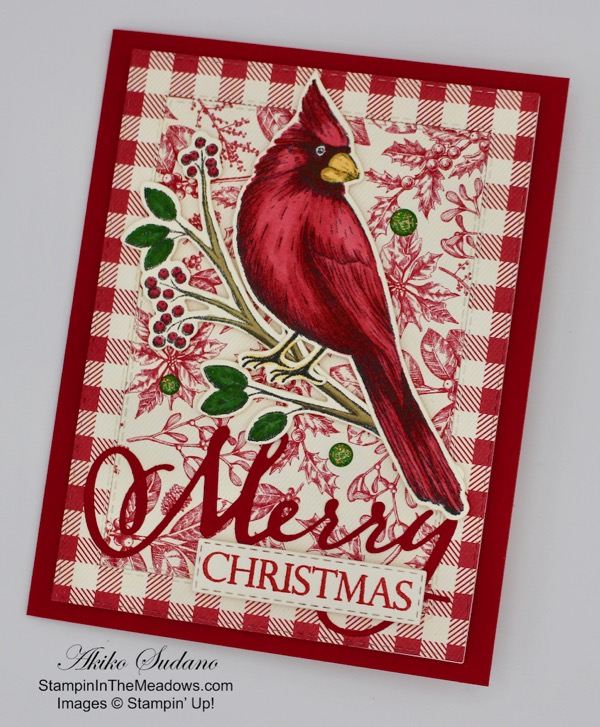
Happy Friday Morning! Today I am sharing a Christmas Card made with the Stampin’ Up! Toile Christmas cling stamp bundle along with the Merry Christmas to All photopolymer stamp set and Merry Christmas dies. Cardinals bring cheer during snowy winters and I’ve loved making cardinal Christmas cards through the years. This is the first cardinal that I’ve had that has a coordinating die, so I think it’s really special. You can find the supplies used to create this card at the bottom of my post along with the sizes of cardstock used.

I started by making a framed background using two of the papers in the Toile Tidings designer series paper and the stitched rectangles dies. I used the checked Real Red paper on the outside that I cut with the largest stitched rectangle die and the Real Red leaves and berries paper on the inside that was cut with the third largest die. I adhered both of these to a Very Vanilla panel that I cut out with the largest stitched rectangle die so that I would have a stronger background panel.

I die cut the Merry word from the Merry Christmas Dies and adhered it to the bottom of the framed panel with the fine tipped glue pen. I adhered the panel to the front of a Real Red card base with dimensionals. I stamped the Christmas greeting from the Merry Christmas To All stamp set in Real Red ink on a Very Vanilla scrap and cut it out with the long small stitched rectangle die. I used the two-step partial die cutting technique so that it would be cut close. I attached the word to the card under the Merry die cut.

I stamped the cardinal and long branch from the Stampin’ Up! Toile Christmas stamp set in Memento Tuxedo Black ink on Very Vanilla card stock. I colored the cardinal with the Real Red and So Saffron Stampin’ Blends. I also used my Crushed Curry Stampin’ Write Marker to give the cardinal’s beak some shadow (I’m going to get the Mango Melody Stampin’ Blends next, so I can use this color next time). I colored the branch with the Soft Suede and Real Red Stampin’ Blends and Garden Green Stampin’ Write Marker (I hope they come out with Garden Green Stampin’ Blends soon). I cut the cardinal and branch out with the coordinating dies and popped them on the card front with dimensionals. I finished off the card front with three green glitter enamel dots.

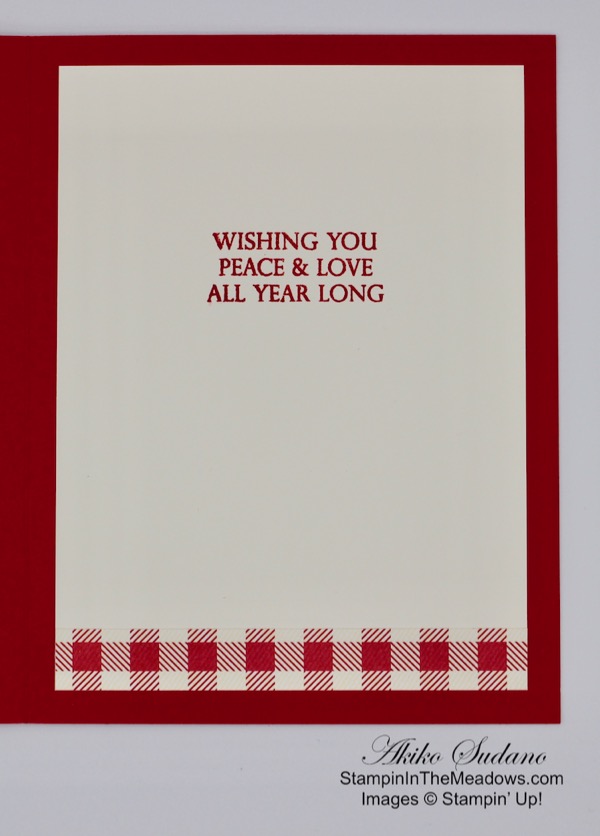
On the inside of the card, I stamped the greeting from the Merry Christmas To All stamp set in Real Red ink on a panel of Very Vanilla. I added a strip of the checked Toile Tidings designer series paper to the bottom.

I think I’m getting spoiled because coloring is so easy with the Stampin’ Blends. I used to use my Stampin’ Write Markers and stamp pads with the Blender pen or Aqua Painters to get a blended look when coloring. That was more cost effective and the effect was also beautiful. I will do this with a project next week.

I hope you like cardinal cards at Christmas! I’ll be on the lookout for these pretty birds as I drive around this weekend. I hope you have a great one!

Akiko


October 15 – 31 Host Code: 3KQUKV9U

Use this host code when you order and receive a free gift from me!  If your order is over $150, please do not use this code, but you’ll still get the free gift.  The free gift is your choice of any item valued up to $10.00 in the 2018-19 Annual Catalog or in the 2019 Occasions Catalog!  That includes some of the Host Exclusive stamp sets!


If you need any stamping supplies, I’d be very happy to be your Demonstrator.  Just click on the Shop Now button on the right side of the screen to go directly to my online store or contact me if you have any questions.  Happy Stamping!

  • Visit my online store here
  • See the current Stampin’ Up! clearance rack specials here
  • Earn FREE Stampin’ Up! products through my Wildflower Frequent Shopper Program – my way of saying thank you to my frequent shopper online customers.
  • Have any questions? I’d be happy to help, click here to contact me.

Cardstock Cuts for this project:

  • Real Red – 5 1/2″ x 8 1/2″, 2 1/4″ x 3 3/4″
  • Very Vanilla – 4″ x 5 1/4″, 3 3/4″ x 5″, 1″ x 2 1/2″, 2 1/2″ x 5″, 2 1/2″ x 4 1/2″
  • Toile Tidings DSP (checked) – 4″ x 5 1/4″, 1/2″ x 3 3/4″
  • Toile Tidings DSP (leaves and berries) – 4 3/4″ x3 1/4″

Stampin’ Up! products used in this project:


Stampin’ Up! Toile Christmas Card

Good Morning! Today I have a Christmas card made with the Stampin’ Up! Toile Christmas bundle. This is a simple card that uses the vintage images in the Toile Tidings Designer Series Paper as the focal point. You can find the supplies used to create this card at the bottom of my post along with the sizes of cardstock used.

I cut a panel of the Stampin’ Up! Toile Tidings designer series paper using the largest of the Stitched Rectangles dies and adhered it to a Real Red mat. I attached them to a Garden Green card base with dimensionals.

Using the Stamparatus, I stamped the Christmas Wishes banner greeting from the Stampin’ Up! Toile Christmas stamp set using the Real Red and Garden Green Stampin’ Write markers. The Stamparatus allowed me to use stamp the image in the same place twice. The first time was with the Real Red marker coloring the letters and the second time was with the Garden Green marker coloring the banner. I cut the banner out using the coordinating die from the Christmas Cardinal dies. I cut two of the medium leaf branches and one of the small leaf branches from the Christmas Cardinal dies and arranged and adhered them behind the label with liquid glue. I attached the label to the card front using dimensionals and added some red glittered enamel dots.

I stamped the sentiment from the Stampin’ Up! Toile Christmas stamp set in Real Red ink on a panel of Very Vanilla. I adhered a strip of the Toile Tidings DSP to the bottom of the panel and adhered it to a Real Red mat before attaching it to the inside of the card.

This is a simple and pretty nostalgic Christmas card. I hope you like it. Thanks for visiting!

Akiko


October 1 – 15 Host Code: 44YKETNJ

Use this host code when you order and receive a free gift from me!  If your order is over $150, please do not use this code, but you’ll still get the free gift.  The free gift is your choice of any item valued up to $10.00 in the 2018-19 Annual Catalog or in the 2019 Occasions Catalog!  That includes some of the Host Exclusive stamp sets!


Join us for the Inkin Krew World Card Making Day Facebook Event!

The Inkin’ Krew is celebrating World Card Making Day on Oct 5 with a Facebook Live Event. Members of our team will be presenting live card making demonstrations throughout the day. In addition we will have fun games and give aways. You can join us NOW at Inkin’ Krew WCMD and join the fun. as we warm up for the big day.


If you need any stamping supplies, I’d be very happy to be your Demonstrator.  Just click on the Shop Now button on the right side of the screen to go directly to my online store or contact me if you have any questions.  Happy Stamping!

  • Visit my online store here
  • See the current Stampin’ Up! clearance rack specials here
  • Earn FREE Stampin’ Up! products through my Wildflower Frequent Shopper Program – my way of saying thank you to my frequent shopper online customers.
  • Have any questions? I’d be happy to help, click here to contact me.

Cardstock Cuts for this project:

  • Garden Green – 5 1/2″ x 8 1/2″, 2″ x 3″
  • Real Red – 3 7/8″ x 5 1/4″, 3 3/4″ x 5″
  • Very Vanilla – 3 5/8″ x 4 7/8″, 2″ x 4″
  • Toile Tidings DSP – 4″ x 5 1/4″, 1/2″ x 4 7/8″

Stampin’ Up! products used in this project:

Product List