Stampin’ Up! Traditional Labels for the Happy Inkin’ Thursday Blog Hop

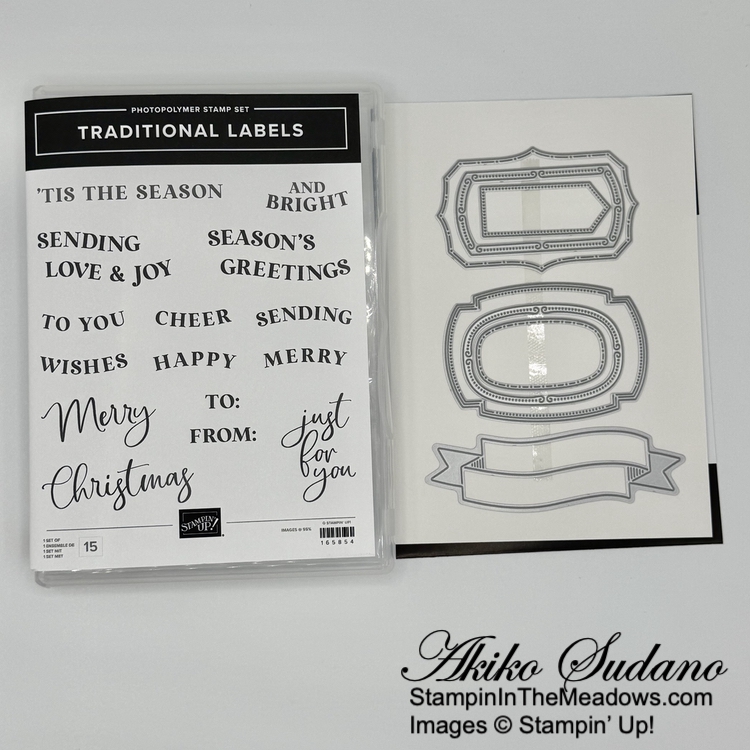
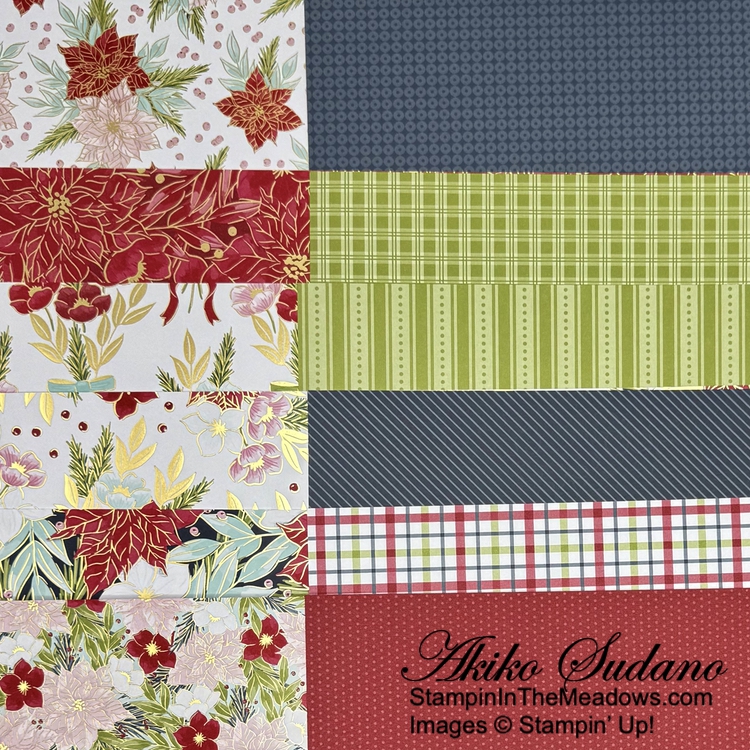
Good Morning and welcome to the Happy Inkin’ Thursday Blog Hop! The Stampin’ Up! Traditional Labels bundle has wonderful sentiments for Christmas cards and tags and goes beautifully with the Christmas Greenery bundle and Traditions of Christmas specialty designer series paper. This is my go to for this year’s Christmas cards and I’ve been busy trying to get them done. You can find the supplies I used along with card stock cuts at the bottom of my post.

We have a color challenge this week that picks up nicely with the Traditions of Christmas DSP:

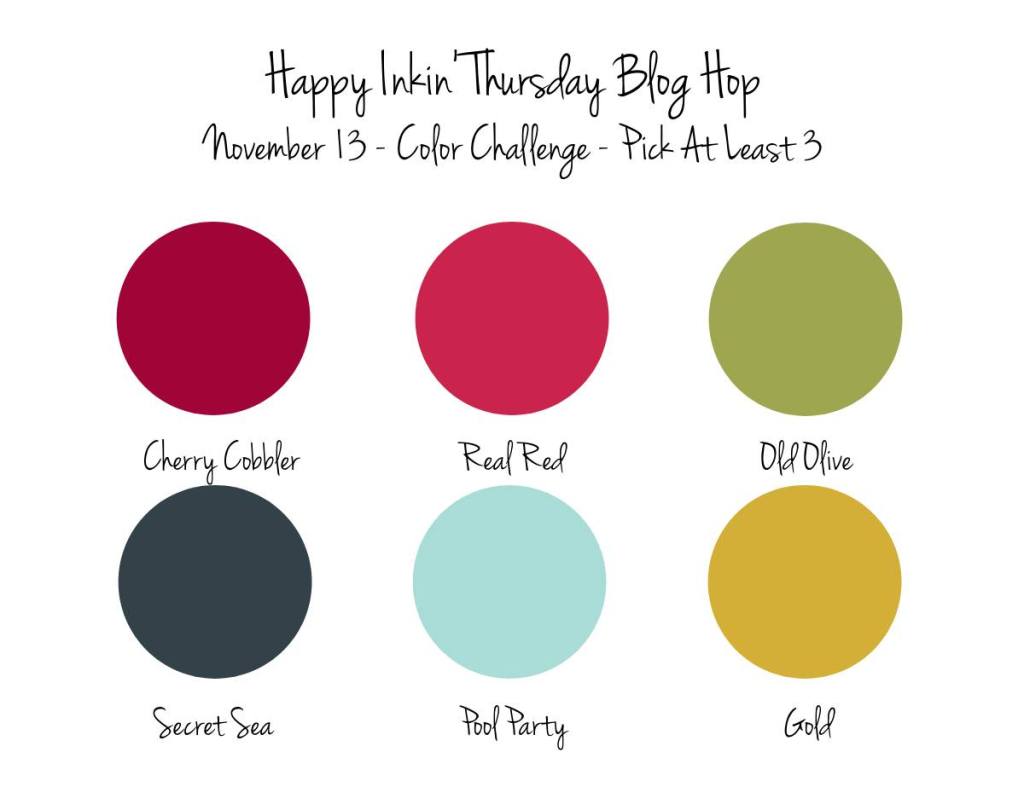
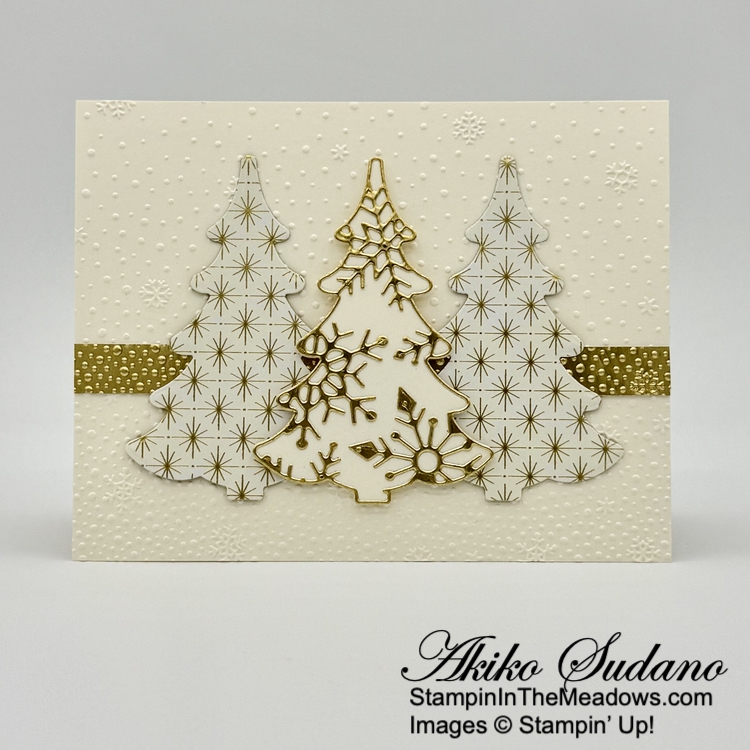
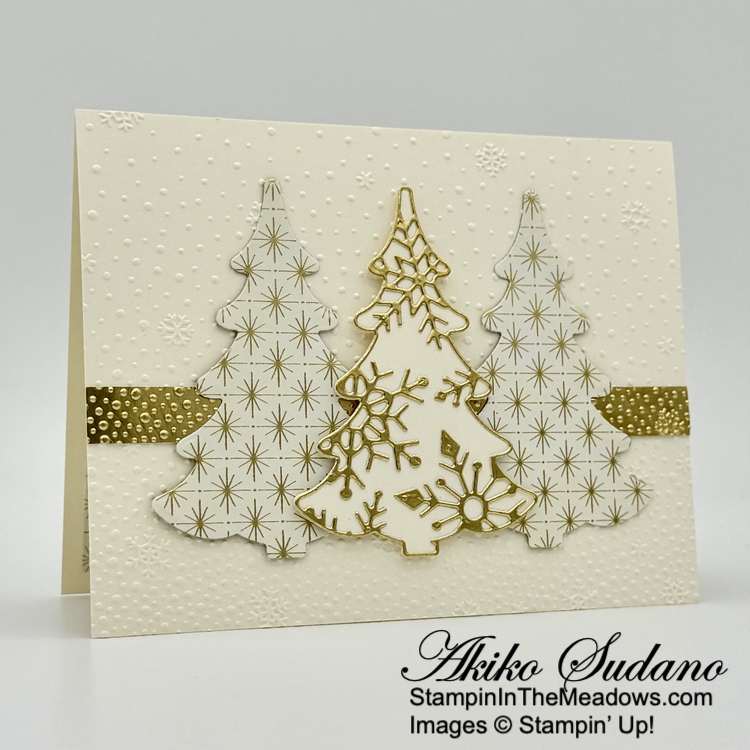
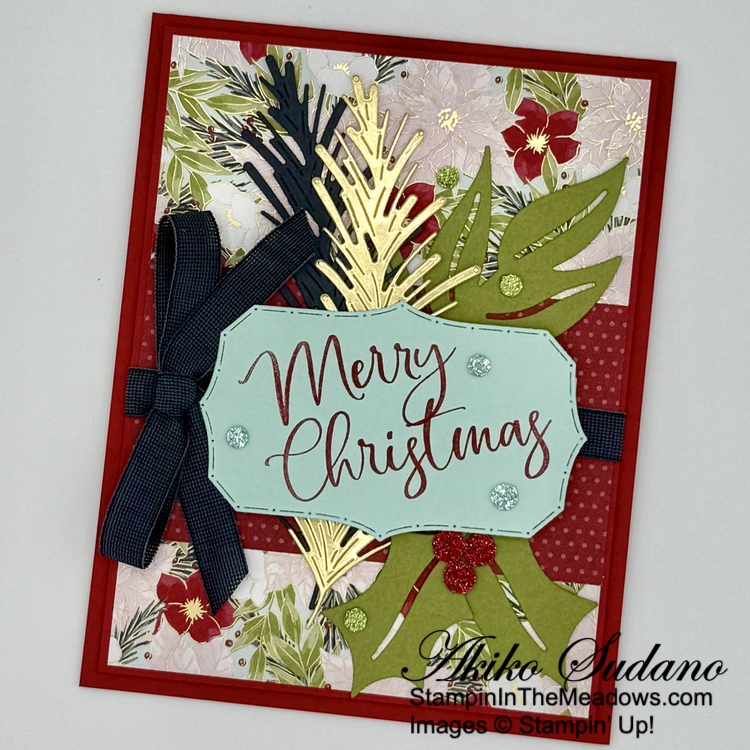
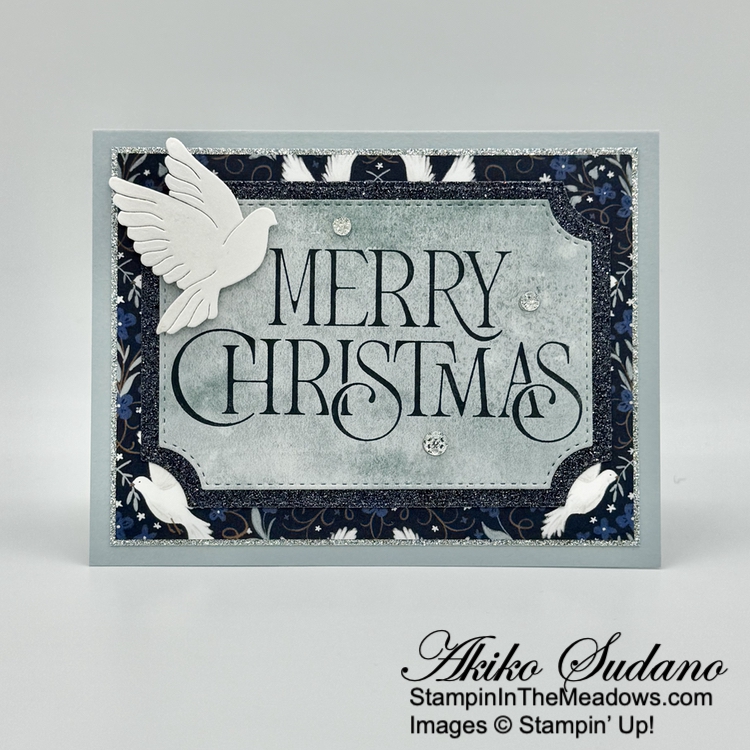
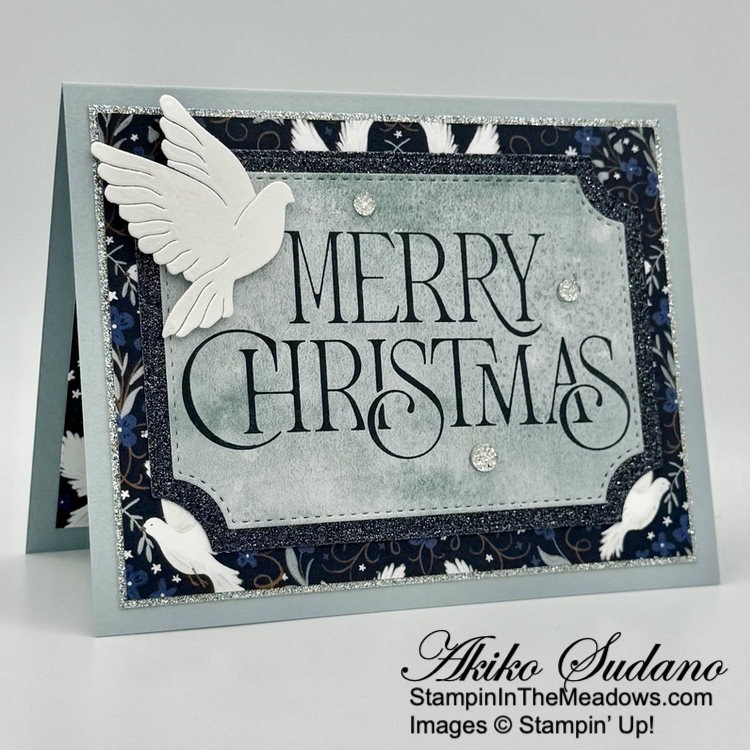
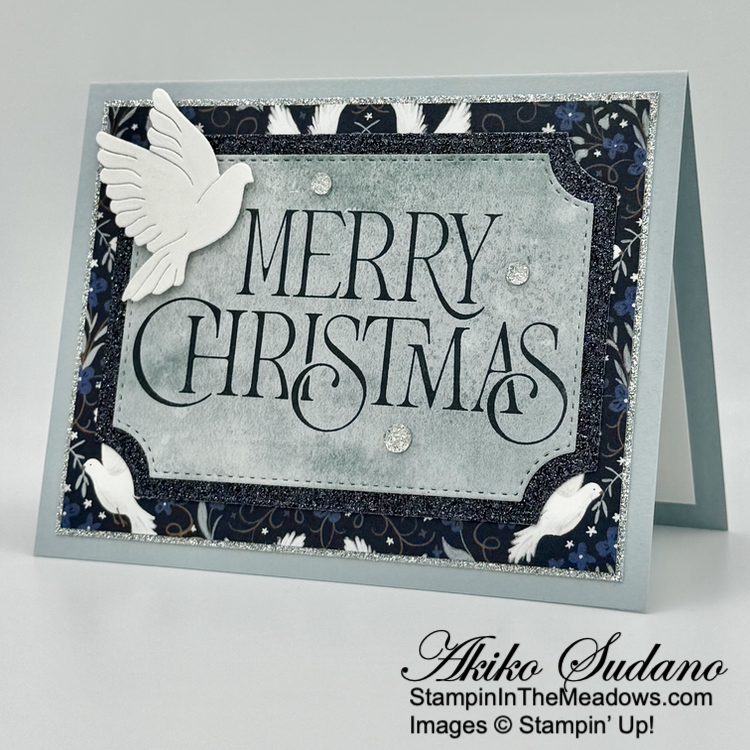
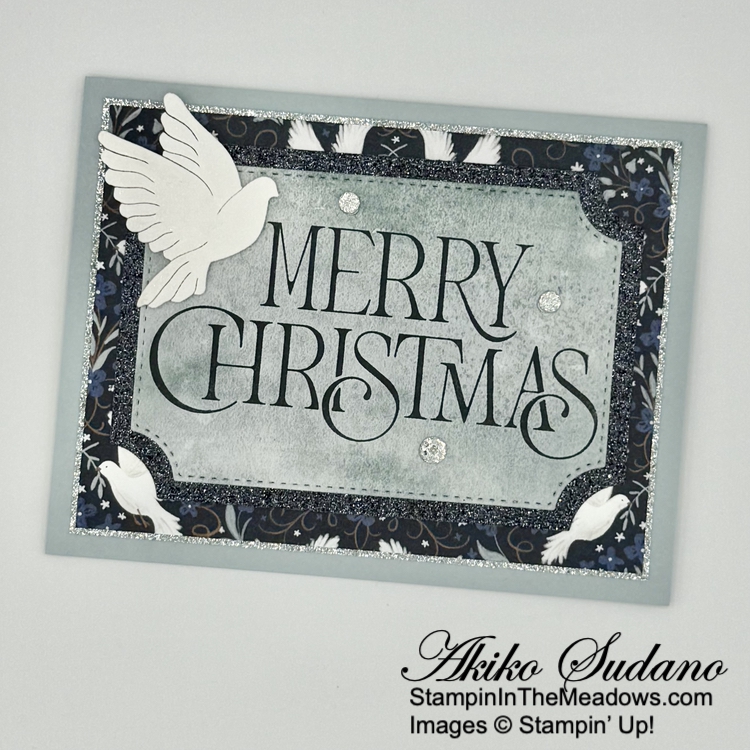
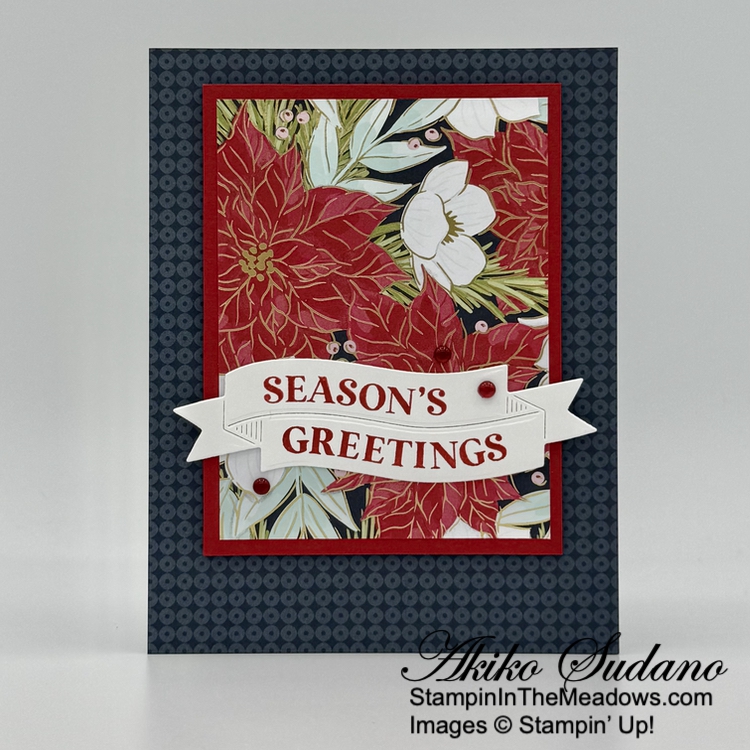
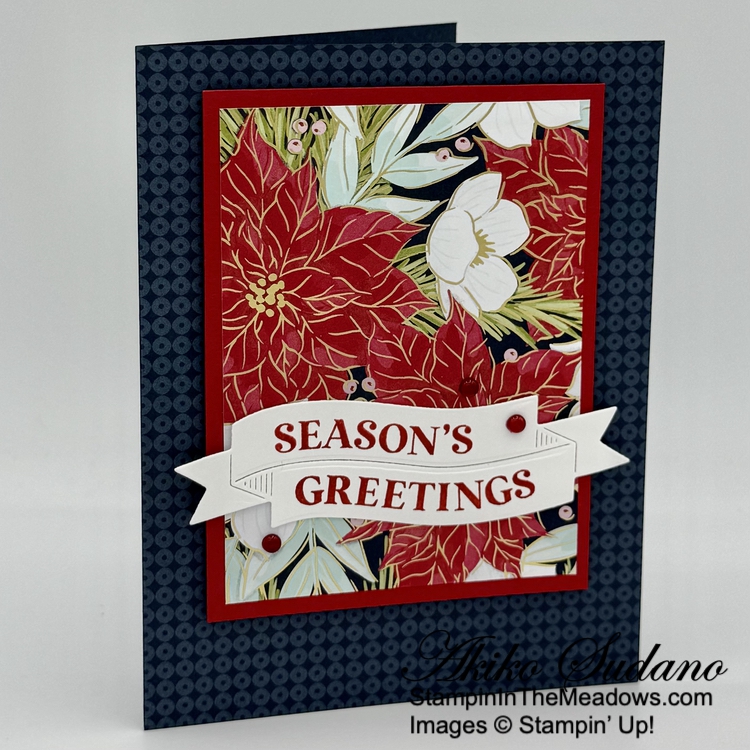
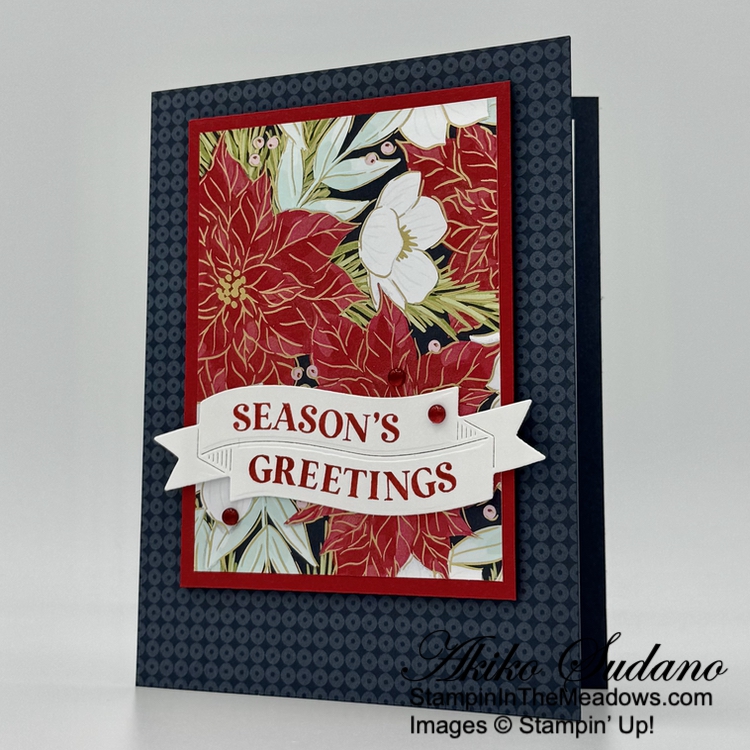
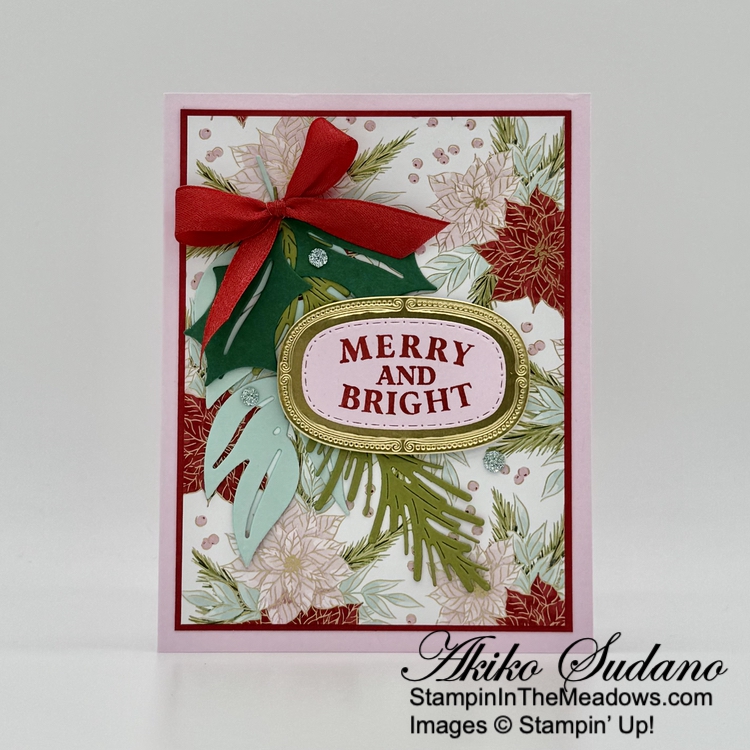
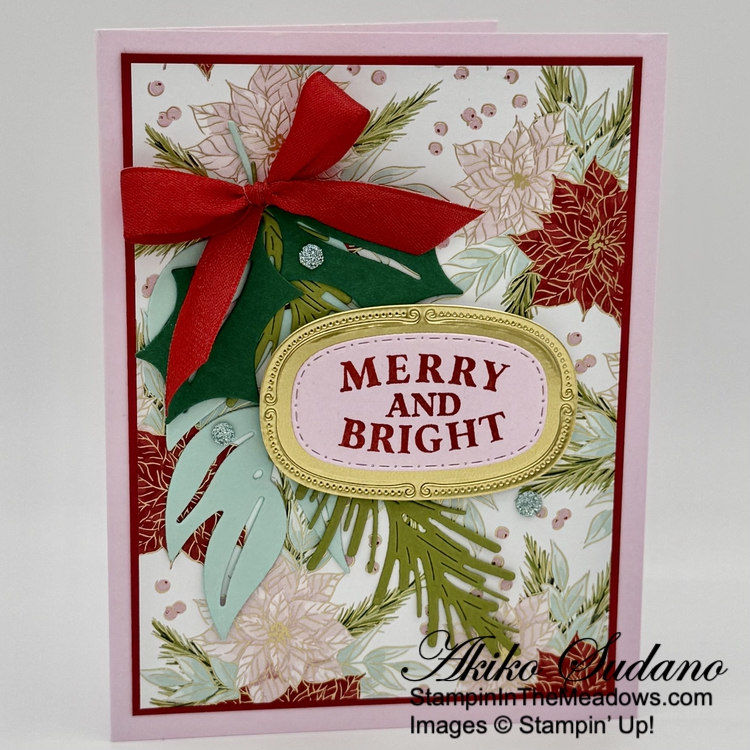
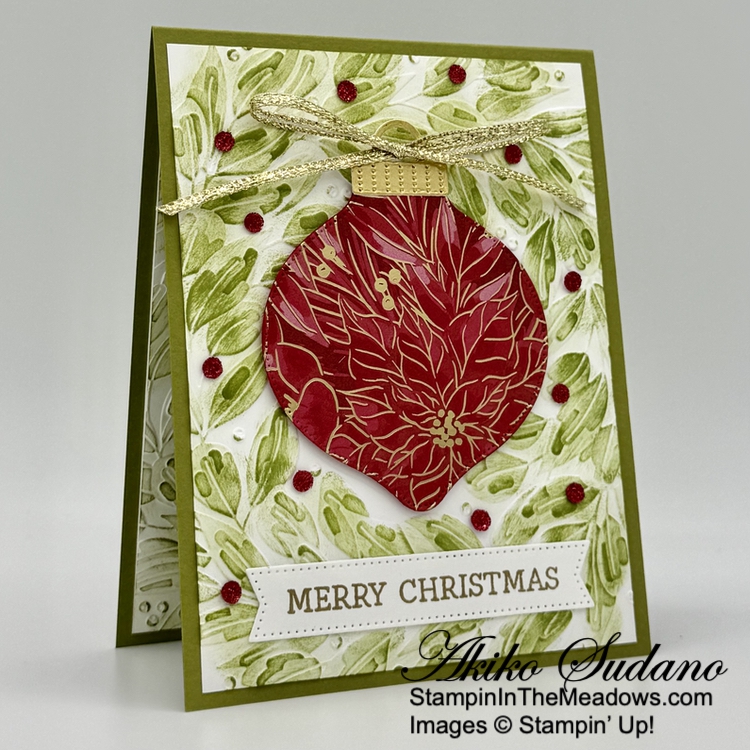
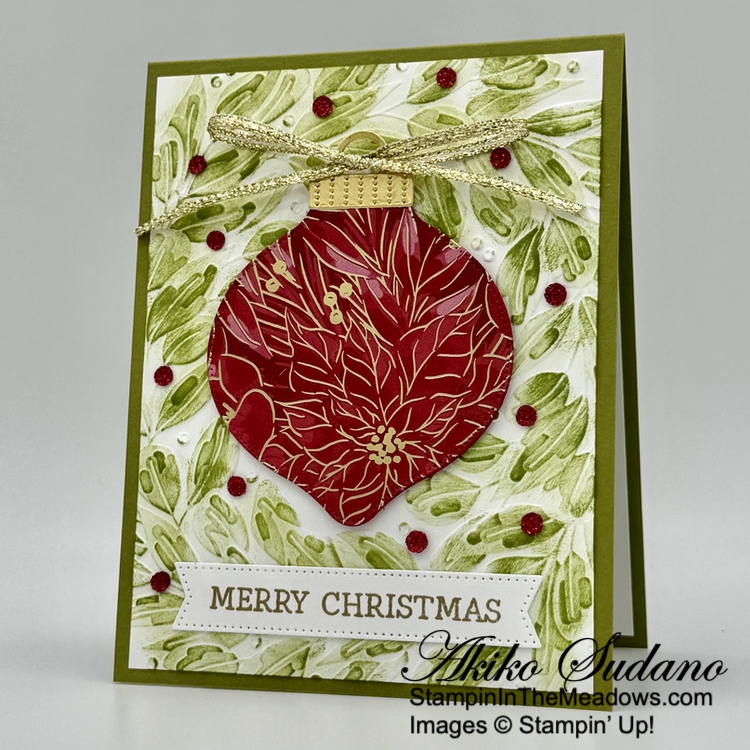
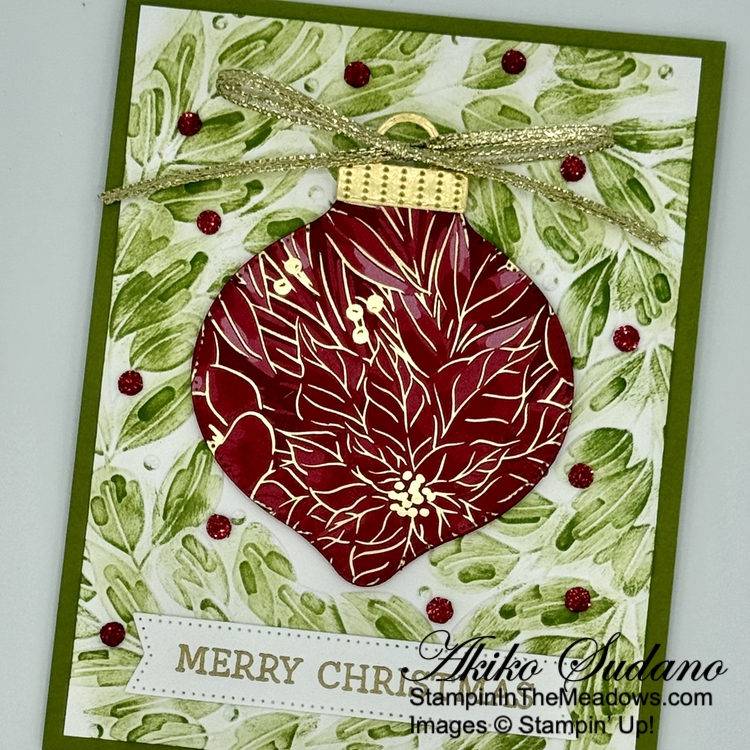
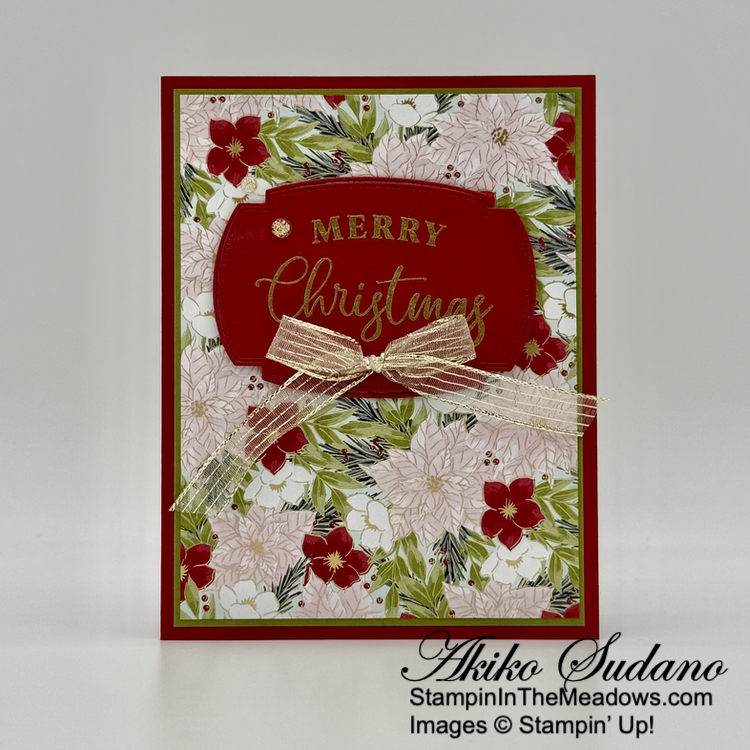
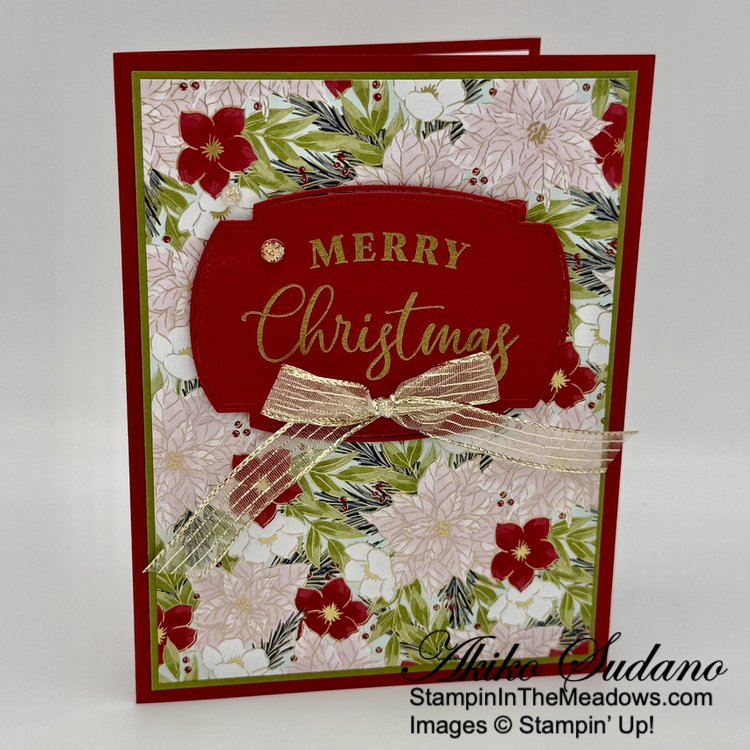
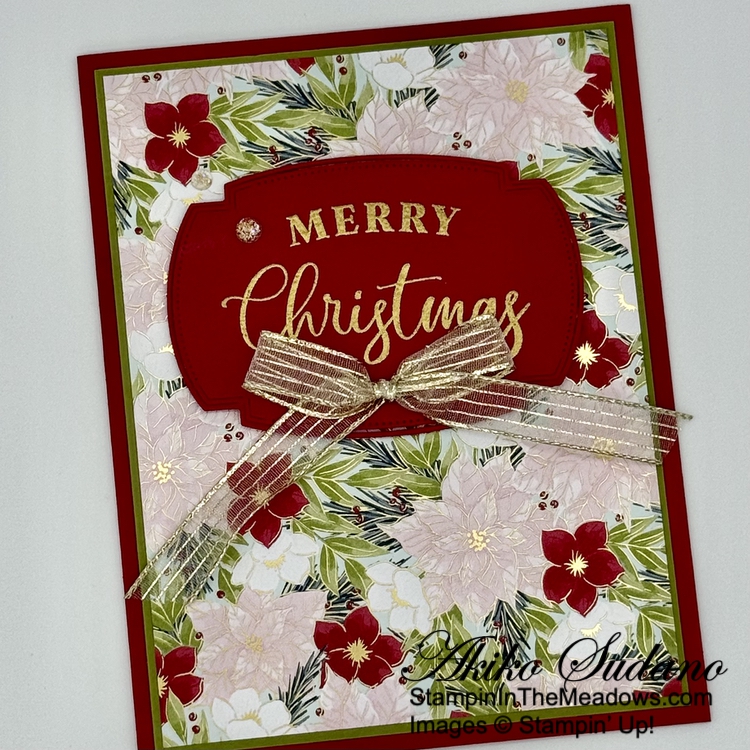
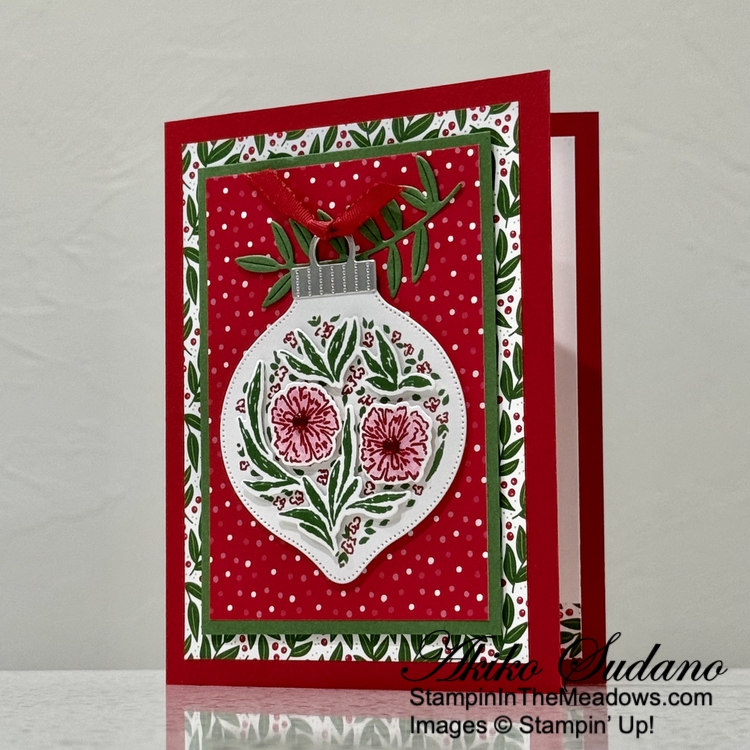
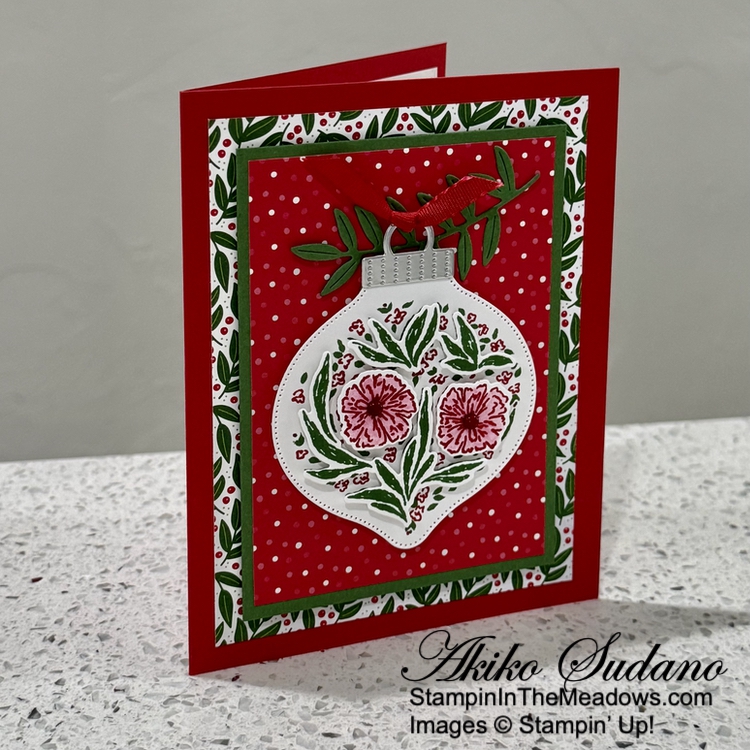
Adhere a strip of Traditions of Christmas DSP to another panel and adhere them both to a Real Red Mat. Wrap the layered panel with Secret Sea ribbon and make a bow on the side. Adhere the panel to the front of a Real Red card base.

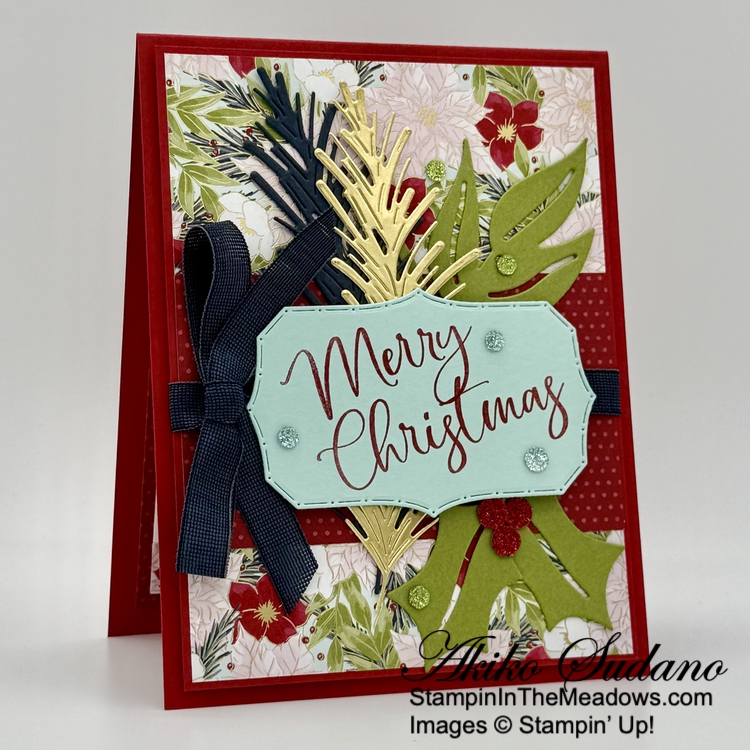
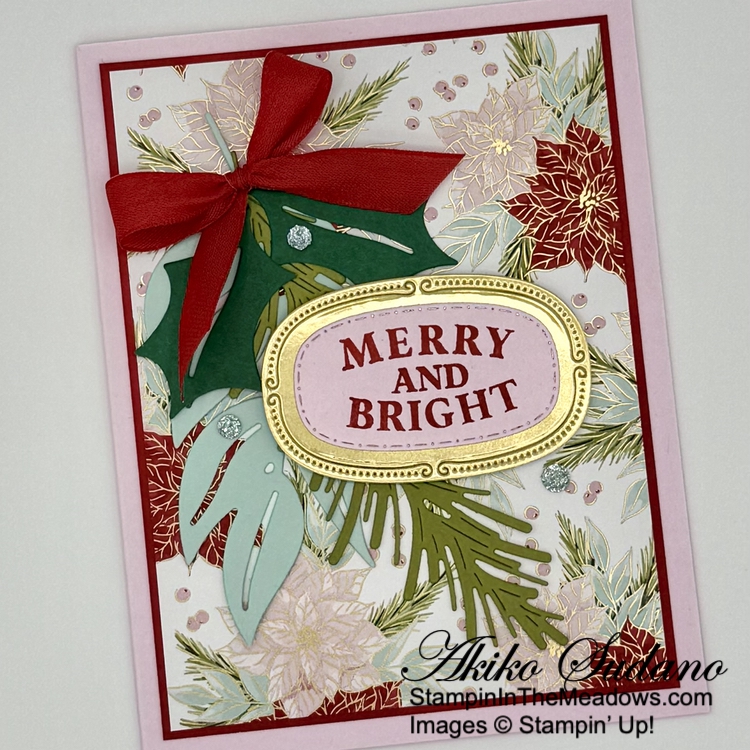
Cut the big leaf and two holly leaves from the Christmas Greenery dies from Old Olive and adhere them to the card with glue dots. Cut the pine sprig from Secret Sea and gold foil sheets and adhere them to the card with glue dots.

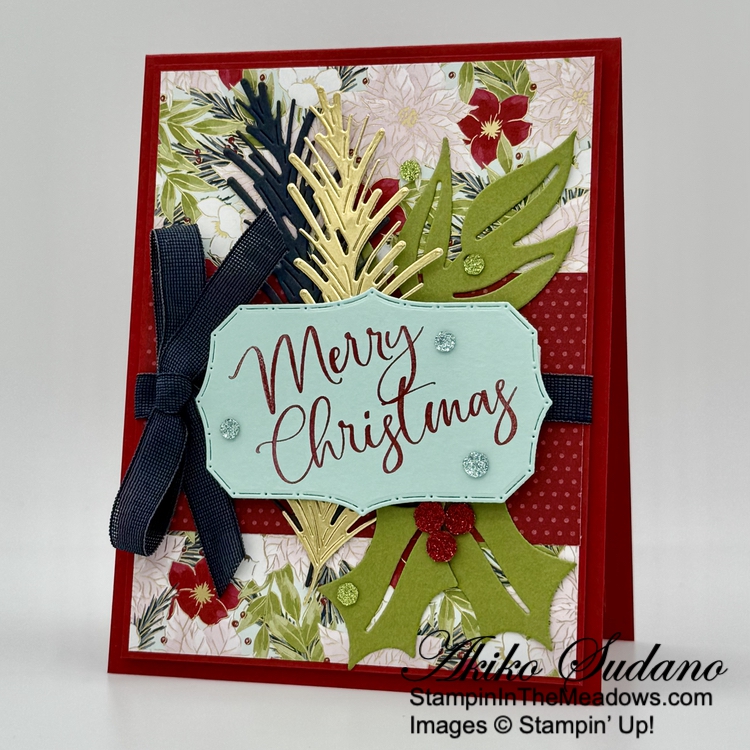
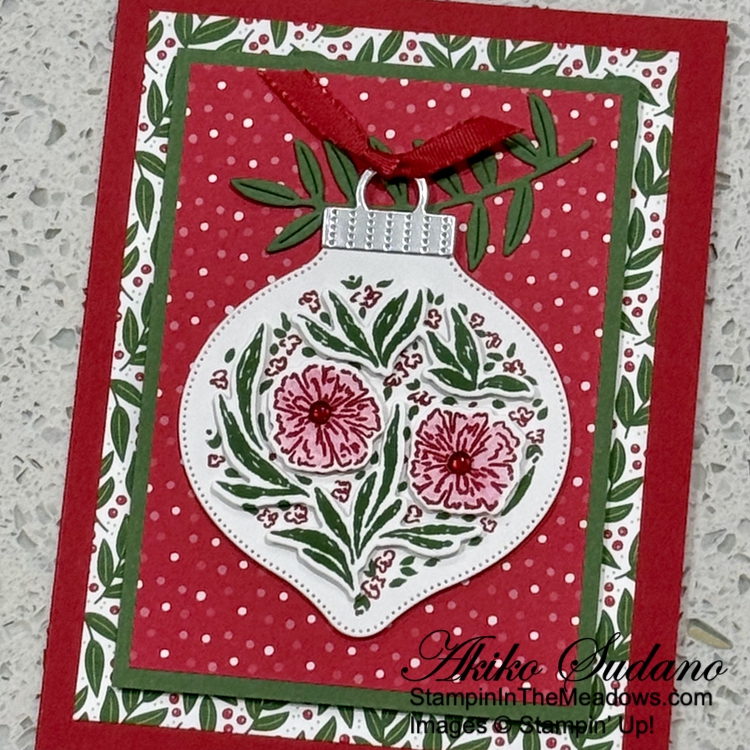
Stamp the sentiments from the Stampin’ Up! Traditional Labels stamp set using Real Red ink on Pool Party and cut it out with the large label die. Adhere the label to the card using dimensionald and finish with sparkly sequins.

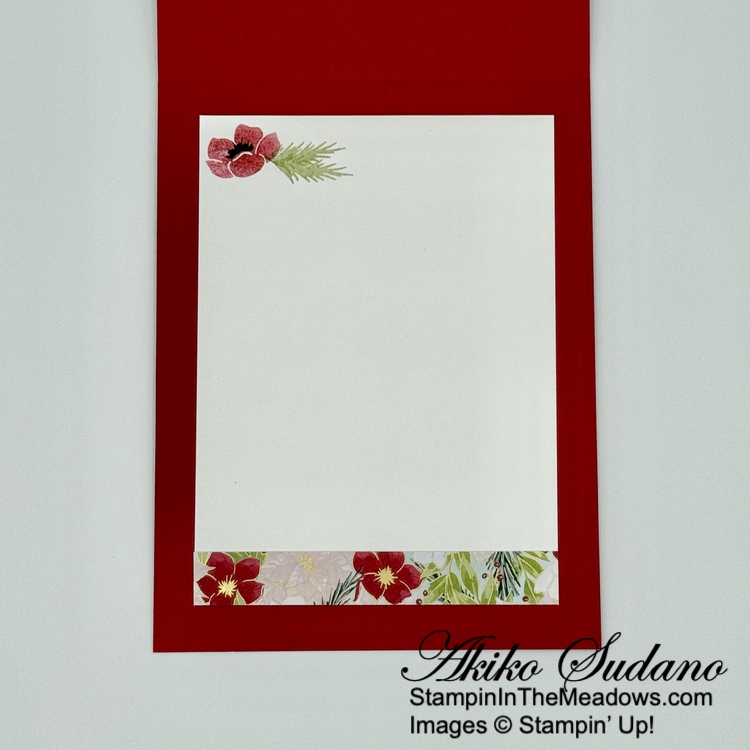
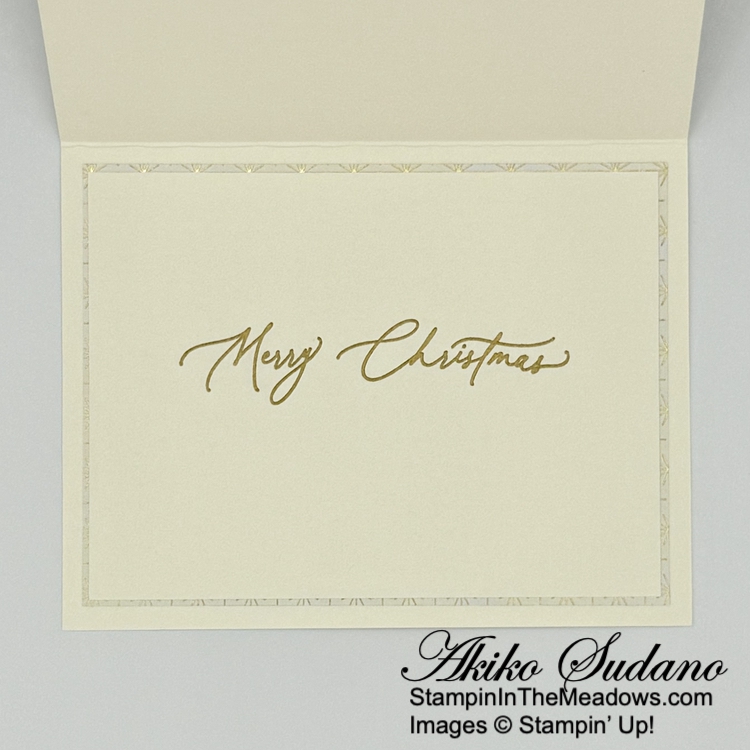
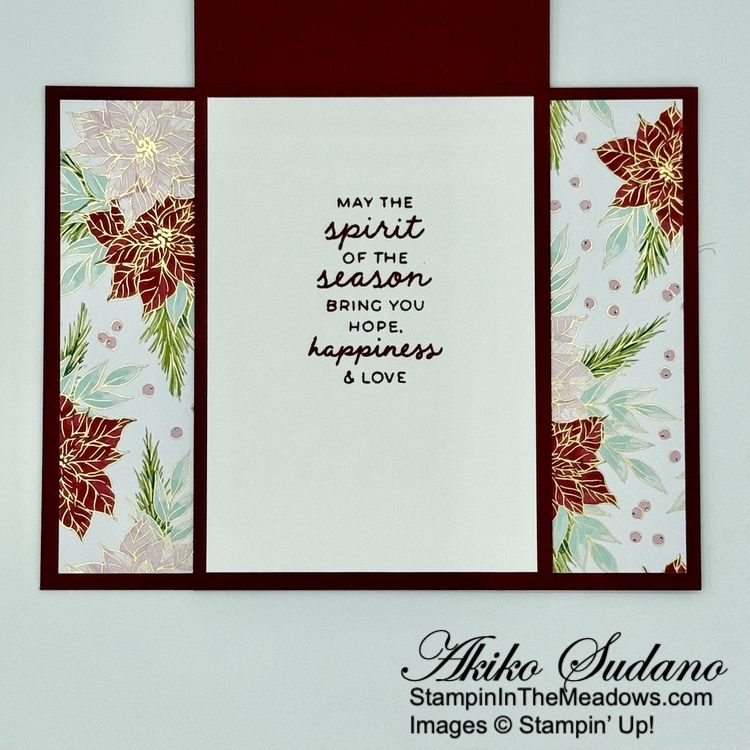
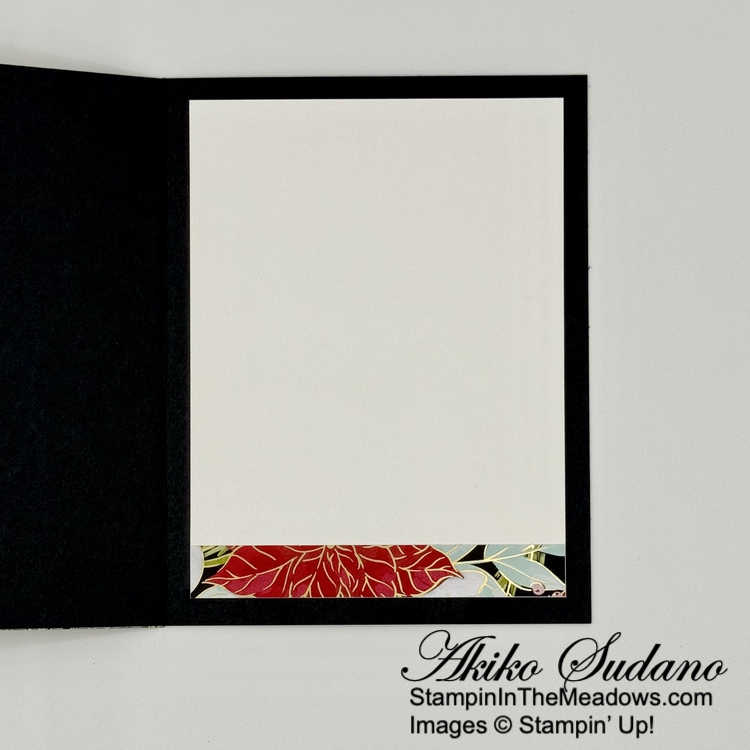
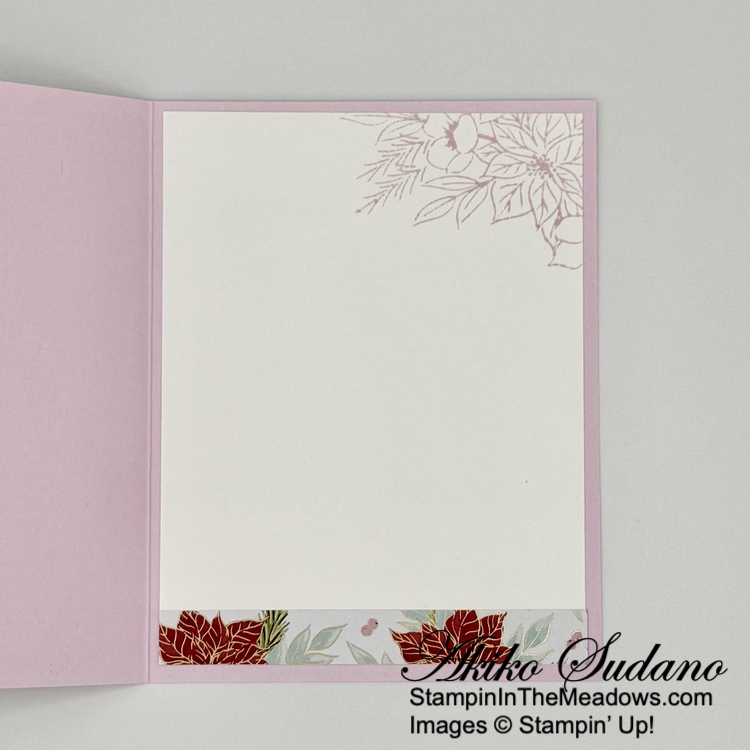
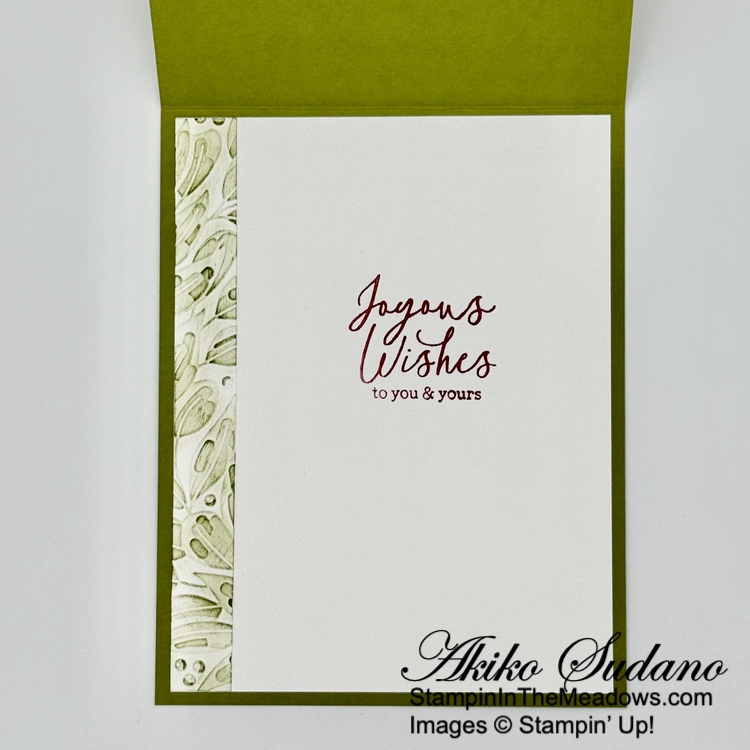
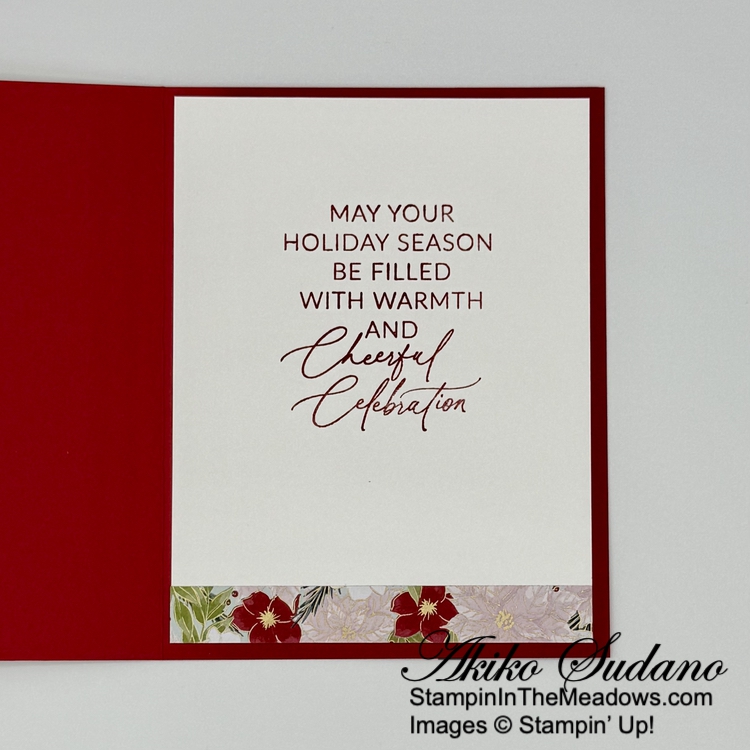
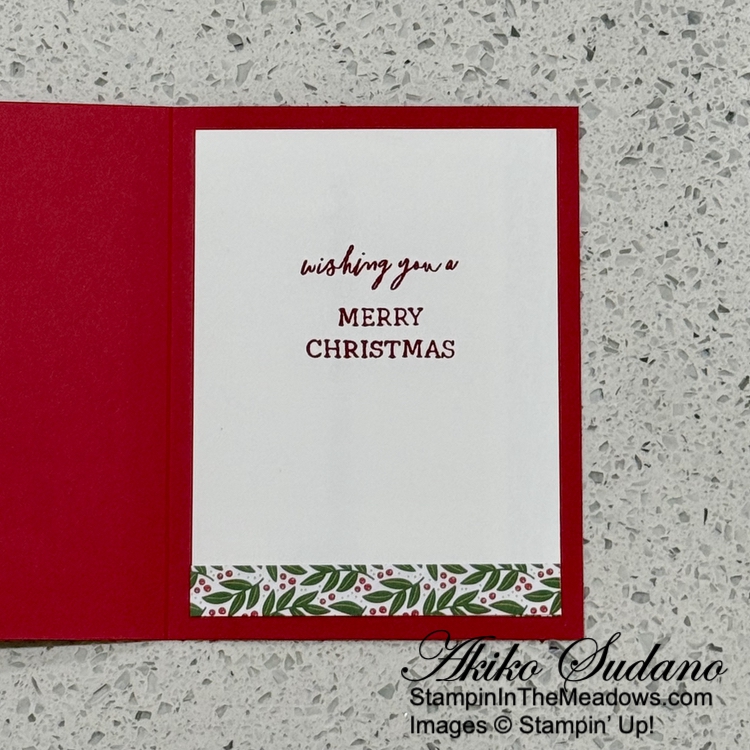
For the inside, stamp the flower and pine branch from the Christmas Greenery stamp set stamped off Real Red, Secret Sea and Old Olive inks in the corner of a Basic White panel. Trim the bottom with DSP and adhere the panel to the inside of the card with Stampin’ Seal.

This card is a bit thick because of the bow, so I will probably tuck it into a gift package or give it directly to the recipient rather than put it in the mail. But I’ve made lots of flat, mailable, beautiful Christmas cards with the Stampin’ Up! Traditional Labels bundle and Traditions of Christmas DSP, so no one will be missing out. Making Christmas cards is one of my favorite parts of stamping and using these beautiful products makes it a big pleasure!

On with the Hop! Click on the Next Blog button to move forward to see the beautiful project Tara Carpenter has created.

If you get lost along the way, here are the participants for the hop:

Thanks for stopping by and Happy Stamping!

Akiko


Cardstock Cuts for this project:

  • Real Red – 4-1/4″ x 11″ card base, scored at 5-1/2″, 4″ x 5-1/4″ (DSP mat)
  • Old Olive – 3″ x 5-1/2″ (die cut leaves)
  • Secret Sea – 2″ x 4-3/4″ (die cut pine sprig)
  • Pool Party – 2-1/4″ x 3-1/2″ (label)
  • Gold Foil – 2″ x 4-3/4″ (die cut pine sprig)
  • Basic White – 3-3/4″ x 5″ (inside panel)
  • Traditions of Christmas specialty DSP – 3-7/8″ x 5-1/8″ (front background), 2-1/4″ x 3-7/8″ (front stripe), 1/2″ x 3-3/4″ (inside trim)

Stampin’ Up! products used in this project:

Stampin’ Up! Jolly Holly with Traditions of Christmas for the Inkin’ Krew Blog Hop

Good Morning! Welcome to the November Inkin’ Krew Team Blog Hop! The theme for this month’s hop is “Merry Christmas/Happy Holidays” and I used the sweet Christmas sentiments from the Stampin’ Up! Jolly Holly stamp set with the beautiful Traditions Of Christmas specialty designer series paper to make a fun fold Christmas Card. You can find the supplies I used along with card stock cuts at the bottom of my post.

Adhere a panel of Traditions of Christmas specialty designer series paper to the flat card base. Fold, burnish and adhere the mini card base to the flat card base and adhere another panel of DSP to the front.

Cut a panel of Old Olive Gathering Together specialty DSP with the sixth largest Everyday Arches dies and a panel of gold foil with the next largest die. Adhere the arches together with liquid glue and adhere it to the front of the mini card.

Use the Christmas Greenery dies to cut a floral bouquet from the Traditions of Christmas DSP and two additional panels of Basic White. Adhere the three die cut bouquets together with liquid glue, giving you a thicker bouquet. Adhere the bouquet to the mini card. This raises the pretty bouquet up a bit making it stand out a little more.

Stamp the small sentiments from the Stampin’ Up! Jolly Holly stamp set using Cherry Cobbler ink on a strip of Basic White. Trim the ends of the sentiment and adhere it to the mini card with dimensionals. Finish with three red sparkle sequins.

For the inside, stamp the sweet sentiment from the Stampin’ Up! Jolly Holly stamp set using Cherry Cobbler ink on Basic White and adhere the panel to the inside of the mini card with Stampin’ Seal. Aren’t the sentiments are perfectly scaled for the mini card?

It’s so easy to make elegant Christmas cards with the beautiful Traditions of Christmas specialty DSP and I’m so glad some of the designs can be cut out with the Christmas Greenery dies! And the Stampin’ Up! Jolly Holly stamp set has a great set of holiday sentiments and images for cards and tags. I’m using it a lot as I work to finish my Christmas cards this month.

On With The Hop! Click on the Next Blog button to move forward to Ann Louise Fodgaard’s project.

If you get lost along the way, here are the participants for the hop:

Thanks for stopping by and have a great week!

Akiko

Cardstock Cuts for this project:

  • Cherry Cobbler – 4-1/4″ x 5-1/2″ card base, 3″ x 8-1/2″ mini card base, scored at 4-1/4″
  • Gold foil – 2-3/4″ x 4″ (large die cut arch)
  • Basic White – 2-3/4″ x 4″ (inside panel), two 2-1/4″ x 4″ panels (bouquet backing), 3/8″ x 3″ (label)
  • Traditions of Christmas specialty DSP – 4″ x 5-1/4″ (background), 2-3/4″ x 4″ (mini card background), die cut bouquet
  • Gathering Together specialty DSP – 2-1/2″ x 3-3/4″ (small die cut arch)

Stampin’ Up! products used in this project:

More Stampin’ Up! Merry Christmas Cards

Good Morning and Happy Halloween! Yesterday I used the Stampin’ Up! Merry Christmas stamp with the Peaceful Garden designer series paper and Branching Out dies to make a simple Christmas card. Today I have variations on the same design using other pretty Christmas themed papers, both current and retired. Here’s the link to yesterday’s card where I have the card stock cuts which are basically the same for today’s cards.

For the first card, I used the beautiful Real Red and gold poinsettia paper for the background on a gold foil mat and a Real Red card base. I stamped the sentiment using Real Red ink on Basic White and matted it on Real Red card stock. I simply accented the sentiment with a bow made with the pretty shiny Real Red ribbon and gold sparkling sequins.

For the second alternative, I used the beautiful retired Season of Green and Gold specialty DSP from last year. I matted it with some retired gold glimmer paper and used a Garden Green card base. I stamped the beautiful sentiment in Garden Green ink on Basic white and matted it with more gold glimmer paper. I fussy cut part of a leaf cluster and die cut a small bell and adhered them to the corner and finished with Old Olive sparkling sequins.

For the insides I simply trimmed a basic white panel with the same pretty DSP as the front background and stamped the sentiment from the Bauble Blooms stamp set using the same ink as the front sentiment.

The Stampin’ Up! Merry Christmas stamp is so elegant and can easily be adapted to any pretty Christmas DSP and embellishments you have on hand. Check yesterday’s blog post (link at the top) for the card stock cuts and product links.

And have a fun and safe Halloween! My haunted house is set up in my window sill and my jack o’lanterns are on the porch. I’ll be handing out candy to the trick or treaters that come to my door.

Akiko

Stampin’ Up! Merry Christmas for the Happy Inkin’ Thursday Blog Hop

Good Morning and welcome to the Happy Inkin’ Thursday Blog Hop! How are you doing with your Christmas cards? Here’s a simple but elegant card using the beautiful Stampin’ Up! Merry Christmas stamp and the Peaceful Garden designer series paper. You can find the supplies I used along with card stock cuts at the bottom of my post.

We have a theme challenge this week:

Adhere a panel of Peaceful Garden designer series paper to a Cloud Cover glimmer paper mat and then to the front of a Cloud Cover card base with liquid glue.

Stamp the Stampin’ Up! Merry Christmas stamp on a Cloud Cover panel of Peaceful Garden DSP using Secret Sea ink and cut it out with the third largest Branching Out rectangle die. Cut a Secret Sea glimmer paper panel with the second largest Branching Out rectangle die and adhere it to the back of the label. Adhere the label to the card with liquid glue.

Cut the dove from Basic White using the Peace On Earth dies and brush it with Wink of Stella so it sparkles. Adhere it to the card with dimensionals. Finish with silver druzy gems.

For the inside, stamp the sentiment from the Bauble Blooms stamp set using Secret Sea ink on a Basic White panel. Trim the side with DSP and adhere the panel to the inside of the card with Stampin’ Seal.

The Stampin’ Up! Merry Christmas stamp is an elegant companion to any gorgeous Christmas designer series paper. Touches of glimmer paper to add sparkle and shine to make your card extra special.

On with the Hop! Click on the Next Blog button to move forward to see the beautiful project Tara Carpenter has created.

If you get lost along the way, here are the participants for the hop:

Thanks for stopping by and Happy Stamping!

Akiko


Cardstock Cuts for this project:

  • Cloud Cover – 5-1/2″ x 8-1/2″ card base, scored at 4-1/4″Peaceful Garden Gli
  • Peaceful Garden Glimmer – 3-7/8″ x 5-1/1″ (DSP mat), 3-1/2″ x 5″ (die cut mat)
  • Basic White – 3-3/4″ x 5″ (inside panel), 2″ x 2-1/2″ (die cut dove)
  • Peaceful Garden DSP – 3-3/4″ x 5″ (front background), 3-1/2″ x 4-1/2″ (label), 1″ x 3-3/4″ (inside trim)

Stampin’ Up! products used in this project:

Stampin’ Up! Traditional Labels Seasons Greetings Card

Good Morning! Here’s a super simple Christmas card made with the Stampin’ Up! Traditional Labels bundle and the beautiful Traditions of Christmas specialty designer series paper. You can find the card stock cuts along with supplies at the bottom of my post.

Adhere a Secret Sea panel of Traditions of Christmas specialty designer series paper to the front of a Secret Sea card base.

Adhere a floral pattern of Traditions of Christmas specialty designer series paper to a Real Red mat with liquid glue and pop it on the card with dimensionals.

Stamp the sentiment from the Stampin’ Up! Traditional Labels stamp set on Basic White card stock using Real Red ink. Cut it out with the coordinating banner die and adhere it to the card with dimensionals. Finish with three Cherry Cobbler dots.

For the inside panel, trim the bottom of a Basic White panel with pretty DSP and adhere it to the inside of your card with Stampin’ Seal.

So quick and easy and the beautiful Traditions of Christmas specialty designer series paper really shines. The fancy banner label made with the Stampin’ Up! Traditional Labels bundle is also quick and adds so much elegance!

Thanks so much for stopping by and Happy Stamping!!

Akiko

Cardstock Cuts for this project:

  • Secret Sea – 5-1/2″ x 8-1/2″ card base, scored at 4-1/4″
  • Real Red – 3-1/4″ x 4-1/4″ (DSP mat)
  • Basic White – 4″ x 5-1/4″ (inside panel), 1-3/4″ x 4-1/2″ (label)
  • Traditions of Christmas DSP – 4-1/4″ x 5-1/2″(front background), 3 x 4″ (DSP panel), 1/2″ x 4″ (inside trim)

Stampin’ Up! products used in this project:


Stampin’ Up! Christmas Greenery with Traditional Labels

Good Morning! The Traditions of Christmas specialty designer series paper is one of the prettiest packs that I’ve seen in a long time. I used it with the Stampin’ Up! Christmas Greenery and Traditional Labels bundles to make another Christmas card for today – and it’s PINK! You can find the card stock cuts along with the currently available supplies at the bottom of my post.

Adhere a panel of Traditions of Christmas DSP to a Real Red mat and then to the front of a Bubble Bath card base with liquid glue. Use the Stampin’ Up! Christmas Greenery dies to cut Pool Party, Old Olive and Shaded Spruce card stock leaves and adhere them to the card with glue dots.

Stamp the sentiments from the Stampin’ Up! Traditional Labels stamp set using Real Red ink on Bubble Bath and cut it out with the small oval Traditional Labels die. Note that I did practice stamping the two sentiments on printer paper first so I could get a feel for how to line up the second stamp and get even spacing. Use the large oval die to cut gold foil and adhere the small oval using liquid glue.

Adhere the label to the card with dimensionals and finish with a Real Red bow and Pool Party sparkle sequins. That new Real Red ribbon is so pretty with light sparkles!

For the inside panel, flowers from the Stampin’ Up! Christmas Greenery stamp set using Bubble Bath ink in the corner of a Basic White panel. Trim the bottom with DSP and adhere the panel to the inside of the card with Stampin’ Seal.

I love the floral patterns in the DSP and I’m so happy to see so many poinsettias! The Stampin’ Up! Christmas Greenery dies are huge – they easily fill an A2 card and make a festive statement!

Thanks so much for stopping by and Happy Stamping!!

Akiko

Cardstock Cuts for this project:

  • Bubble Bath – 5-1/2″ – 8-1/2″ card base, scored at 4-1/4″, 1-1/2″ x 2-1/4″ (label)
  • Pool Party – 2-1/4″ x 4-1/4″ (die cut leaves)
  • Old Olive – 2″ x 4-3/4″ (die cut pine sprig)
  • Shaded Spruce – 1-3/4″ x 2-1/2″ (die cut leaves)
  • Real Red – 3-7/8″ x 5-1/8″ (DSP mat)
  • Gold Foil – 2″ x 2-3/4″ (label mat)
  • Basic White – 4″ x 5-1/4″ (inside panel)
  • Traditions of Christmas specialty DSP – 3-3/4″ x 5″ (front background), 1/2″ x 4″ (inside trim)

Stampin’ Up! products used in this project:


Stampin’ Up! Bauble Blooms Christmas Card II

Good Morning! Here’s another Christmas card made with the Stampin’ Up! Bauble Blooms bundle with the beautiful Traditions of Christmas specialty designer series paper. You can find the card stock cuts along with supplies at the bottom of my post.

Emboss a Basic White panel with the new Traditional Wreath 3D embossing folder. Use a sponge dauber to apply Old Olive ink to the raised leaves and berries and adhere it to the front of an Old Olive card base with liquid glue.

Use the ornament die from the Stampin’ Up! Bauble Blooms dies to cut a panel of the Traditions of Christmas specialty designer series paper and a Real Red backing. Adhere the DSP die cut to the backing with liquid glue. Cut the ornament topper from Gold foil and adhere it to the ornament. Adhere the ornament to the card with dimensionals.

Stamp the sentiments from the Stampin’ Up! Bauble Blooms stamp set using Versamark ink on Basic White. Sprinkle with gold embossing powder and heat set. Cut it out with the long skinny Stylish Shapes banner die using a two step method and adhere it to the card with glue dots. Tie a loopy bow with gold trim and adhere it to the ornament top and decorate the rest of the wreath with lots of Real Red sparkly sequins.

For the inside panel, emboss and sponge a Basic White strip like the front background and adhere it to the side of a Basic White panel. Stamp the sentiment from the Stampin’ Up! Bauble Blooms stamp set using Real Red ink and adhere the panel to the inside of the card.

The Traditions of Christmas specialty designer series paper is so pretty that it makes a nice ornament on it’s own.

Thanks so much for stopping by and Happy Stamping!!

Akiko

Cardstock Cuts for this project:

  • Old Olive – 4-1/4″ – 11″ card base, scored at 5-1/2″
  • Real Red – 3″ x 3″ (ornament backing)
  • Gold Foil – 1″ x 2″ (ornament top)
  • Basic White – two 4″ x 5-1/4″ panels” (embossed front background and inside panel), 1″ x 4″ (label), 1/2″ x 5-1/4″ (embossed inside trim)
  • Traditions of Christmas specialty DSP – 3″ x 3″ (die cut ornament)

Stampin’ Up! products used in this project:


Stampin’ Up! Traditions of Christmas Sneak Peek

Good Morning! The Stampin’ Up! Traditions of Christmas Suite Collection is a new Christmas Suite from the upcoming September – December 2025 Mini Catalog that will be available on September 3. It’s a beautiful suite with specialty designer series paper, two stamp bundles, embellishments and an embossing folder. I used the Traditional Labels bundle with the beautiful DSP to make a simple and quick Christmas card. You can find the card stock cuts along with the currently available supplies at the bottom of my post.

Adhere a panel of the beautiful Stampin’ Up! Traditions Of Christmas specialty designer series paper to an Old Olive mat, then to the front of a Real Red card base with liquid glue.

Stamp the sentiments from the Traditional Labels stamp set using Versamark ink on Real Red and sprinkle with gold embossing powder. Heat set and cut out the sentiment with the beautiful Traditional Labels die.

Adhere the label to the card with dimensionals and finish with iridescent dots and gold striped bow. Isn’t that paper beautiful!! I love the gold touches and pretty poinsettias.

For the inside panel, trim the bottom of a Basic White panel with the DSP and stamp a sentiment if desired. I used one of my favorites from last year’s Greetings of the Season stamp set in Real Red ink.

Here is the Traditional Labels bundle. They also make great tags.

And here’s the beautiful Traditions of Christmas specialty DSP.

You can see more of the detail on the label die. The dies in the Traditional Labels bundle are extra special with beautiful border details. Beautiful papers and dies make it so easy to create elegant Christmas cards!

The Stampin’ Up! Traditions of Christmas Suite will be available on Sept 3 when the new Mini Catalog goes live.

Thanks so much for stopping by and Happy Stamping!!

Akiko

Cardstock Cuts for this project:

  • Real Red – 5-1/2″ – 8-1/2″ card base, scored at 4-1/4″, 2-1/2″ x 3-1/2″ (label)
  • Old Olive – 4″ x 5-1/4″ (DSP mat)
  • Basic White – 4″ x 5-1/4″ (inside panel)
  • Traditions of Christmas specialty DSP – 3-7/8″ x 5-1/8″ (front background), 1/2″ x 4″ (inside trim)

Stampin’ Up! products used in this project:


Stampin’ Up! Bauble Blooms Christmas Card

Good Morning!! Have you started Christmas cards yet? For my first Christmas card of the year, I’m using the new Online Exclusive Stampin’ Up! Bauble Blooms bundle and I’ve paired it with the retired Take A Bow 6″ x 6″ designer series paper. You can find the card stock cuts for this card along with the supplies at the bottom of my post.

Adhere a panel of DSP to the front of a Real Red card base. Adhere another panel to a Garden Green mat and pop it on the card with dimensionals. Stamp the leaves from the Stampin’ Up! Bauble Blooms stamp set twice using Garden Green ink on Basic White panels. Stamp the outline floral images twice using Real Red ink over the stamped leaves.

Cut one of the stamped images out with the ornament die from the Stampin’ Up! Bauble Blooms dies. Cut the flowers and leaves out from the second image using the detailed die. Color the die cut flowers with the Melon Mambo watercolor pencil and Blender Pen. Adhere the die cut flowers and leaves to the ornament with dimensionals.

Cut a leaf sprig from Garden Green using the Label Me Grateful dies and adhere it to the card with glue dots. Cut the large ornament holder from Silver foil using the Stampin’ Up! Bauble Blooms dies and adhere it to the ornament with liquid glue. Tie a Real Red ribbon around the ornament holder hole and pop the ornament on the card with dimensionals. Finish with Cherry Cobbler dots.

Stamp the sentiments from the Stampin’ Up! Bauble Blooms stamp set using Real Red ink on Basic White and trim the bottom with DSP. Adhere the panel to the inside of the card with Stampin’ Seal.

The ornament from Stampin’ Up! You Are Remarkable bundle is real pretty in Real Red and Garden Green and the two step stamping technique is really nice for outlining the flowers in Real Red. The challenge was to color the flowers light enough to contrast with the lines and the watercolor pencils worked perfect.

Unfortunately the Take A Bow DSP is retired, so if you don’t have any leftover from last year, take heart because next month a new release of Online Exclusives and a new Mini Catalog are coming out and there are several options for Christmas papers that will work beautifully with this design (as well as any other Christmas papers you may have in your stash).

Thanks so much for stopping by and Happy Stamping!!

Akiko

Cardstock Cuts for this project:

  • Real Red – 5-1/2″ x 8-1/2″ card base, scored at 4-1/4″
  • Garden Green – 3-1/4″ x 4-1/2″ (DSP mat), 1-1/2″ x 3″ (die cut leaf sprig)
  • Silver Foil – 1″ x 1-1/2″ (ornament hanger)
  • Basic White – 3-3/4″ x 5″ (inside panel), two 3″ x 3″ panels (stamped ornaments)
  • Take A Bow 6″ x 6″ DSP (retired) – 3-3/4″ x 5″ (front background), 3″ x 4-1/4″ (red dot background), 1/2″ x 3-3/4″ (inside trim)

Stampin’ Up! products used in this project:


Stampin’ Up! Decorative Trees Christmas Card for the Happy Inkin’ Thursday Blog Hop

Good Morning and welcome to the Happy Inkin’ Thursday Blog Hop! One of favorites from the retiring September-December 2024 Mini Catalog is the Stampin’ Up! Decorative Trees bundle. The die cut overlays for the trees are just beautiful and I’ve made today’s card with Very Vanilla and gold for a simple and elegant Christmas card. You can find the supplies I used along with card stock cuts at the bottom of my post.

We have a pretty sketch challenge this week:

I embossed a Very Vanilla panel with the pretty Snowflake Sky 3D embossing folder and adhered it to the front of a Very Vanilla card base with liquid glue. I also embossed a strip of gold foil with the same folder, using the bottom where the snowflakes are dense. I adhered the embossed Gold Foil strip to the card with glue dots.

I I used the plain tree die from the Stampin’ Up! Decorative Trees dies to cut two panels from the Season of Green and Gold specialty designer series paper. I adhered the trees to the card with glue dots.

I cut another tree from Very Vanilla card stock. I cut the snowflake overlay from the Stampin’ Up! Decorative Trees dies from Gold Foil (after applying adhesive sheets to the back). I peeled off the adhesive sheet backing and adhered the snowflake overlay to the Very Vanilla tree and popped the tree on the card with dimensionals.

For the inside panel, I stamped sentiments from the Greetings of the Season stamp set using Versamark ink on a Very Vanilla panel. I sprinkled it with gold embossing powder and shook off the excess. I heated the powder with my heat tool until it was bright and shiny. I adhered the panel to a DSP mat and adhered the layered panel to the inside of the card with Stampin’ Seal.

The trees in the Stampin’ Up! Decorative Trees bundle are beautiful dressed up with gold foil or simply stamped on a rustic Christmas card. These are one of my all time Christmas favorites!

On with the Hop! Click on the Next Blog button to move forward to see the beautiful project Karen Ksenzakovic has created.

If you get lost along the way, here are the participants for the hop:


Current Host Code: VT29C2UC

Use this host code when you order $50 or more and receive a free gift from me!  The free gift is your choice of any item currently available valued up to $10.00!

If your order is over $150, please do not use the host code since you’ll receive your own Host Dollars plus I’ll still send you the free gift!  This host code can be used by anyone, no club or commitment required. Let me know if you have any questions.


If you need any stamping supplies, I’d be very happy to be your Demonstrator.  Just click on the Shop Now button on the right side of the screen to go directly to my online store or contact me if you have any questions. 

Thanks for stopping by and Happy Stamping!

Akiko

  • Visit my online store here
  • See the current Stampin’ Up! Last Chance items here
  • Earn FREE Stampin’ Up! products through my Wildflower Frequent Shopper Program – my way of saying thank you to my online frequent shopper customers.
  • Have any questions? I’d be happy to help, click here to contact me.

Cardstock Cuts for this project:

  • Very Vanilla – 5-1/2″ x 8-1/2″ card base, scored at 4-1/4″, 4-1/4″ x 5-1/2″ (embossed background), 2-1/2″ x 3-1/2″ (die cut tree), 3-3/4″ x 5″ (inside panel)
  • Gold Foil – 3/4″ x 5-1/2″ (embossed strip), 2-1/2″ x 3-1/2″ (die cut snowy insert)
  • Season of Green and Gold specialty DSP – two 2-1/2″ x 3-1/2″ panels (die cut trees), 3-7/8″ x 5-1/8″ (inside mat)

Stampin’ Up! products used in this project: