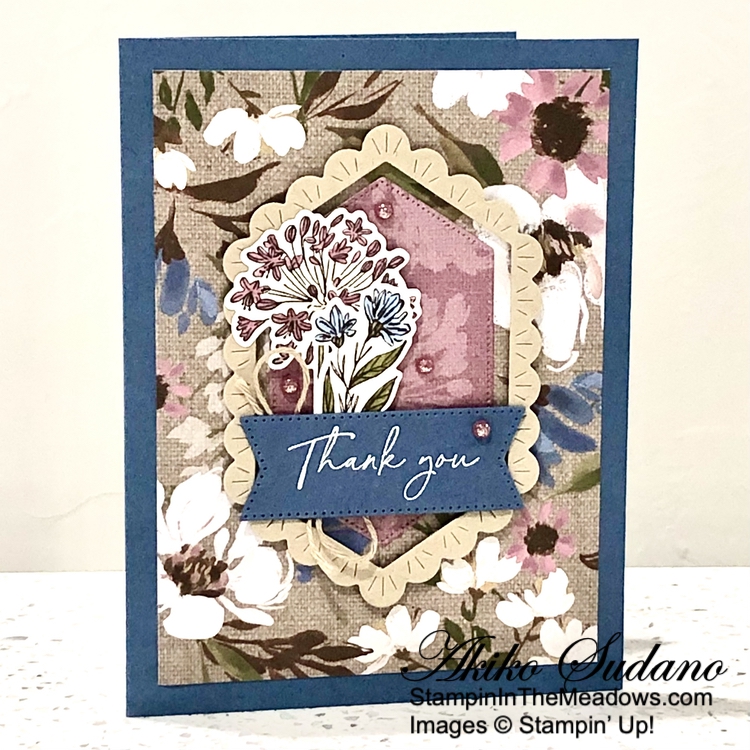
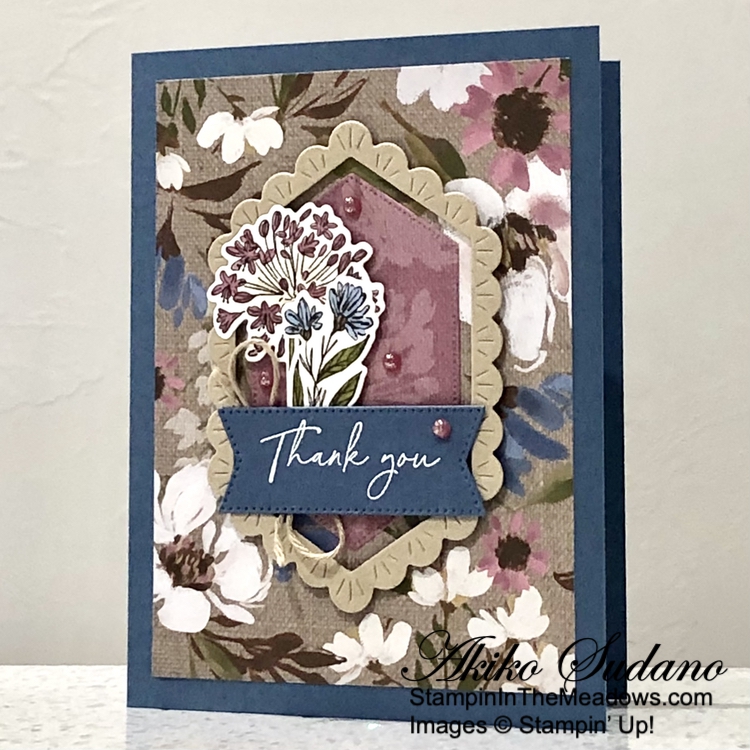
Good Morning! Here’s a simple thank you card made with the pretty Stampin’ Up! Wildflower Designs bundle and the pretty Splendid Autumn 6″ x 6″ designer series paper. You can find the products I used at the bottom of my post along with the card stock sizes.
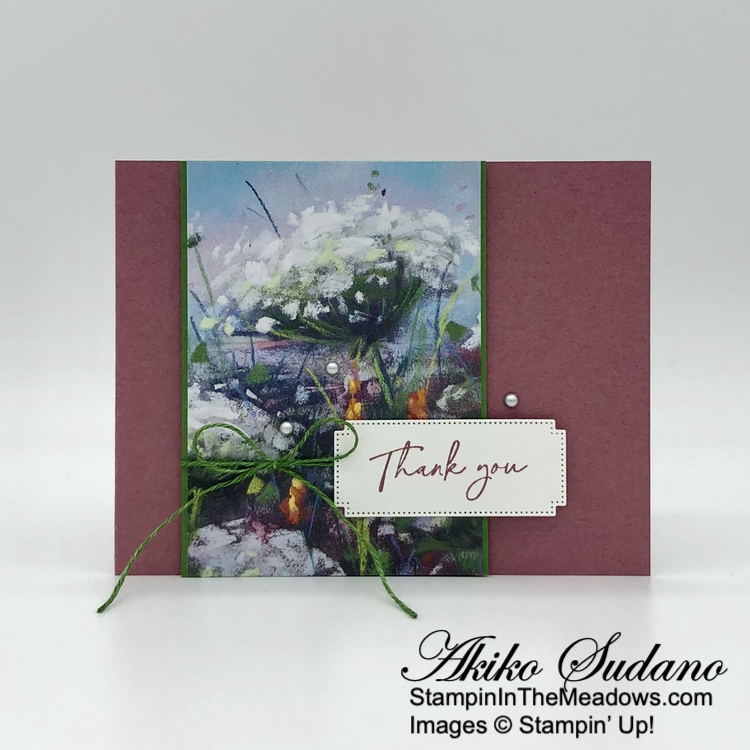
I adhered floral panel of Splendid Autumn 6″ x 6″ designer series paper to a Garden Green mat with liquid glue. I wrapped it with Garden green Linen Thread and tied a bow before popping it on the front of a Moody Mauve card base with dimensionals.
I stamped the sentiment from the Stampin’ Up! Wildflower Designs stamp set on a Basic White panel using Moody Mauve ink. I cut it out with the long label die from the Autumn Leaves dies and popped it on the card with dimensionals and glue dots.
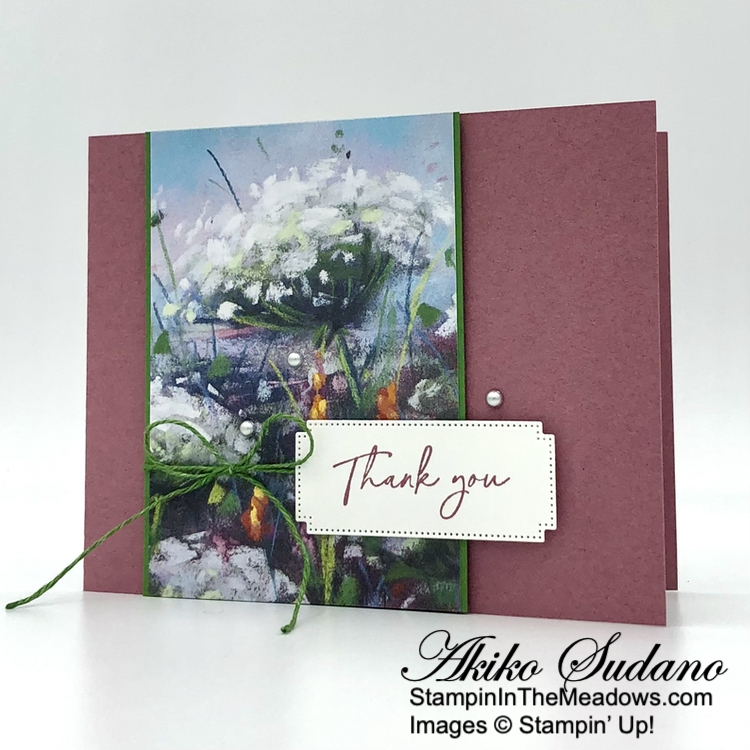
I finished the card with three Smoky Slate pearls.
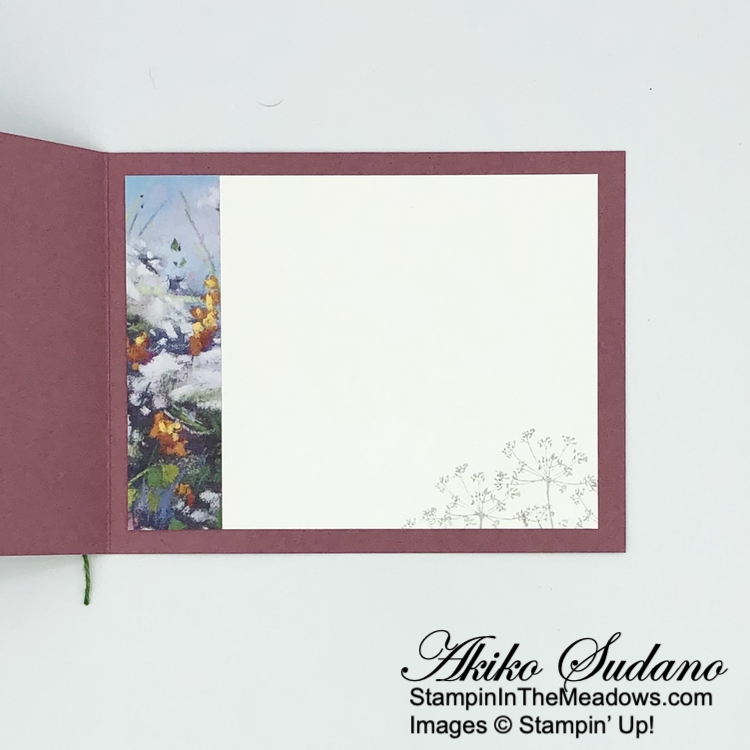
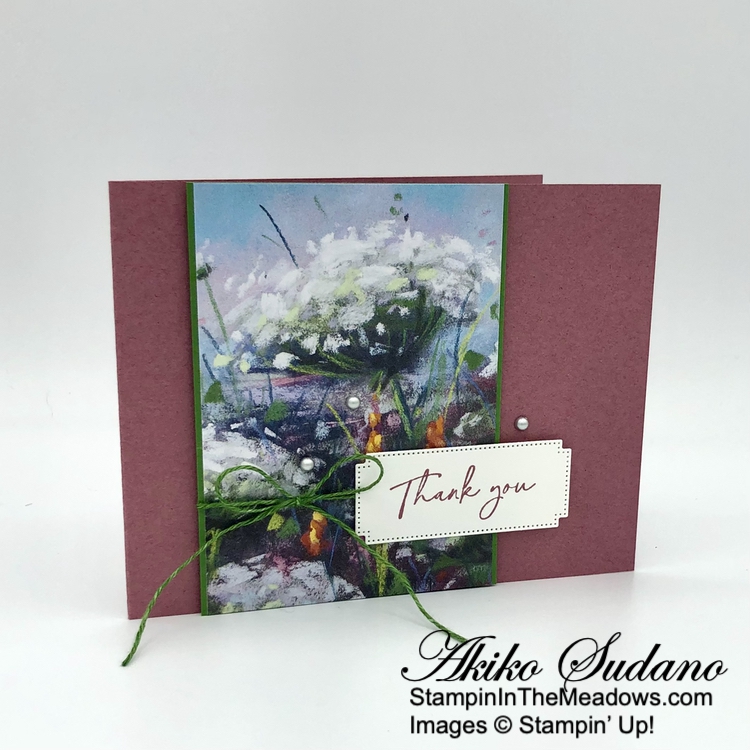
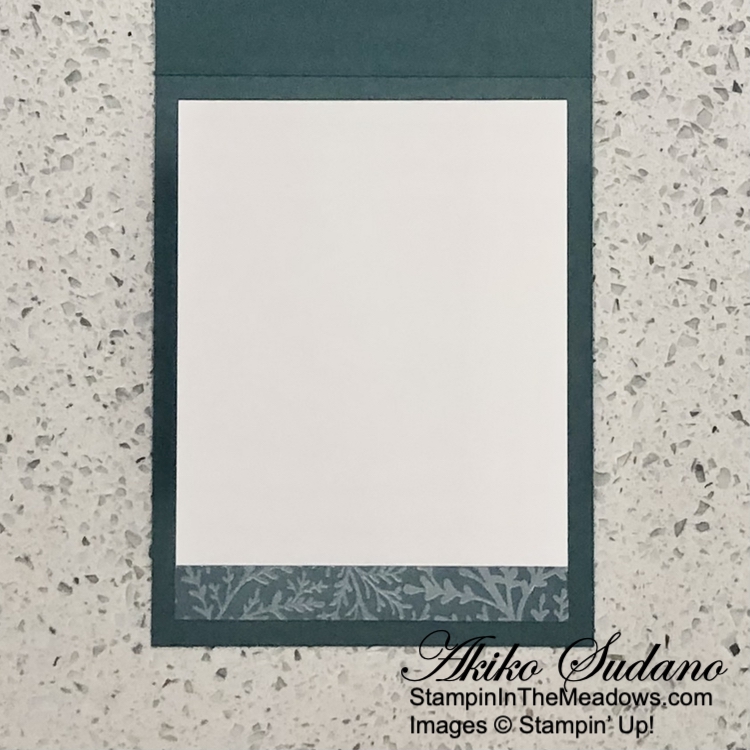
For the inside of the card, I stamped the flowers from the Stampin’ Up! Wildflower Designs stamp set using stamped off Smoky Slate ink on Basic White. I trimmed the side with a strip of DSP and adhered the panel to the inside of the card with Stampin’ Seal.

This is such a pretty panel of the Splendid Autumn DSP and It reminds me of Queen Anne’s Lace. And the inside flowers from the Stampin’ Up! Wildflower Designs stamp set reminded me of them too. I love how well the stamp goes with the DSP!
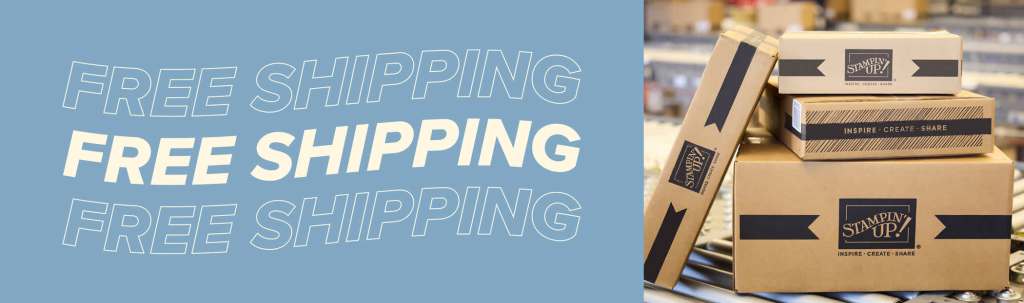
Today Only – Free Shipping on Orders of $75 or more!
Surprise! It’s time for FREE SHIPPING! Today you can shop and save on all qualifying orders of $75 or more. What a great way to stock up on all your favorite products from the catalog, Online Exclusives, kits, and more!
Here are the details:
- Free shipping is for 24 hours only. Orders must be opened and closed on September 18, 2024.
- Free shipping automatically applies to your cart after the qualifying amount has been met, which is $75 (before tax).
- Orders must meet the qualifying amount to be eligible for free shipping.
- The additional cost for expedited shipping is not covered by this promotion.
- Prepaid 3-, 6-, or 12-month Paper Pumpkin subscriptions can contribute to the qualifying amount for free shipping (Month-to-month subscriptions do not qualify). Subscriptions billed and shipped this month will be charged for the normal amount ($25.00 shipping included) + tax.
- Ordering Deadline: September 18, 2024 at 11:59 p.m. (MT)
Go to my Online Store to start shopping.

New Kits In Kits Collection!
The Kits Collection by Stampin’ Up! provides different options and a range of project types that allow you to choose the crafting experiences that best fits your style and needs. There’s a variety of kits to choose from and these all-inclusive project kits have everything you need in one box! You can Find these kits in the Online Store.
The new kits for September are the pretty Christmas Ornaments Kit and the wonderful Card Keeper Kit. The Christmas Ornaments kit makes 9 Christmas ornaments including precut paper greenery, pinecones, bright berries, and festive details. The Card Keeper Kit includes everything you need to make 10 beautiful all-occasion cards plus a coordinating card container to keep everything organized.
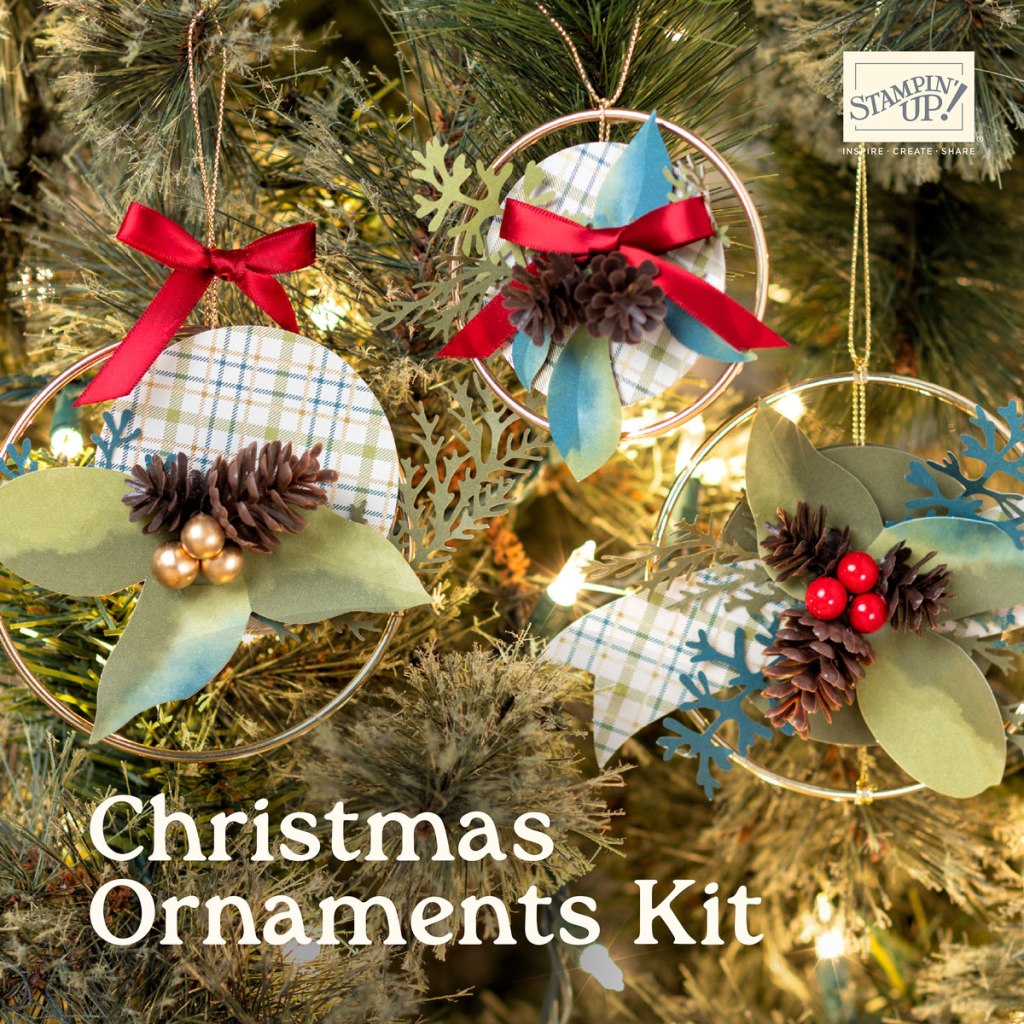
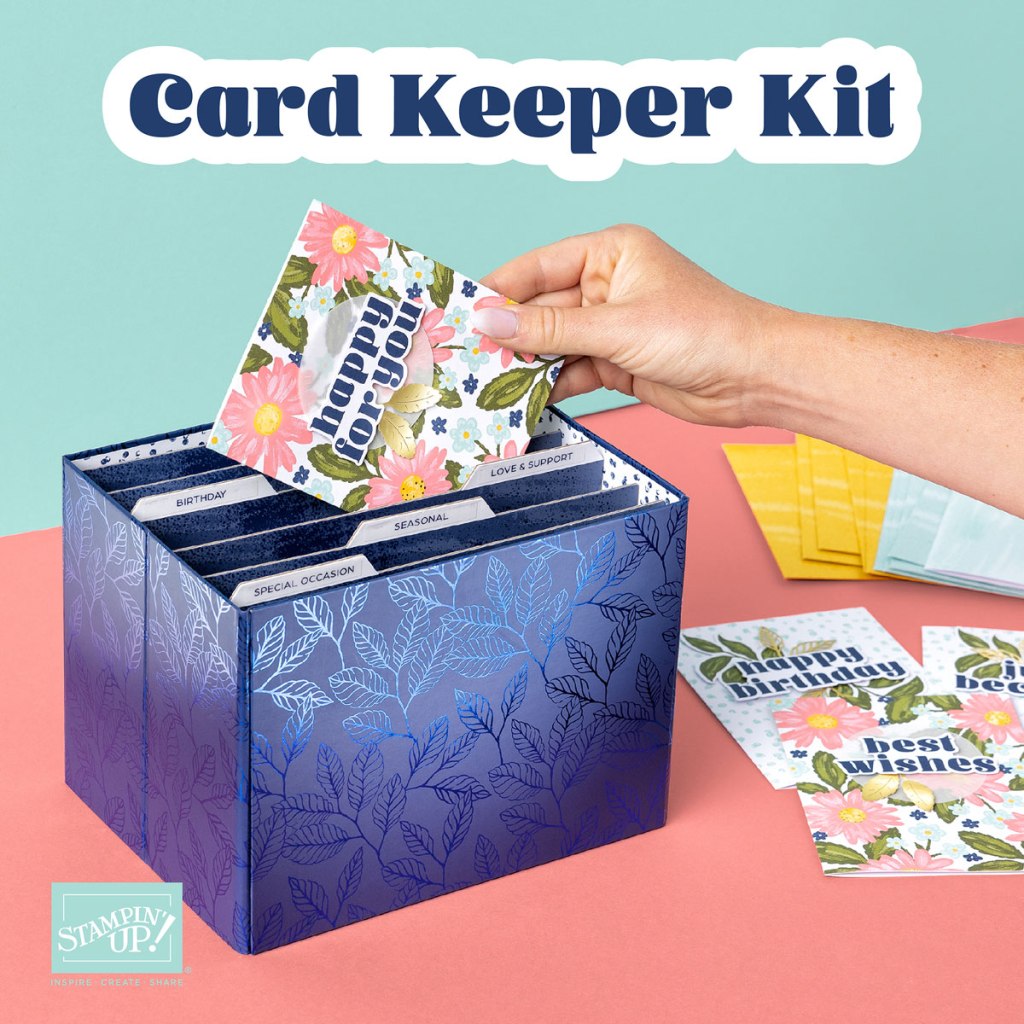
The Kits Collection offering changes frequently as new kits are released, and kit availability fluctuates. To check the availability of these new kits or past kits, visit my Online Store.
Current Host Code: V3YZAAN7
Use this host code when you order $50 or more and receive a Thank You gift from me! The free gift is your choice of any item currently available valued up to $10.00.
If your order is over $150, please do not use the host code since you’ll receive your own Host Dollars plus I’ll still send you the Thank You gift! This host code can be used by anyone, no club or commitment required. Let me know if you have any questions.
If you need any stamping supplies, I’d be very happy to be your Demonstrator. Just click on the Shop Now Button on the right side of the screen to go directly to my Online store or contact me if you have any questions. Happy Stamping!
Thanks for stopping by and have a great day!
Akiko
- Visit my online store here
- See the current Stampin’ Up! clearance rack specials here
- Earn FREE Stampin’ Up! products through my Wildflower Frequent Shopper Program – my way of saying thank you to my online frequent shopper customers.
- Have any questions? I’d be happy to help, click here to contact me.
Cardstock Cuts for this project:
- Moody Mauve – 4-1/4” x 11” card base, scored at 5-1/2”
- Garden Green – 3-1/8” x 4-1/4” (DSP mat)
- Basic White – 3-3/4” x 5” (inside panel), 1-1/4″ x 3″ (label)
- Splendid Autumn 6″ x 6″ DSP – 3″ x 4-1/4″ (front DSP panel), 1″ x 3-3/4″ (inside trim)
Stampin’ Up! products used in this project:
")

 Designer Series Paper")


")


 Designer Series Paper")


 Designer Series Paper")


")


")
 Designer Series Paper")
 Specialty Designer Series Paper")