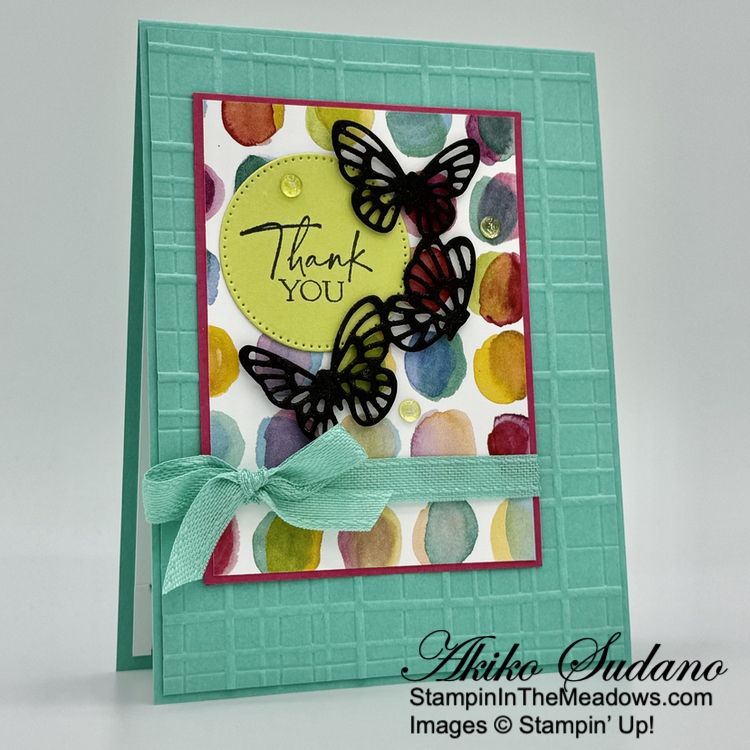
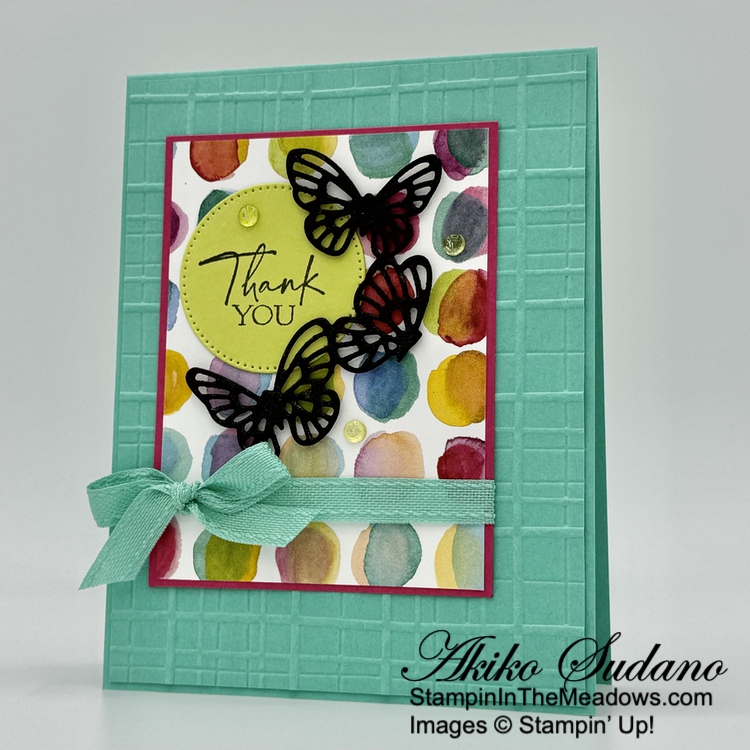
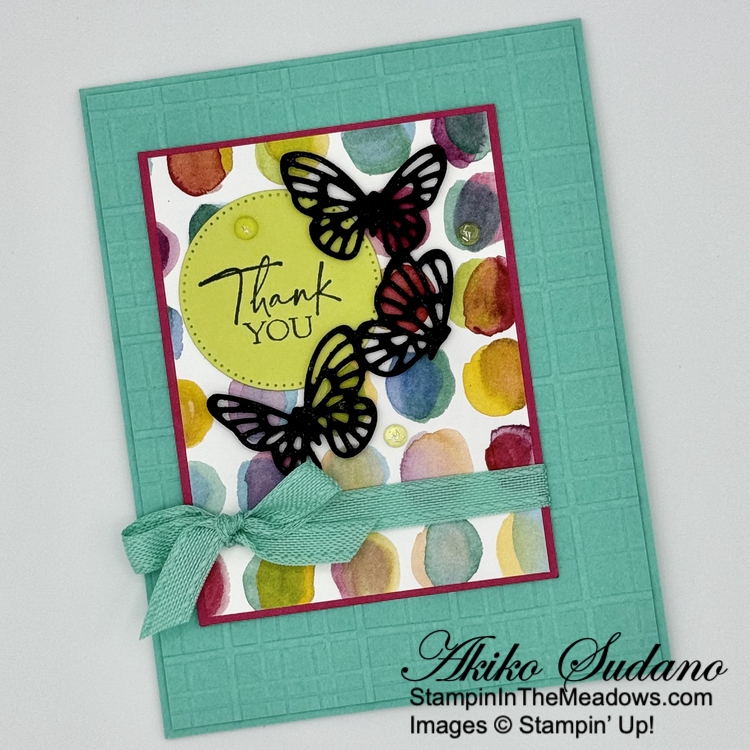
Good Morning and welcome to the Happy Inkin’ Thursday Blog Hop! The Stampin’ Up! Sketched Butterflies bundle is full of pretty pen drawn butterflies and sweet sentiments and I paired it with the colorful Full Of Life 6″ x 6″ designer series paper for a Thank You card. You can find the supplies I used along with card stock cuts at the bottom of my post.
We have a color challenge this week and I used all of the colors – I love how the Full Of Life DSP blends the colors in those little circles!
I embossed a Summer Splash panel with the Forever Plaid 3D embossing folder and adhered it to the front of a Summer Splash card base. I adhered a panel of Full Of Life 6″ x 6″ designer series paper to a Melon Mambo mat and wrapped it with Summer Splash ribbon and tied a bow. I adhered the DSP panel to the card with liquid glue.
I stamped the sentiment from the Stampin’ Up! Sketched Butterflies stamp set Memento Tuxedo Black ink on Lemon Lime Twist card stock and cut it out with a Stylish Shapes circle die. I adhered it to the card with glue dots.
I used the die from the Stampin’ Up! Sketched Butterflies dies to cut a Basic Black panel. I brushed Wink of Stella on the butterflies to give them sparkle – I just wish it showed up better in the pictures. I adhered the butterflies to the card with bits of black dimensionals and finished the card with Lemon Lime Twist dots.
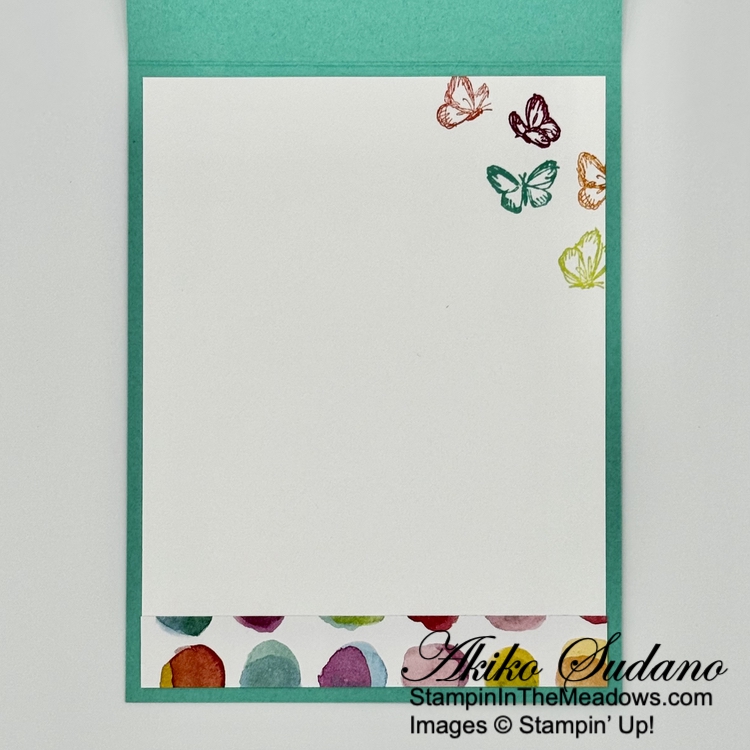
For the inside of the card, I stamped the small butterflies from the Stampin’ Up! Sketched Butterflies stamp set using Calypso Coral, Summer Splash, Lemon Lime Twist, Pumpkin Pie and Berry Burst inks. I inked up each butterfly separately and wiped the stamp before stamping the next one. I trimmed the bottom with DSP and adhered the panel to the inside of the card with Stampin’ Seal..
The Stampin’ Up! Sketched Butterflies bundle is on the Last Chance products list so it’s only available while supplies last. Be sure to check out the Last Chance list to see the retiring items from the current Annual and Mini Catalogs.
On with the Hop! Click on the Next Blog button to move forward to see the beautiful project Karen Ksenzakovichas created.
If you get lost along the way, here are the participants for the hop:
If you need any stamping supplies, I’d be very happy to be your Demonstrator. Just click on the Shop Now button on the right side of the screen to go directly to my online store or contact me if you have any questions.
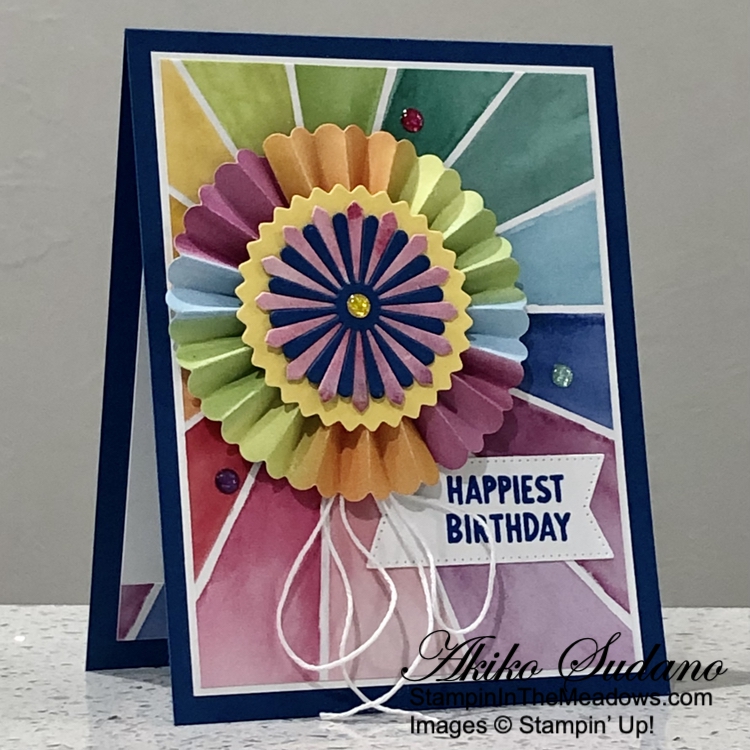
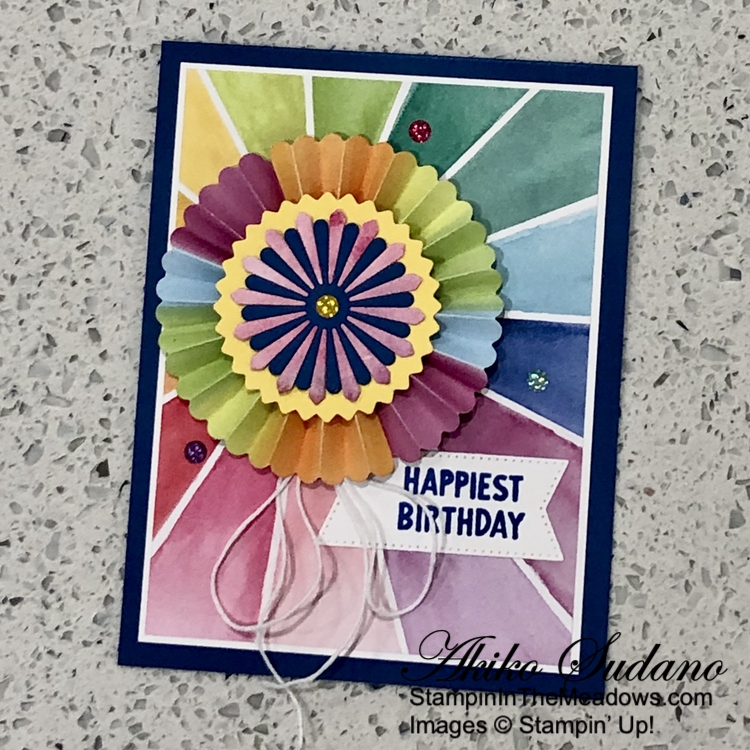
Good Morning! The Stampin’ Up! Round We Go bundle is such a fun set with stamps and dies featuring radiating circles and cheery sentiments. I had to pair it with the colorful Full Of Life 6″ x 6″ designer series paper for a birthday card. You can find the products I used at the bottom of my post along with the card stock sizes.
I adhered a panel of Full of Life 6″ x 6″ designer series paper to a Basic White mat and adhered the layered panel to the front of a Blueberry Bushel card base. I kept this flat since the rosette adds lots of bulk to the card front. I used the rosette die from the Stampin’ Up! Round We Go dies to cut two sections of Full of Life DSP and folded along the score lines (it’s so easy!). I adhered the ends together and flattened it out. I used hot glue in the center to hold the rosette – this worked so much better than the last time when I tried to use liquid glue. But I did use liquid glue to adhere the rosette to the card – lots of liquid glue!!
I used the dies from the Stampin’ Up! Round We Go bundle to make a cover for the rosette center. I used the pinked circle to cut Daffodil Delight, the angled petal die to cut a section of Full of Life DSP and the curved petal to cut Blueberry Bushel card stock. I layered these and adhered them together with liquid glue and adhered it to the card with lots of liquid glue to cover the rosette center.
I stamped the sentiment from the Stampin’ Up! Round We Go stamp set using Blueberry Bushel ink on Basic White and cut it out with the short, fat Stylish Shapes banner die. I adhered the label to the card with glue dots. I made a loopy bow from white baker’s twine and tucked it under the rosette, adhering it with glue dots. I finished the card with glossy dots.
For the inside panel, I stamped the sentiment from the Stampin’ Up! Round We Go stamp set using Blueberry Bushel ink on Basic White. I stamped the sparkles in the corner using different color Stampin’ Write markers and trimmed the bottom with DSP. I adhered the panel to the inside of the card with Stampin’ Seal.
Such a cheerful and colorful Birthday card! The rosette does add a lot of bulk to the card front, so it can’t be mailed, but it’s sure to bring a birthday smile. After making this card, I’m imagining using the rosette from the Stampin’ Up! Round We Go bundle with holiday designer series paper to make backgrounds for Christmas ornaments and fancy tags. Stay tuned!
Starter Kit Special During October!
Become a Stampin’ Up! demonstrator between October 1–31 and you’ll get $125$155 worth of product in your Starter Kit for just $99! Your Starter Kit also includes FREE business supplies and FREE shipping. Not to mention all the FUN that comes with being part of our fantastic crafting community. There’s no better time to join than now!
Starter Kit Specia Details:
Promotion Period: October 1–31, 2024
When you purchase your Starter Kit, you will be able to redeem $155 of Starter Kit eligible products for just $99!
New demonstrators who submit their Independent Demonstrator Agreement (IDA) before October 1 or after October 31 will not be eligible for this offer.
Deadline to join: October 31 2024, at 11:59 PM (MT)
We’d love to have you join our team! Once you join, you’ll get at least a 20% discount on all of your Stampin’ Up! purchases and you can preorder from the upcoming catalogs! Plus, you’ll get invitations to Stampin’ Up! Demonstrator events. We welcome all types of Demonstrators from those only purchasing to get the discount for themselves to those who want to run a business and those anywhere in between! We’re a relaxed group that loves to stamp with no pressure to sell!
There is no commitment and no penalty if you decide that being a Demonstrator isn’t right for you. Why not give it a try? We have a fun Facebook page where we chat a lot and we do virtual meetings monthly and in-person meetings quarterly.
As a demonstrator, I am happy to help you through the joining process and beyond. If you’re interested joining my team, please reach out! I am excited to answer your questions and help you get started on your creative journey.
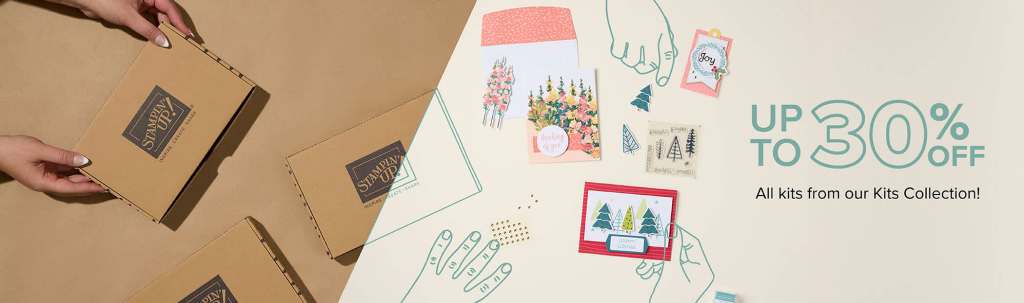
Stampin’ Up! Kits Collection on Sale During October
Save up to 30% off on all your favorite kits October 1–31! The Kits Collection by Stampin’ Up! come with everything you need to create a unique paper craft. There are crafting options for card kits, treat packaging, home decor, and so much more! Start shopping today, as kits are only available while supplies last.
Details:
Sales Period: October 1 – 31, 2024
ALL kits from our collection qualify for the discount.
There is no limit on how many kits you can order, as long as product is available.
Orders must be opened and placed during the promotion dates. Orders opened before October 1 will not qualify for the sale.
Kits can be added to a Starter Kit at their discounted rate.
Coupon codes can also be used with discounted kits.
Ordering Deadline: October 31 at 11:59 PM (MT)
New Kits In Kits Collection!
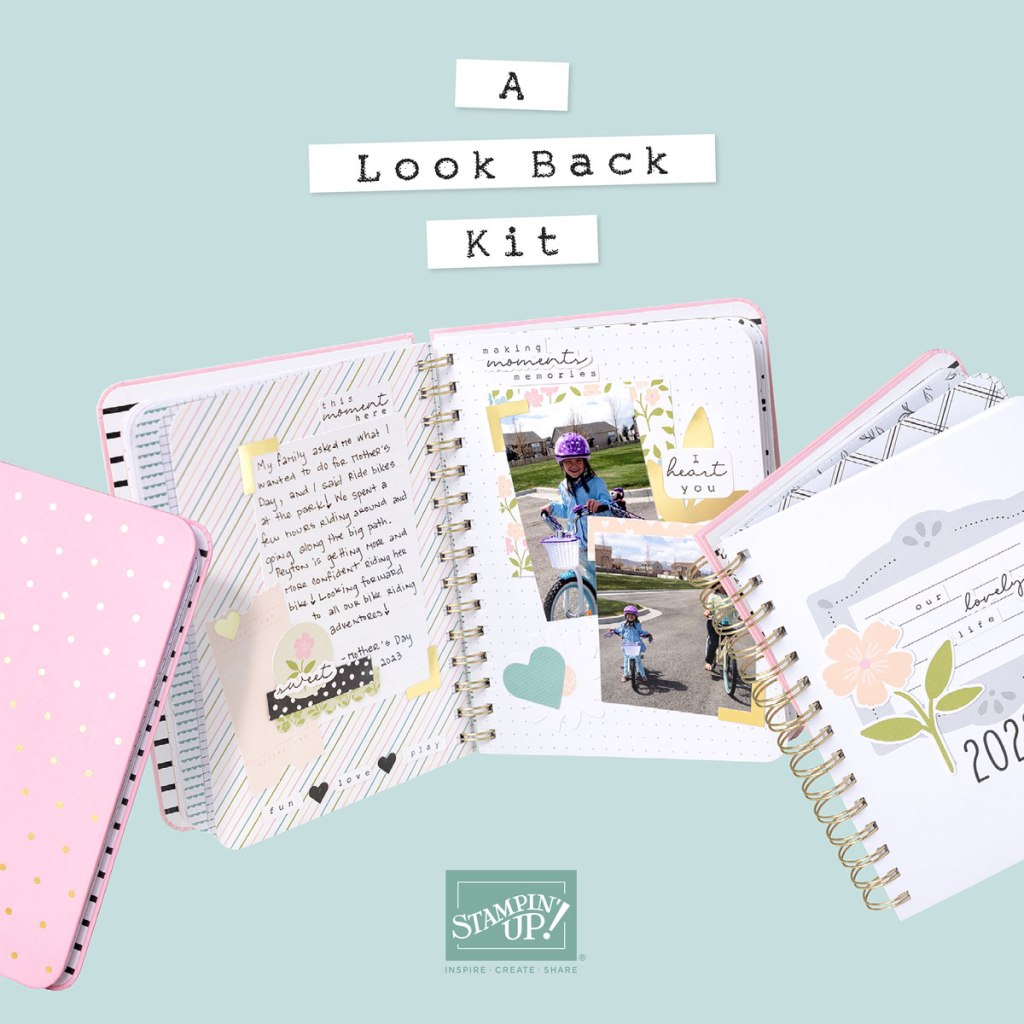
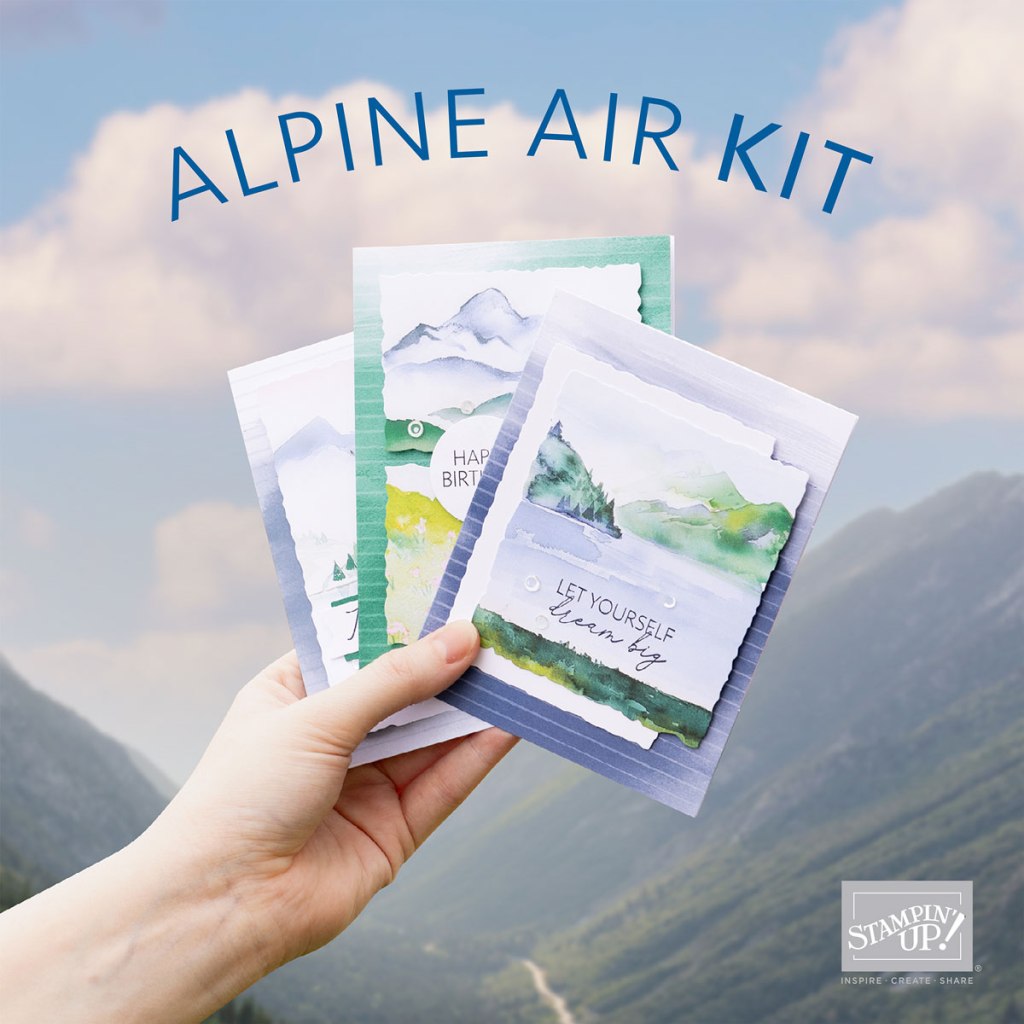
The new kits for October are the sweet A Look Back Kit and the wonderful Alpine Air Kit. The A Look Back kit includes a variety of precut paper pieces, stickers, paper pockets, and other ephemera and a spiral-bound notebook for memory keeping, journaling, and more. The Alpine Air Kit includes everything you need to make 9 all-occasion cards with an elegant mountain theme.
To check the availability of these kits or past kits, visit my Online Store.
Current Host Code: BTWRDNAU
Use this host code when you order $50 or more and receive a Thank You gift from me! The free gift is your choice of any item currently available valued up to $10.00.
If your order is over $150, please do not use the host code since you’ll receive your own Host Dollars plus I’ll still send you the Thank You gift! This host code can be used by anyone, no club or commitment required. Let me know if you have any questions.
If you need any stamping supplies, I’d be very happy to be your Demonstrator. Just click on the Shop Now Button on the right side of the screen to go directly to my Online store or contact me if you have any questions. Happy Stamping!
See the current Stampin’ Up! clearance rack specials here
Earn FREE Stampin’ Up! products through my Wildflower Frequent Shopper Program – my way of saying thank you to my online frequent shopper customers.
Have any questions? I’d be happy to help, click here to contact me.
Cardstock Cuts for this project:
Blueberry Bushel – 4-1/4″ x 11″ card base, scored at 5-1/2″, 1-3/4″ x 1-3/4″ (small petal die cut)
Daffodil Delight – 2-1/4″ x 2-1/4″ (pinked circle die cut)
Basic White – 3-3/4″ x 5″ (inside panel), 3-7/8″ x 5-1/8″ (front background mat), 1-1/4″ x 2-1/2″ (label)
Full of Life 6″ x 6″ DSP – 3-3/4″ x 5″ (front background), two 1-3/4″ x 5-1/2″ panels (large rosette), 2″ x 2″ (large petal die cut), 1/2″ x 3-3/4″ (inside trim)


")


 Designer Series Paper")


 Bordered Ribbon")


")


