Stampin’ Up! A Good Man Birthday Card

Good Morning! Today’s card is a masculine birthday card featuring the Stampin’ Up! A Good Man cling stamp set. This set has some great images and sentiments for making birthday and Father’s Day cards for the special men in your life.

I was inspired to use the layout in Sunday Stamps, SSC208 Sketch Fun. Be sure to check out the other fabulous entries in the challenge.

Now for today’s card – you can find supplies used to create this card at the bottom of my post along with the sizes of cardstock used.

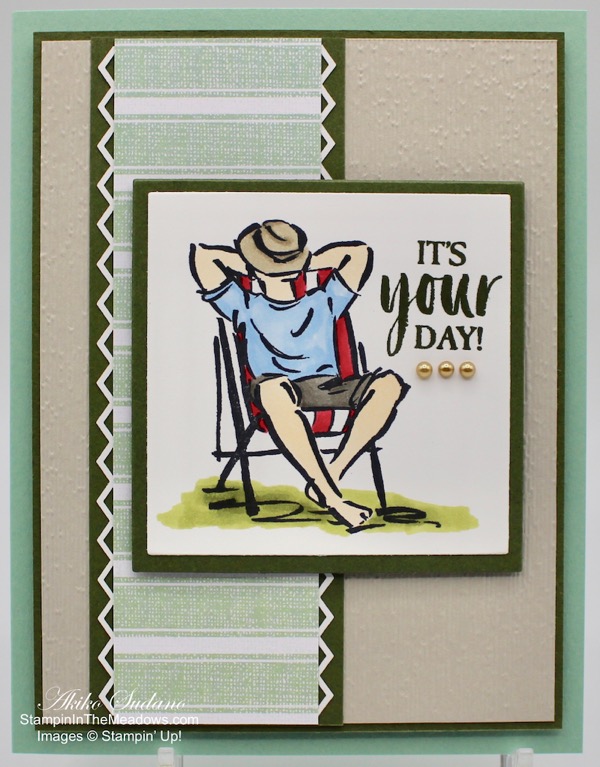
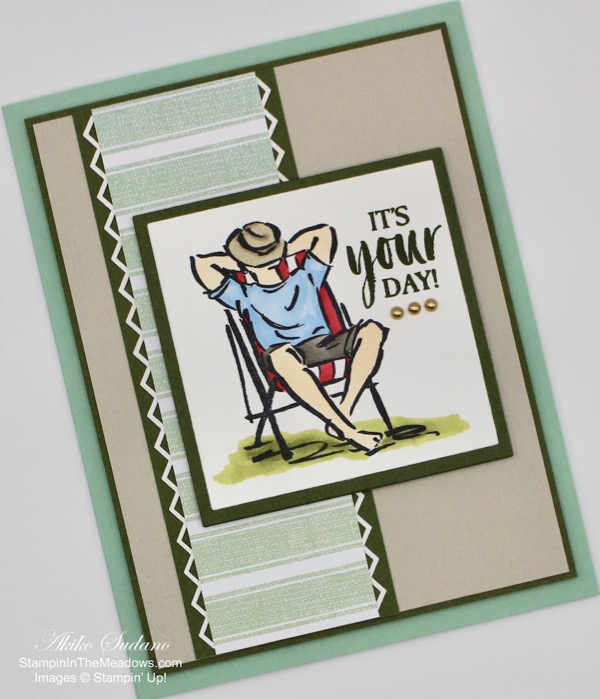
I started by taking a piece of Sahara Sand cardstock and running it through the Subtle embossing folder and adhering it to a Mossy Meadow mat with multipurpose liquid glue. I then took a piece of the Mint Macaron striped Magnolia Lane Memories and More card and attached the diamond strips from the retired Delightfully Detailed laser cut DSP and adhered them to the back. I attached this to a strip of mossy meadow cardstock and adhered this to the embossed panel.

I stamped the relaxed man napping in the lawn chair from the Stampin’ Up! A Good Man cling stamp set in Memento Tuxedo Black on a piece of Whisper White. I stamped the It’s your day sentiment in Mossy Meadow next to the man and colored the piece with Copic markers since I didn’t have the Stampin’ Blends in the colors I wanted to use. I cut out the image with a Layering Square die and then cut a mat from Mossy Meadow in the next larger size square die. I adhered these together and popped the image on the panel with dimensionals. I then used dimensionals to adhere the panel to a Mint Macaron card base and added some gold Metallic Pearls to finish off the picture.

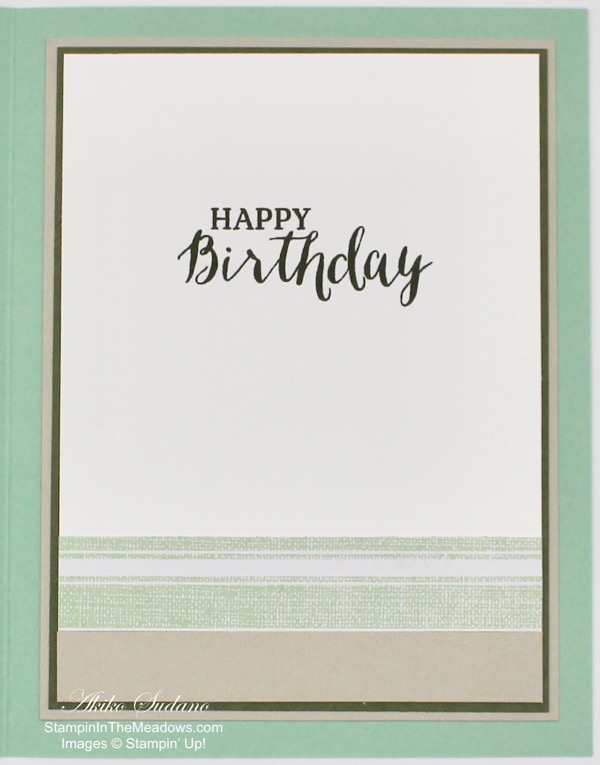
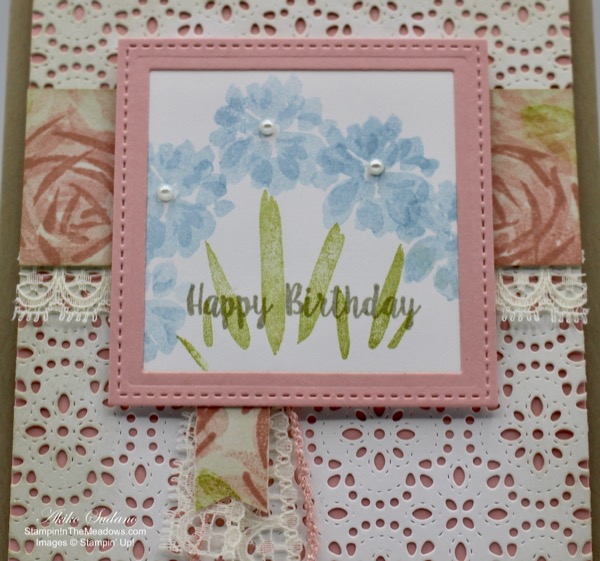
On the inside of the card, I stamped the Happy Birthday sentiment from the retired Rose Wonder stamp set since the font is similar to the font in the Stampin’ Up! A Good Man stamp set. I decorated it with another strip of the Magnolia Lane Memories and More card pack and a piece of embossed Sahara Sand. I added mats in Mossy Meadow and Sahara Sand and added it to the inside of the card

A nice simple masculine birthday card! Thanks for visiting and have a great weekend!

Akiko


Don’t forget that we are in the earning period of Bonus Days where you get a coupon for $5 to redeem in August for every $50 you spend (before shipping and taxes) in July. See the full details on the Stampin’ Up! Promotions Page.


July 1 – 15 Host Code: 6X3A6D6C

Use this host code when you order and receive a free gift from me!  If your order is over $150, please do not use this code, but you’ll still get the free gift.  The free gift is your choice of any item valued up to $10.00 in the 2018-19 Annual Catalog or in the 2019 Occasions Catalog!  That includes some of the Host Exclusive stamp sets!


If you need any stamping supplies, I’d be very happy to be your Demonstrator.  Just click on the Shop Now button on the right side of the screen to go directly to my online store or contact me if you have any questions.  Happy Stamping!

  • Visit my online store here
  • See the current Stampin’ Up! clearance rack specials here
  • Earn FREE Stampin’ Up! products through my Wildflower Frequent Shopper Program – my way of saying thank you to my frequent shopper online customers.
  • Have any questions? I’d be happy to help, click here to contact me.

Cardstock Cuts for this project:

  • Mint Macron – 5 1/2″ x 8 1/2″
  • Sahara Sand – (2) 3 3/4″ x 5″, 1/2″ x 3 1/2″
  • Mossy Meadow – (2) 3 5/8″ x 4 7/8″, 1 3/4″ x 5″, 3″ x 3″
  • Whisper White – 3 1/2″ x 4 3/4″, 3″ x 3″
  • Magnolia Lane Memories and More card – 1 1/2″ x 5, 3/4″ x 3 1/2″

Stampin’ Up! products used in this project:


Stampin’ Up! Varied Vases Birthday Card

Hello! Today’s project is a layered floral birthday card with red tulips in a navy vase featuring the Stampin’ Up! Varied Vases photopolymer stamp set.

My card was inspired by two challenges going on this week. The first challenge is the Sunday Stamps SSC207 Summer Adventure:

The inspiration and colors perfectly capture my current mood – finding relief from the hot humid summer! The second challenge is the Hand Stamped Sentiments Sketch Challenge #317.

This simple sketch is really great for handmade cards with the layered look! Head over to both of these challenges to be inspired by the design teams and other challenge players. Now for today’s card – you can find supplies used to create this card at the bottom of my post along with the sizes of cardstock used.

I started by cutting a piece of the retired Wood Textures DSP. I stamped the birthday wishes sentiment from the Stampin’ Up! Varied Vases photopolymer stamp set in Night of Navy on the bottom of the DSP and adhered it to a Night of Navy Card base. I used the large narrow rectangle in the Stitched Rectangles dies to cut a piece of Seaside Spray cardstock and then ran it through the Subtles embossing folder. I took a piece of White Bakers twine and dyed it red using a couple of drops of Cherry Cobbler re-inker mixed with a couple of squirts of water on a paper plate. I then took the twine and swooshed it in the red water and let it dry. Once dry, I wrapped it around the Seaside Spray die cut and tied a bow.

I next stamped the tall vase from the Stampin’ Up! Varied Vases stamp set on a scrap piece of Whisper White cardstock and Punched it out using the Vase Builder punch. I next stamped three of the tulip shapes in Cherry Cobbler on Real Red scraps and then punched them out as well. I finally stamped the leaf using Old Olive ink on a scrap of Old Olive cardstock and punched it out as well. Boy, it felt good to use up some of those small scraps I always seem to save!

Then I cut a stitched oval from the Stitched Shapes dies in Whisper White and a Real Red scalloped oval from the Layering Ovals dies. I glued these together with multipurpose liquid glue. I positioned the elements on the panel and drew the stems with an Old Olive Stampin’ Write marker. I glued the leaf on with the multipurpose liquid glue and attached the flowers with mini dimensionals. I used regular dimensionals to attach the vase.

I attached the Seaside Spray embossed panel to the card with dimensionals and then the oval focal piece using dimensionals on the right and glue dots on the left where it overlapped the Seaside Spray panel. I finished off the card front with 3 large faux pearls colored with the dark Real Red Stampin’ Blend. So pretty and patriotic!

I finished off the inside of the card by stamping the sentiment in Night of Navy on a Whisper White panel. I attached a strip of the DSP to the bottom and stamped a tulip in Real Red in the upper right corner. I attached the panel to a Seaside Spray mat and attached it to the inside of the card using snail adhesive.

The Stampin’ Up! Varied Vases photopolymer stamp set is so versatile because it has so many images and great sentiments. The Vase Builder Punch is a must have for easily creating dimensional cards, although the images in the stamp set are also great without the punch for creating clean and simple flat cards.

Thanks for visiting today and have a great weekend!

Akiko


June 16 – 30 Host Code: 3ZXWQ49Y

Use this host code when you order and receive a free gift from me!  If your order is over $150, please do not use this code, but you’ll still get the free gift.  The free gift is your choice of any item valued up to $10.00 in the 2018-19 Annual Catalog or in the 2019 Occasions Catalog!  That includes some of the Host Exclusive stamp sets!


If you need any stamping supplies, I’d be very happy to be your Demonstrator.  Just click on the Shop Now button on the right side of the screen to go directly to my online store or contact me if you have any questions.  Happy Stamping!

  • Visit my online store here
  • See the current Stampin’ Up! clearance rack specials here
  • Earn FREE Stampin’ Up! products through my Wildflower Frequent Shopper Program – my way of saying thank you to my frequent shopper online customers.
  • Have any questions? I’d be happy to help, click here to contact me.

Cardstock Cuts for this project:

  • Night of Navy – 4 1/4″ x 11″
  • Seaside Spray – 3 3/4″ x 5″, 2″ x 4″
  • Real Red – 2 1/4″ x 3 1/4″, scraps for flowers
  • Old Olive – scrap for leaf
  • Wood Textures Designer Series Paper – 2 1/2″ x 5″, 1/2″ x 3 1/2″
  • Whisper White – 3 1/2″ x 4 3/4″, 2″ x 3″
  • Thick Whisper White – 1″ x 1 1/2″ scrap for vase

Stampin’ Up! products used in this project:


Stampin’ Up! Abstract Impressions Birthday Card

Good Morning! Today I am participating in another Amy’s Inkin’ Krew Team Blog Hop! The theme for this month’s Blog Hop is Birthday and I can’t wait to see everyone’s Stampin’ Up! Birthday projects.

I am sharing a feminine grunge/vintage birthday card using the Stampin’ Up! Abstract Impressions stamp set . I love this set and the colorful DSP that came out with it in last year’s Annual Catalog, so it was a challenge to come up with another color scheme and vintage look for this stamp set. So here’s my card.

My card’s layout was inspired by the Try Stampin’ On Tuesday Challenge 411 where the optional theme of grunge/vintage made me look at this stamp set in a new light.

I decided to give it a try because there are so many beautiful vintage themes and inspiration in the new 2019-2020 Annual Catalog. I decided that I needed to use the beautiful new Stitched Lace Die as the background and of course I needed to have Blushing Bride cardstock peeking through the lace. I also used some Sahara Sand ink and sponged the edge of the lace to add a little grungy age to the lace.

Continuing with the Blushing Bride color theme, I used the Stampin’ Up! Abstract Impression roses and leaves stamps to create a DSP with the look of vintage roses. The roses have three stamps that layer on top of each other and I took the thickest one and randomly stamped the flower on a strip of whisper white. I stamped off each time to get a lighter base. I took the second stamp and stamped over the first images, again stamping off each time. Finally I took the third stamp with the thinnest lines and stamped full strength on each flower. Then I did the same thing with the leaves, first using the thickest image and stamping off with Old Olive ink, followed by the thinner lined image. I finished off the panel by lightly sponging with Sahara Sand all over.

I cut a square frame using the two largest Stitched Shapes square framelits. Then I stamped the flower picture using the Stampin’ Up! Abstract Impressions posy flowers and stems. I stamped the stems in Old Olive after stamping off once and stamped the flowers using the new In Color Seaside Spray, again stamping off once. The seaside spray goes really well with the blushing bride to give the old fashioned shabby pink and blue look. I finally stamped the ‘Happy Birthday’ greeting from the Stampin’ Up! Piece of Cake stamp set in Sahara Sand ink, and again lightly sponged the image with Sahara Sand before gluing it to the frame with multipurpose liquid glue.

To assemble the card front, I glued the lacy background to Blushing Bride and attached it to a Crumb Cake card base with dimensionals. I added a bit of the newly retired very vanilla lace ribbon to the bottom of the stamped vintage rose panel and adhered it to the lacy background with snail. I trimmed a little piece of the stamped vintage rose panel to make a fishtail banner and added some more lace and the pink cord from the Hugs from Shelley Paper Pumpkin kit to make a little tassel to hang from the bottom of the picture frame. I attached this to the lacy background with dimensionals and trimmed the flowers with faux pearls.

On the inside of the card, I added another strip of the vintage rose panel and sponged the edges of a Whisper White panel with Sahara Sand. I attached this to a Blushing Bride mat and finally to the card base with snail adhesive.

I was pleased with how old fashioned this card looked, and I think it came out pretty too! I’m glad to have found a new look for this versatile stamp set!

Thanks for stopping by and enjoy everyone’s wonderful projects on the blog hop!

Akiko


Thanks again for visiting! Click on the Next Blog button to move forward to see Amy Koenders’ project or click the Previous Blog button to move back to see the project that Sue Prather created.

If you get lost along the way, here are the participants for the hop:


June 1 – 15 Host Code: FK7YAMPQ

Use this host code when you order and receive a free gift from me!  If your order is over $150, please do not use this code, but you’ll still get the free gift.  The free gift is your choice of any item valued up to $10.00 in the 2018-19 Annual Catalog or in the 2019 Occasions Catalog!  That includes some of the Host Exclusive stamp sets!


If you need any stamping supplies, I’d be very happy to be your Demonstrator.  Just click on the Shop Now button on the right side of the screen to go directly to my online store or contact me if you have any questions.  Happy Stamping!

  • Visit my online store here
  • See the current Stampin’ Up! clearance rack specials here
  • Earn FREE Stampin’ Up! products through my Wildflower Frequent Shopper Program – my way of saying thank you to my frequent shopper online customers.
  • Have any questions? I’d be happy to help, click here to contact me.

Cardstock Cuts for this project:

  • Crumb Cake – 5 1/2″ x 8 1/2″
  • Whisper White – 5 1/8″ x 3 7/8″, 5″ x 3 3/4″, 2″ x 4 1/2″, 2 1/2″ x 2 1/2″
  • Blushing Bride – (2) 5 1/8″ x 3 7/8″, 3″ x 3″

Stampin’ Up! products used in this project: