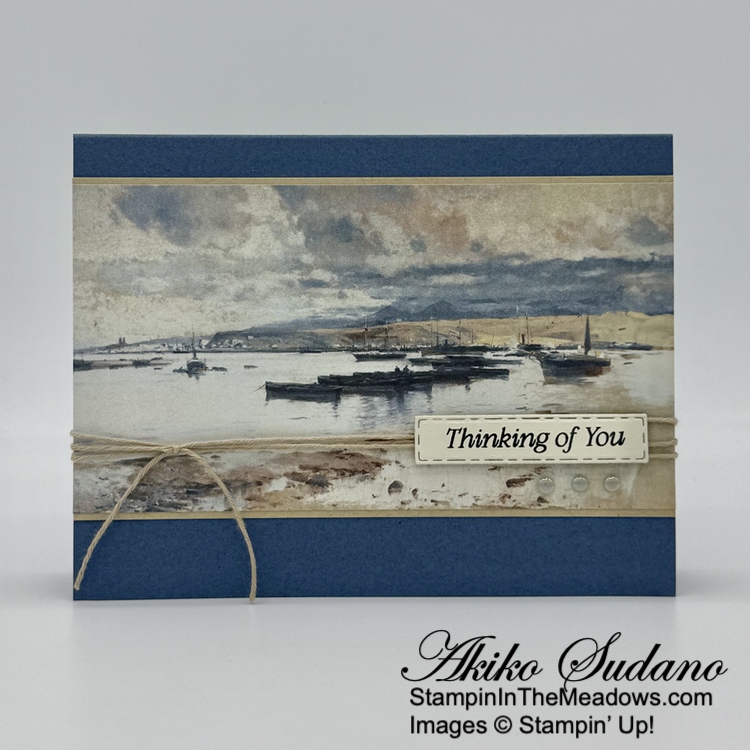
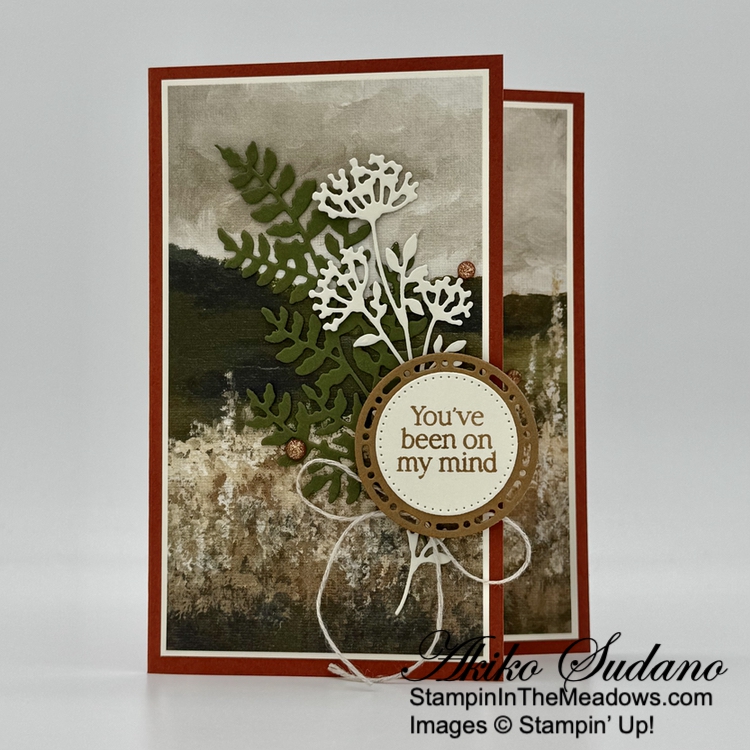
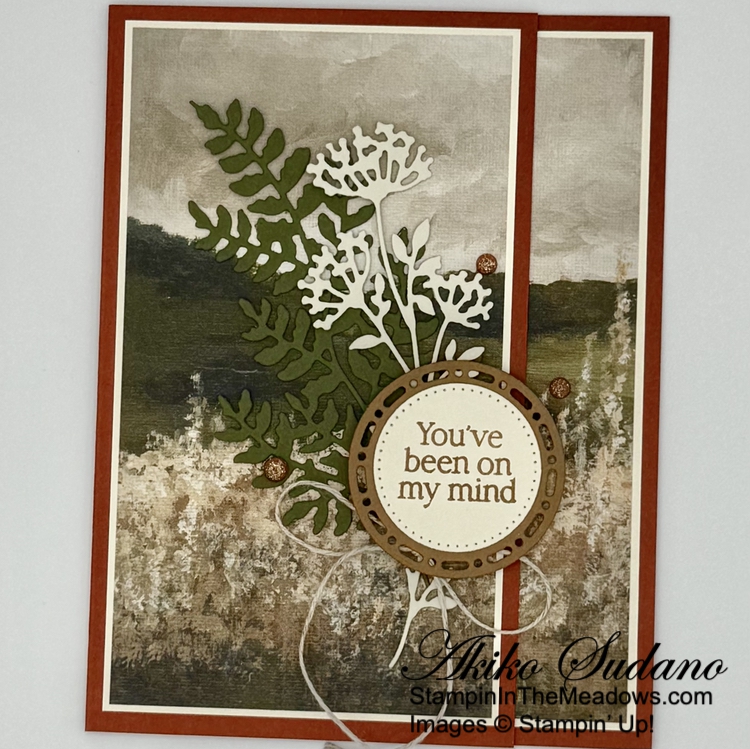
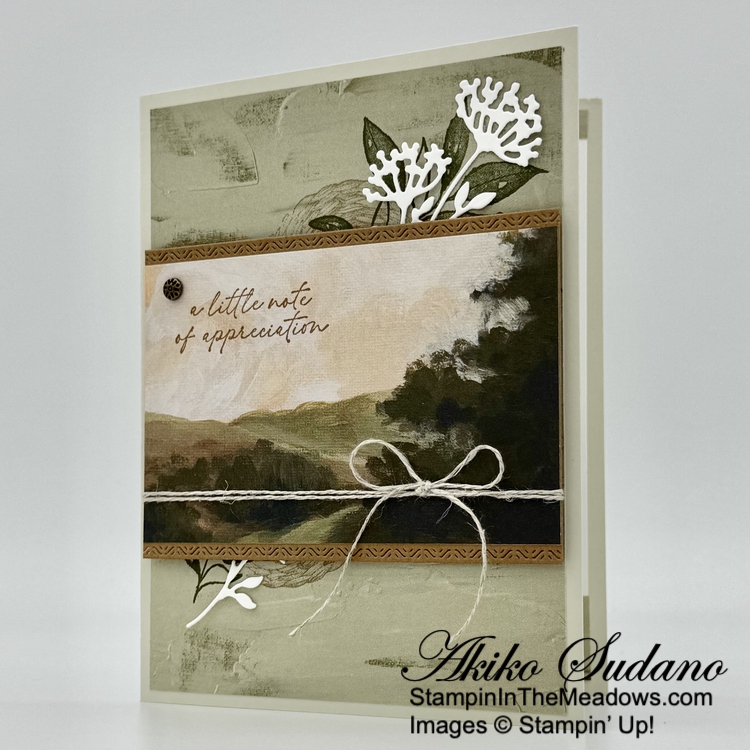
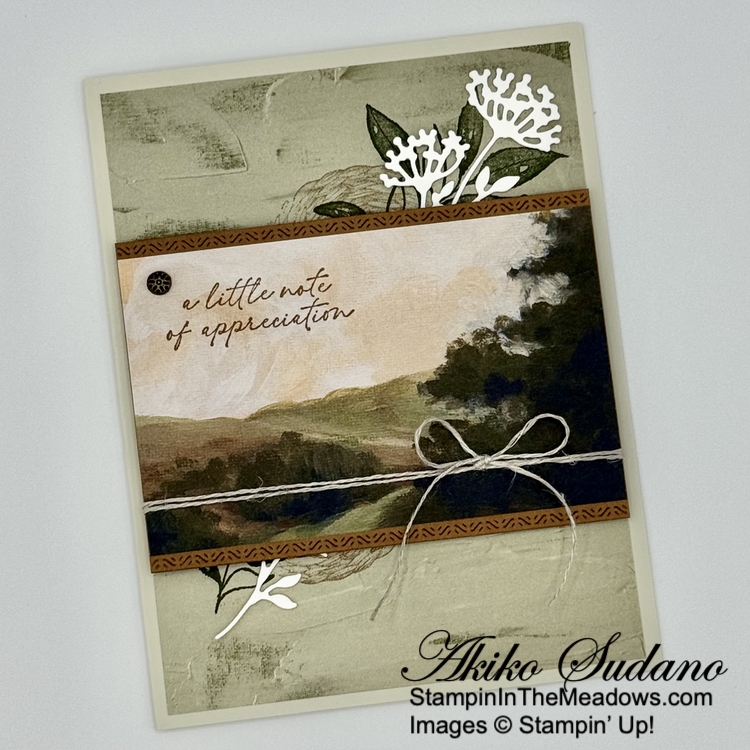
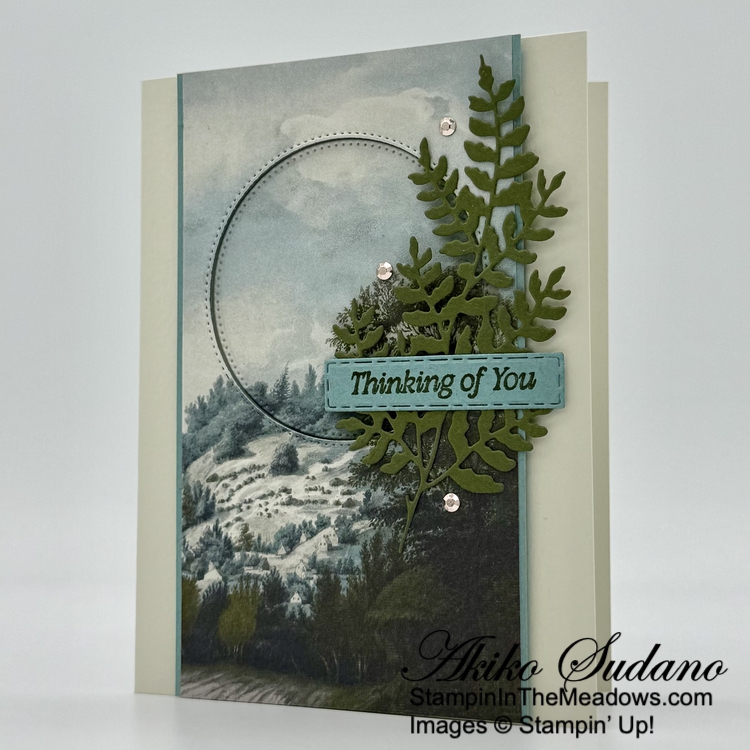
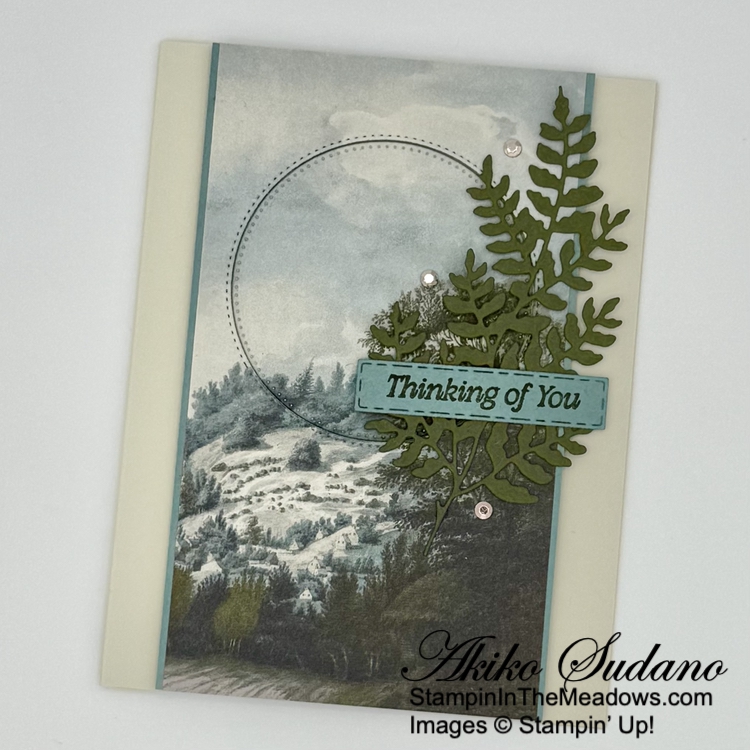
Good Morning! Today’s Thank You card was inspired by the pretty box on page 52 of the 2025-2026 Annual Catalog using the Stampin’ Up! Beautiful Motifs bundle. But I wanted to use the new Peaceful Garden designer series paper and make a layered card. You can find the card stock cuts along with supplies at the bottom of my post.

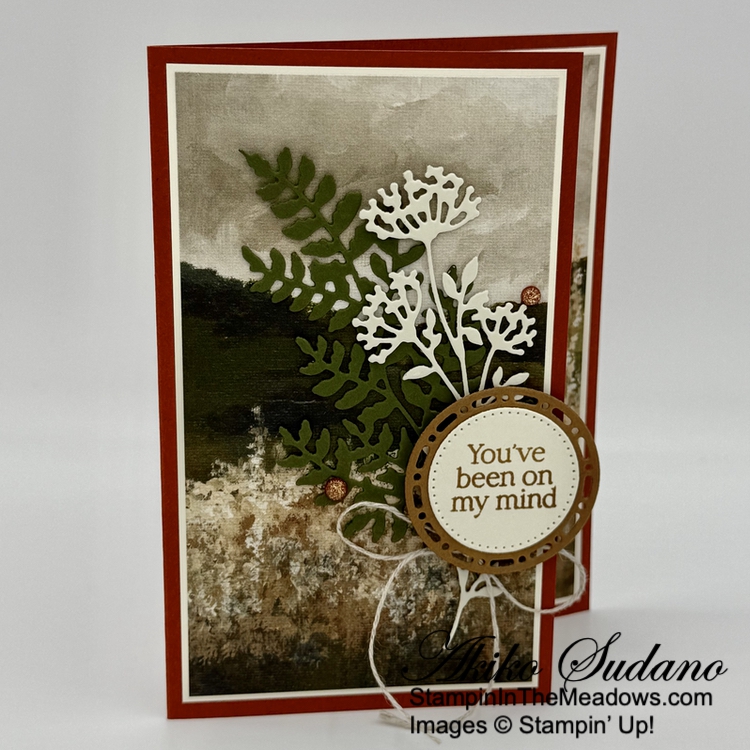
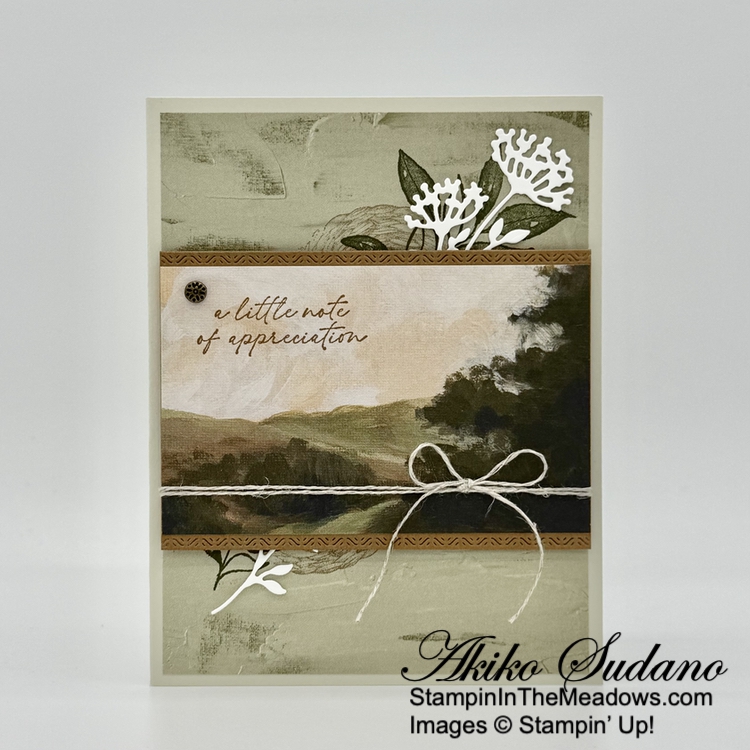
Cut and adhere panels of Peaceful Garden designer series paper to the front of a Misty Moonlight card base using liquid glue.
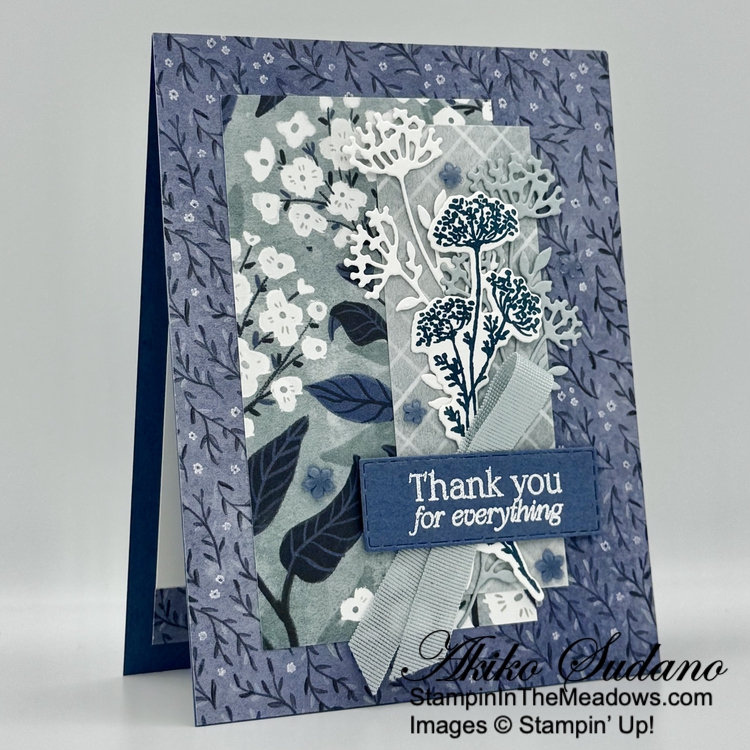
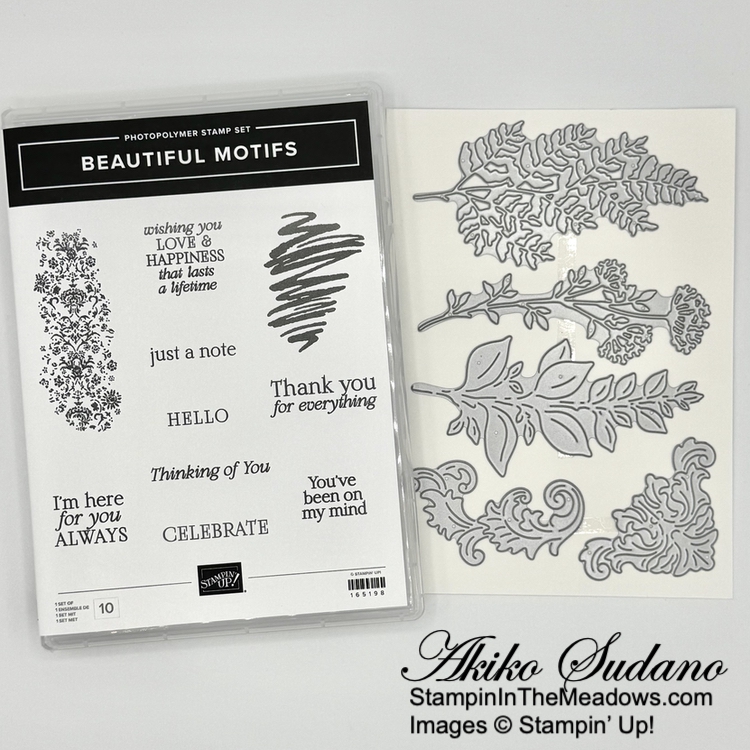
Die cut the pretty wildflowers from Basic White and Cloud Cover card stock using the Stampin’ Up! Beautiful Motifs dies and adhered them to the card using glue dots. Stamp the flower from the Gallery Blooms stamp set using Misty Moonlight ink on Basic White and cut it out with the coordinating die. Adhere the stamped flower to the card with glue dots. Fold a length of Cloud Cover ribbon in half and adhere it to the card with glue dots.
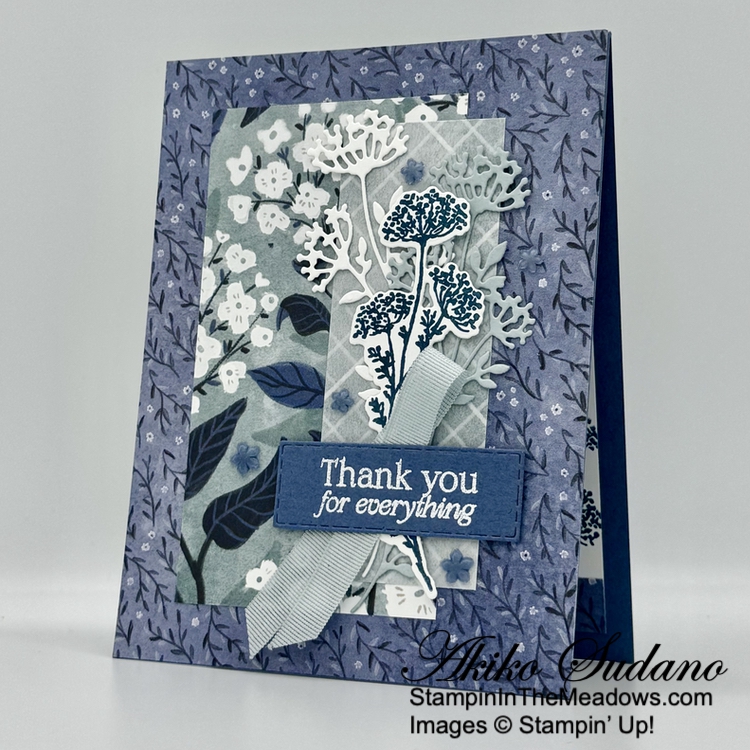
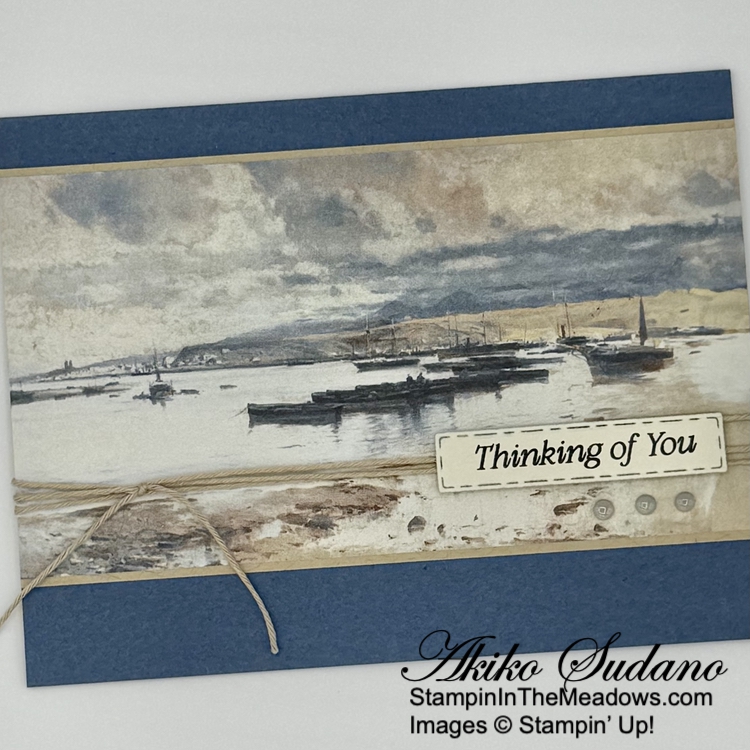
Stamp the sentiment from the Stampin’ Up! Beautiful Motifs stamp set using Versamark ink on Misty Moonlight. Sprinkle it with white embossing powder and heat set. Cut it out with the small short Textured Notes die and adhere it to the card with dimensionals. Finish with Misty Moonlight flowers.
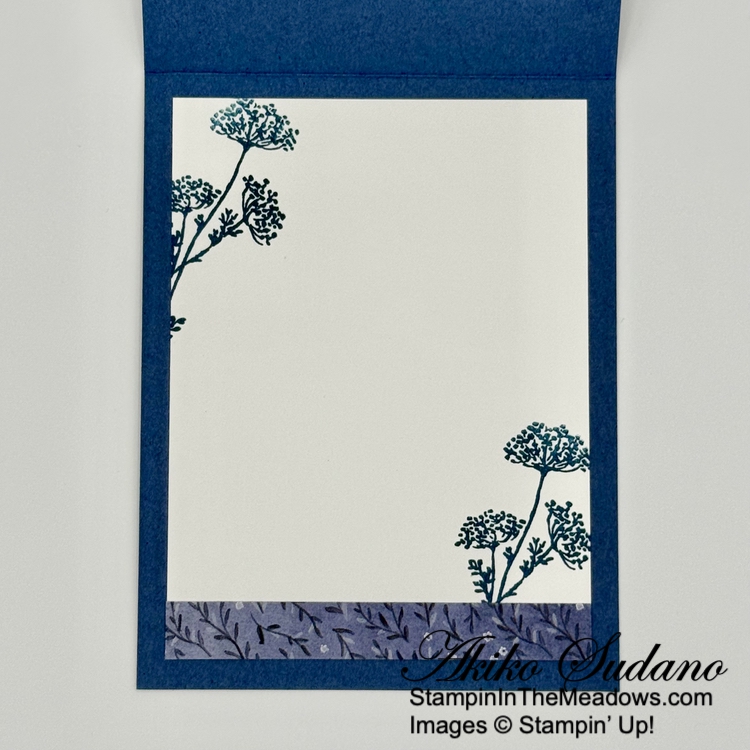
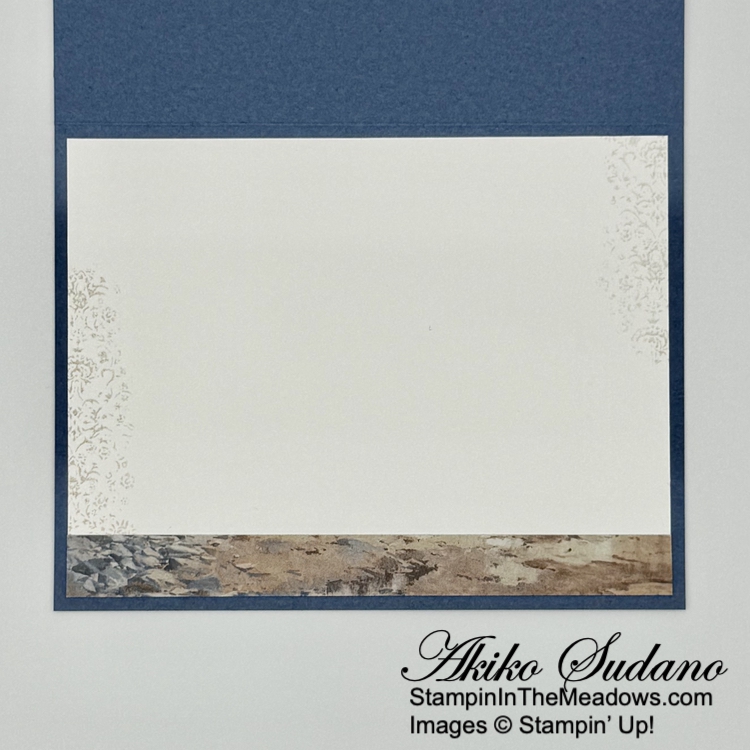
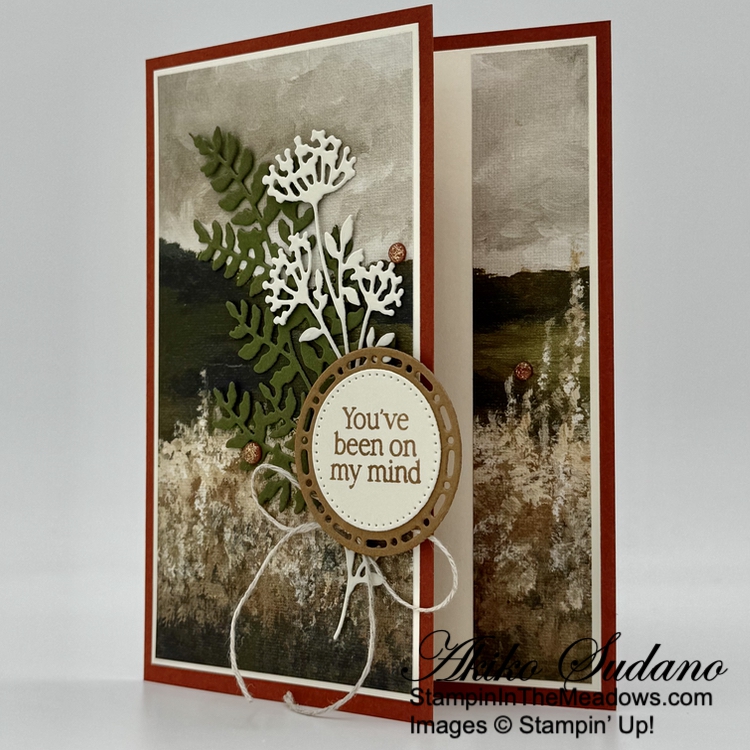
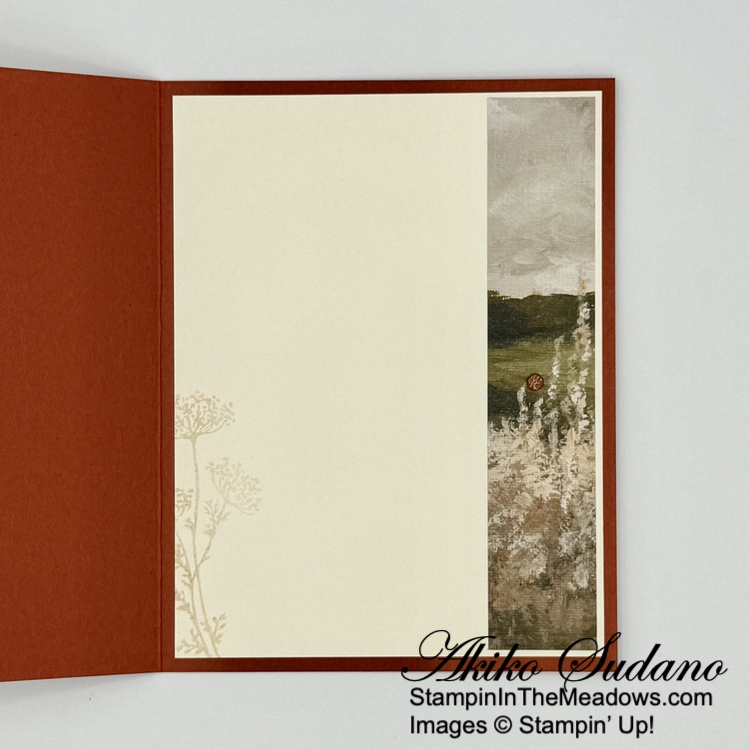
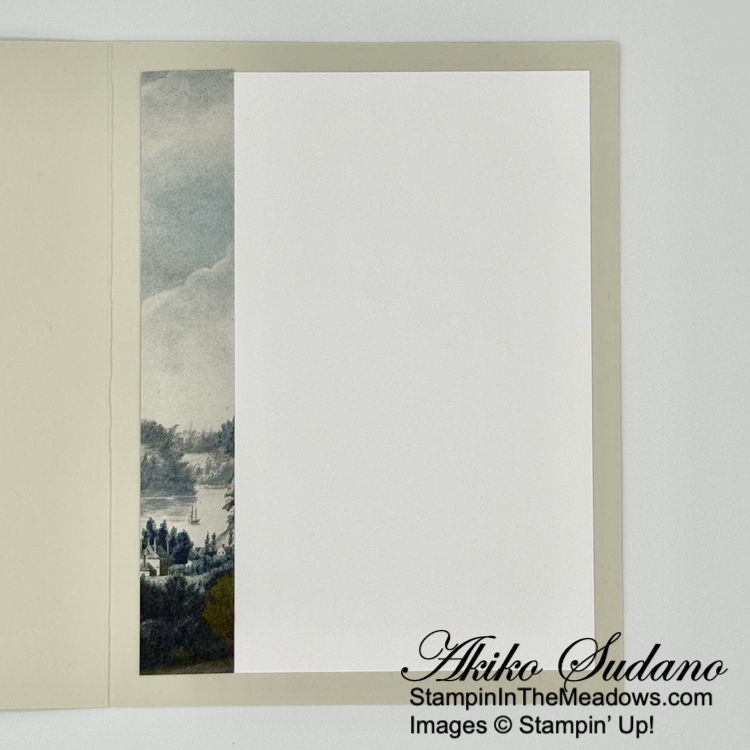
For the inside panel, stamp the wildflower from the Gallery Blooms stamp set using Misty Moonlight ink in the corners of a Basic White panel. Trim the bottom with DSP and adhere the panel to the inside of the card with Stampin’ Seal.
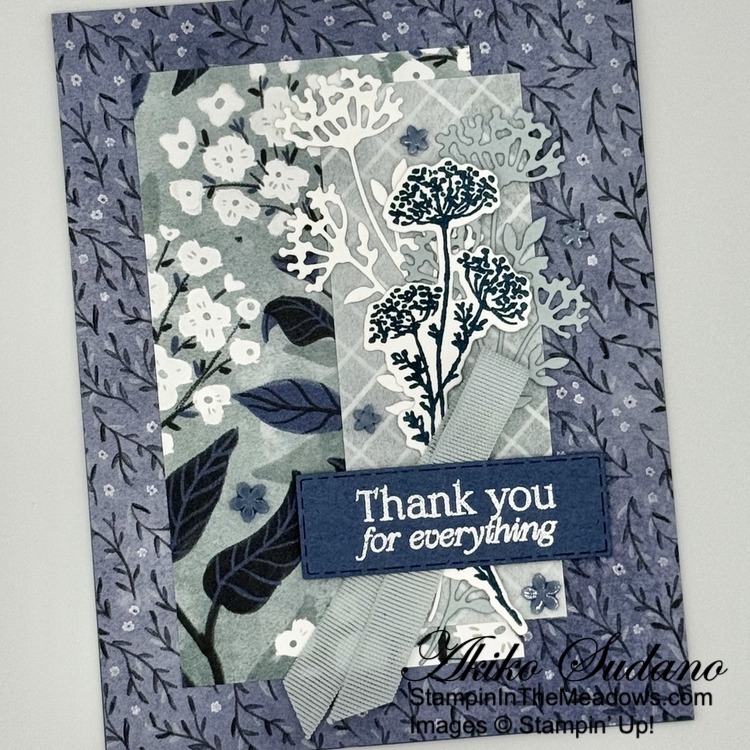
I love that the stamped and die cut flowers from the Stampin’ Up! Beautiful Motifs and Gallery Blooms stamp sets are similar to the flowers in the Peaceful Garden DSP. I wonder if I should have put mats behind the smaller DSP panels. What do you think?
Thanks so much for stopping by and Happy Stamping!!
Akiko
Cardstock Cuts for this project:
- Misty Moonlight – 4-1/4″ x 11″ card base, scored at 5-1/2″, 1-1/2″ x 3″ (label)
- Cloud Cover – 1-1/2″ x 4-1/4″ (die cut flower)
- Basic White – 3-3/4″ x 5″ (inside panel), two 1-1/2″ x 4-1/4″ (die cut and stamped flowers)
- Peaceful Garden DSP – 4-1/4″ x 5-1/5″ (front background), 2-1/2″ x 4-1/2″ (floral layer), 1-1/2″ x 4″ (plaid layer), 1/2″ x 3-3/4″ (inside trim)
Stampin’ Up! products used in this project:
![Beautiful Motifs Bundle (English) [ 165206 ]](https://assets1.tamsnetwork.com/images/EC042017NF/165206s.jpg "Beautiful Motifs Bundle (English) [ 165206 ]")
![Gallery Blooms Bundle [ 165213 ]](https://assets1.tamsnetwork.com/images/EC042017NF/165213s.jpg "Gallery Blooms Bundle [ 165213 ]")
![Textured Notes Dies [ 165555 ]](https://assets1.tamsnetwork.com/images/EC042017NF/165555s.jpg "Textured Notes Dies [ 165555 ]")
![Peaceful Garden 12" X 12" (30.5 X 30.5 Cm) Designer Series Paper [ 165917 ]](https://assets1.tamsnetwork.com/images/EC042017NF/165917s.jpg "Peaceful Garden 12\" X 12\" (30.5 X 30.5 Cm) Designer Series Paper [ 165917 ]")
![Misty Moonlight 8-1/2" X 11" Cardstock [ 153081 ]](https://assets1.tamsnetwork.com/images/EC042017NF/153081s.jpg "Misty Moonlight 8-1/2\" X 11\" Cardstock [ 153081 ]")
![Cloud Cover 8 1/2" X 11" Cardstock [ 165621 ]](https://assets1.tamsnetwork.com/images/EC042017NF/165621s.jpg "Cloud Cover 8 1/2\" X 11\" Cardstock [ 165621 ]")
![Basic White 8 1/2" X 11" Cardstock [ 166780 ]](https://assets1.tamsnetwork.com/images/EC042017NF/166780s.jpg "Basic White 8 1/2\" X 11\" Cardstock [ 166780 ]")
![Misty Moonlight Classic Stampin' Pad [ 153118 ]](https://assets1.tamsnetwork.com/images/EC042017NF/153118s.jpg "Misty Moonlight Classic Stampin' Pad [ 153118 ]")
![Versamark Pad [ 102283 ]](https://assets1.tamsnetwork.com/images/EC042017NF/102283s.jpg "Versamark Pad [ 102283 ]")
![Basics Wow! Embossing Powder [ 165679 ]](https://assets1.tamsnetwork.com/images/EC042017NF/165679s.jpg "Basics Wow! Embossing Powder [ 165679 ]")
![Hues Of Blue Flowers [ 165930 ]](https://assets1.tamsnetwork.com/images/EC042017NF/165930s.jpg "Hues Of Blue Flowers [ 165930 ]")
![Cloud Cover 3/8" (1 Cm) Faux Linen Ribbon [ 165271 ]](https://assets1.tamsnetwork.com/images/EC042017NF/165271s.jpg "Cloud Cover 3/8\" (1 Cm) Faux Linen Ribbon [ 165271 ]")
![Multipurpose Liquid Glue [ 110755 ]](https://assets1.tamsnetwork.com/images/EC042017NF/110755s.jpg "Multipurpose Liquid Glue [ 110755 ]")
![Mini Glue Dots [ 103683 ]](https://assets1.tamsnetwork.com/images/EC042017NF/103683s.jpg "Mini Glue Dots [ 103683 ]")
![Stampin' Dimensionals [ 104430 ]](https://assets1.tamsnetwork.com/images/EC042017NF/104430s.jpg "Stampin' Dimensionals [ 104430 ]")
![Stampin' Seal [ 152813 ]](https://assets1.tamsnetwork.com/images/EC042017NF/152813s.jpg "Stampin' Seal [ 152813 ]")
![Stampin' Cut & Emboss Machine [ 149653 ]](https://assets1.tamsnetwork.com/images/EC042017NF/149653s.jpg "Stampin' Cut & Emboss Machine [ 149653 ]")


![Beautiful Motifs Photopolymer Stamp Set (English) [ 165198 ]](https://assets1.tamsnetwork.com/images/EC042017NF/165198s.jpg "Beautiful Motifs Photopolymer Stamp Set (English) [ 165198 ]")
![Beautiful Gallery 6" X 6" (15.2 X 15.2 Cm) Designer Series Paper [ 165196 ]](https://assets1.tamsnetwork.com/images/EC042017NF/165196s.jpg "Beautiful Gallery 6\" X 6\" (15.2 X 15.2 Cm) Designer Series Paper [ 165196 ]")
![Crumb Cake 8-1/2" X 11" Cardstock [ 120953 ]](https://assets1.tamsnetwork.com/images/EC042017NF/120953s.jpg "Crumb Cake 8-1/2\" X 11\" Cardstock [ 120953 ]")
![Basic Beige 8 1/2" X 11" Cardstock [ 164511 ]](https://assets1.tamsnetwork.com/images/EC042017NF/164511s.jpg "Basic Beige 8 1/2\" X 11\" Cardstock [ 164511 ]")
![Secret Sea Classic Stampin' Pad [ 165285 ]](https://assets1.tamsnetwork.com/images/EC042017NF/165285s.jpg "Secret Sea Classic Stampin' Pad [ 165285 ]")
![Antique Pearls [ 164679 ]](https://assets1.tamsnetwork.com/images/EC042017NF/164679s.jpg "Antique Pearls [ 164679 ]")
![Baker's Twine Essentials Pack [ 155475 ]](https://assets1.tamsnetwork.com/images/EC042017NF/155475s.jpg "Baker's Twine Essentials Pack [ 155475 ]")

![Stylish Shapes Dies [ 159183 ]](https://assets1.tamsnetwork.com/images/EC042017NF/159183s.jpg "Stylish Shapes Dies [ 159183 ]")
![Spotlight On Nature Dies [ 163580 ]](https://assets1.tamsnetwork.com/images/EC042017NF/163580s.jpg "Spotlight On Nature Dies [ 163580 ]")
![Cajun Craze 8-1/2" X 11" Cardstock [ 119684 ]](https://assets1.tamsnetwork.com/images/EC042017NF/119684s.jpg "Cajun Craze 8-1/2\" X 11\" Cardstock [ 119684 ]")
![Mossy Meadow 8-1/2" X 11" Cardstock [ 133676 ]](https://assets1.tamsnetwork.com/images/EC042017NF/133676s.jpg "Mossy Meadow 8-1/2\" X 11\" Cardstock [ 133676 ]")
![Pecan Pie 8 1/2" X 11" Cardstock [ 161717 ]](https://assets1.tamsnetwork.com/images/EC042017NF/161717s.jpg "Pecan Pie 8 1/2\" X 11\" Cardstock [ 161717 ]")
![Very Vanilla 8 1/2" X 11" Cardstock [ 166784 ]](https://assets1.tamsnetwork.com/images/EC042017NF/166784s.jpg "Very Vanilla 8 1/2\" X 11\" Cardstock [ 166784 ]")
![Pecan Pie Classic Stampin' Pad [ 161665 ]](https://assets1.tamsnetwork.com/images/EC042017NF/161665s.jpg "Pecan Pie Classic Stampin' Pad [ 161665 ]")
![Cajun Craze & Gold Dots [ 165984 ]](https://assets1.tamsnetwork.com/images/EC042017NF/165984s.jpg "Cajun Craze & Gold Dots [ 165984 ]")
![Linen Thread [ 104199 ]](https://assets1.tamsnetwork.com/images/EC042017NF/104199s.jpg "Linen Thread [ 104199 ]")


![Textured Notes Bundle (English) [ 165556 ]](https://assets1.tamsnetwork.com/images/EC042017NF/165556s.jpg "Textured Notes Bundle (English) [ 165556 ]")
![Beautiful Motifs Dies [ 165205 ]](https://assets1.tamsnetwork.com/images/EC042017NF/165205s.jpg "Beautiful Motifs Dies [ 165205 ]")
![Mossy Meadow Classic Stampin' Pad [ 147111 ]](https://assets1.tamsnetwork.com/images/EC042017NF/147111s.jpg "Mossy Meadow Classic Stampin' Pad [ 147111 ]")
![Crumb Cake Classic Stampin' Pad [ 147116 ]](https://assets1.tamsnetwork.com/images/EC042017NF/147116s.jpg "Crumb Cake Classic Stampin' Pad [ 147116 ]")
![Pressed Flower Motifs [ 165215 ]](https://assets1.tamsnetwork.com/images/EC042017NF/165215s.jpg "Pressed Flower Motifs [ 165215 ]")


![Lost Lagoon 8-1/2" X 11" Cardstock [ 133679 ]](https://assets1.tamsnetwork.com/images/EC042017NF/133679s.jpg "Lost Lagoon 8-1/2\" X 11\" Cardstock [ 133679 ]")
![Adhesive Backed Metallic Gems [ 163780 ]](https://assets1.tamsnetwork.com/images/EC042017NF/163780s.jpg "Adhesive Backed Metallic Gems [ 163780 ]")

